Tenerife is a paradise for hikers!
You’ll never get tired of it. We loved exploring Tenerife’s three national parks — each with its own kind of magic:
- Teno Rural Park in the west with the village of Masca and Wild West vibes near Punta de Teno
- Teide National Park, home to volcanoes and Mount Teide, the highest peak in Spain
- Anaga Rural Park, with stunning beaches and enchanting forests that feel otherworldly
In these three amazing parks, you’ll find countless trails to explore.
We highly recommend renting a car to get around easily. Check out all our tips in our article: Tenerife Road Trip in the Canary Islands.
Voici un tableau récapitulatif et plus bas, on vous détail les randonnées !
Our Selection of the Best Hikes:
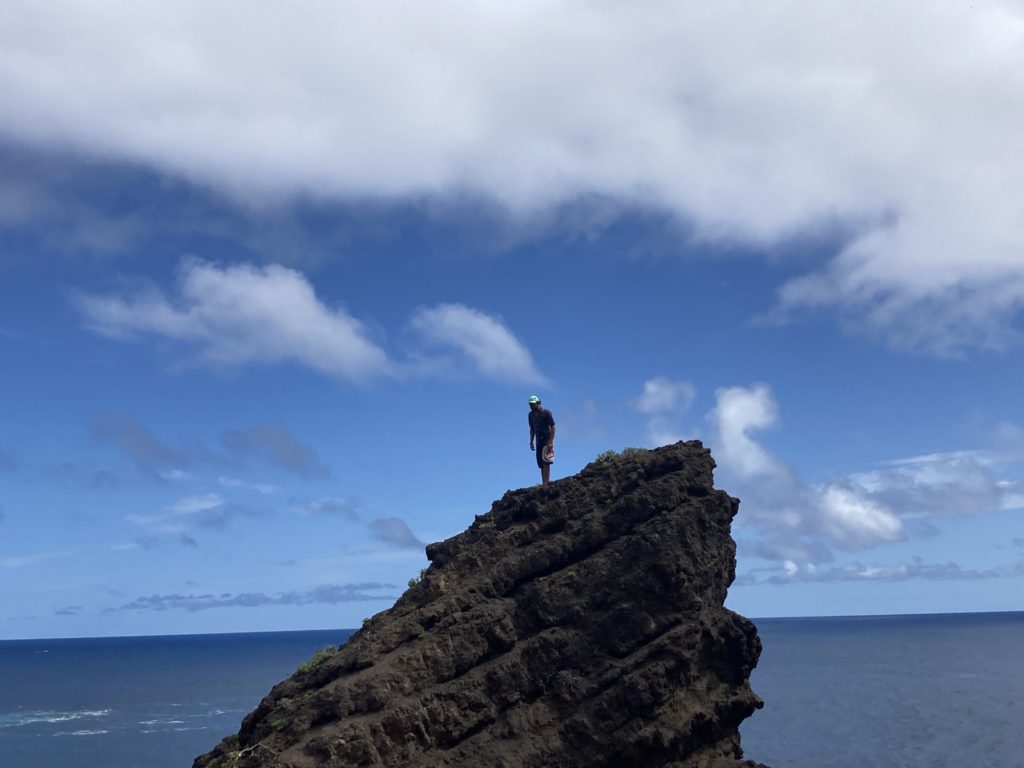
#1 • Barranco de Masca (ou Morro de la Galera):
Full details in our dedicated article: Randonnée Barranco de Masca (ou Morro de la Galera)
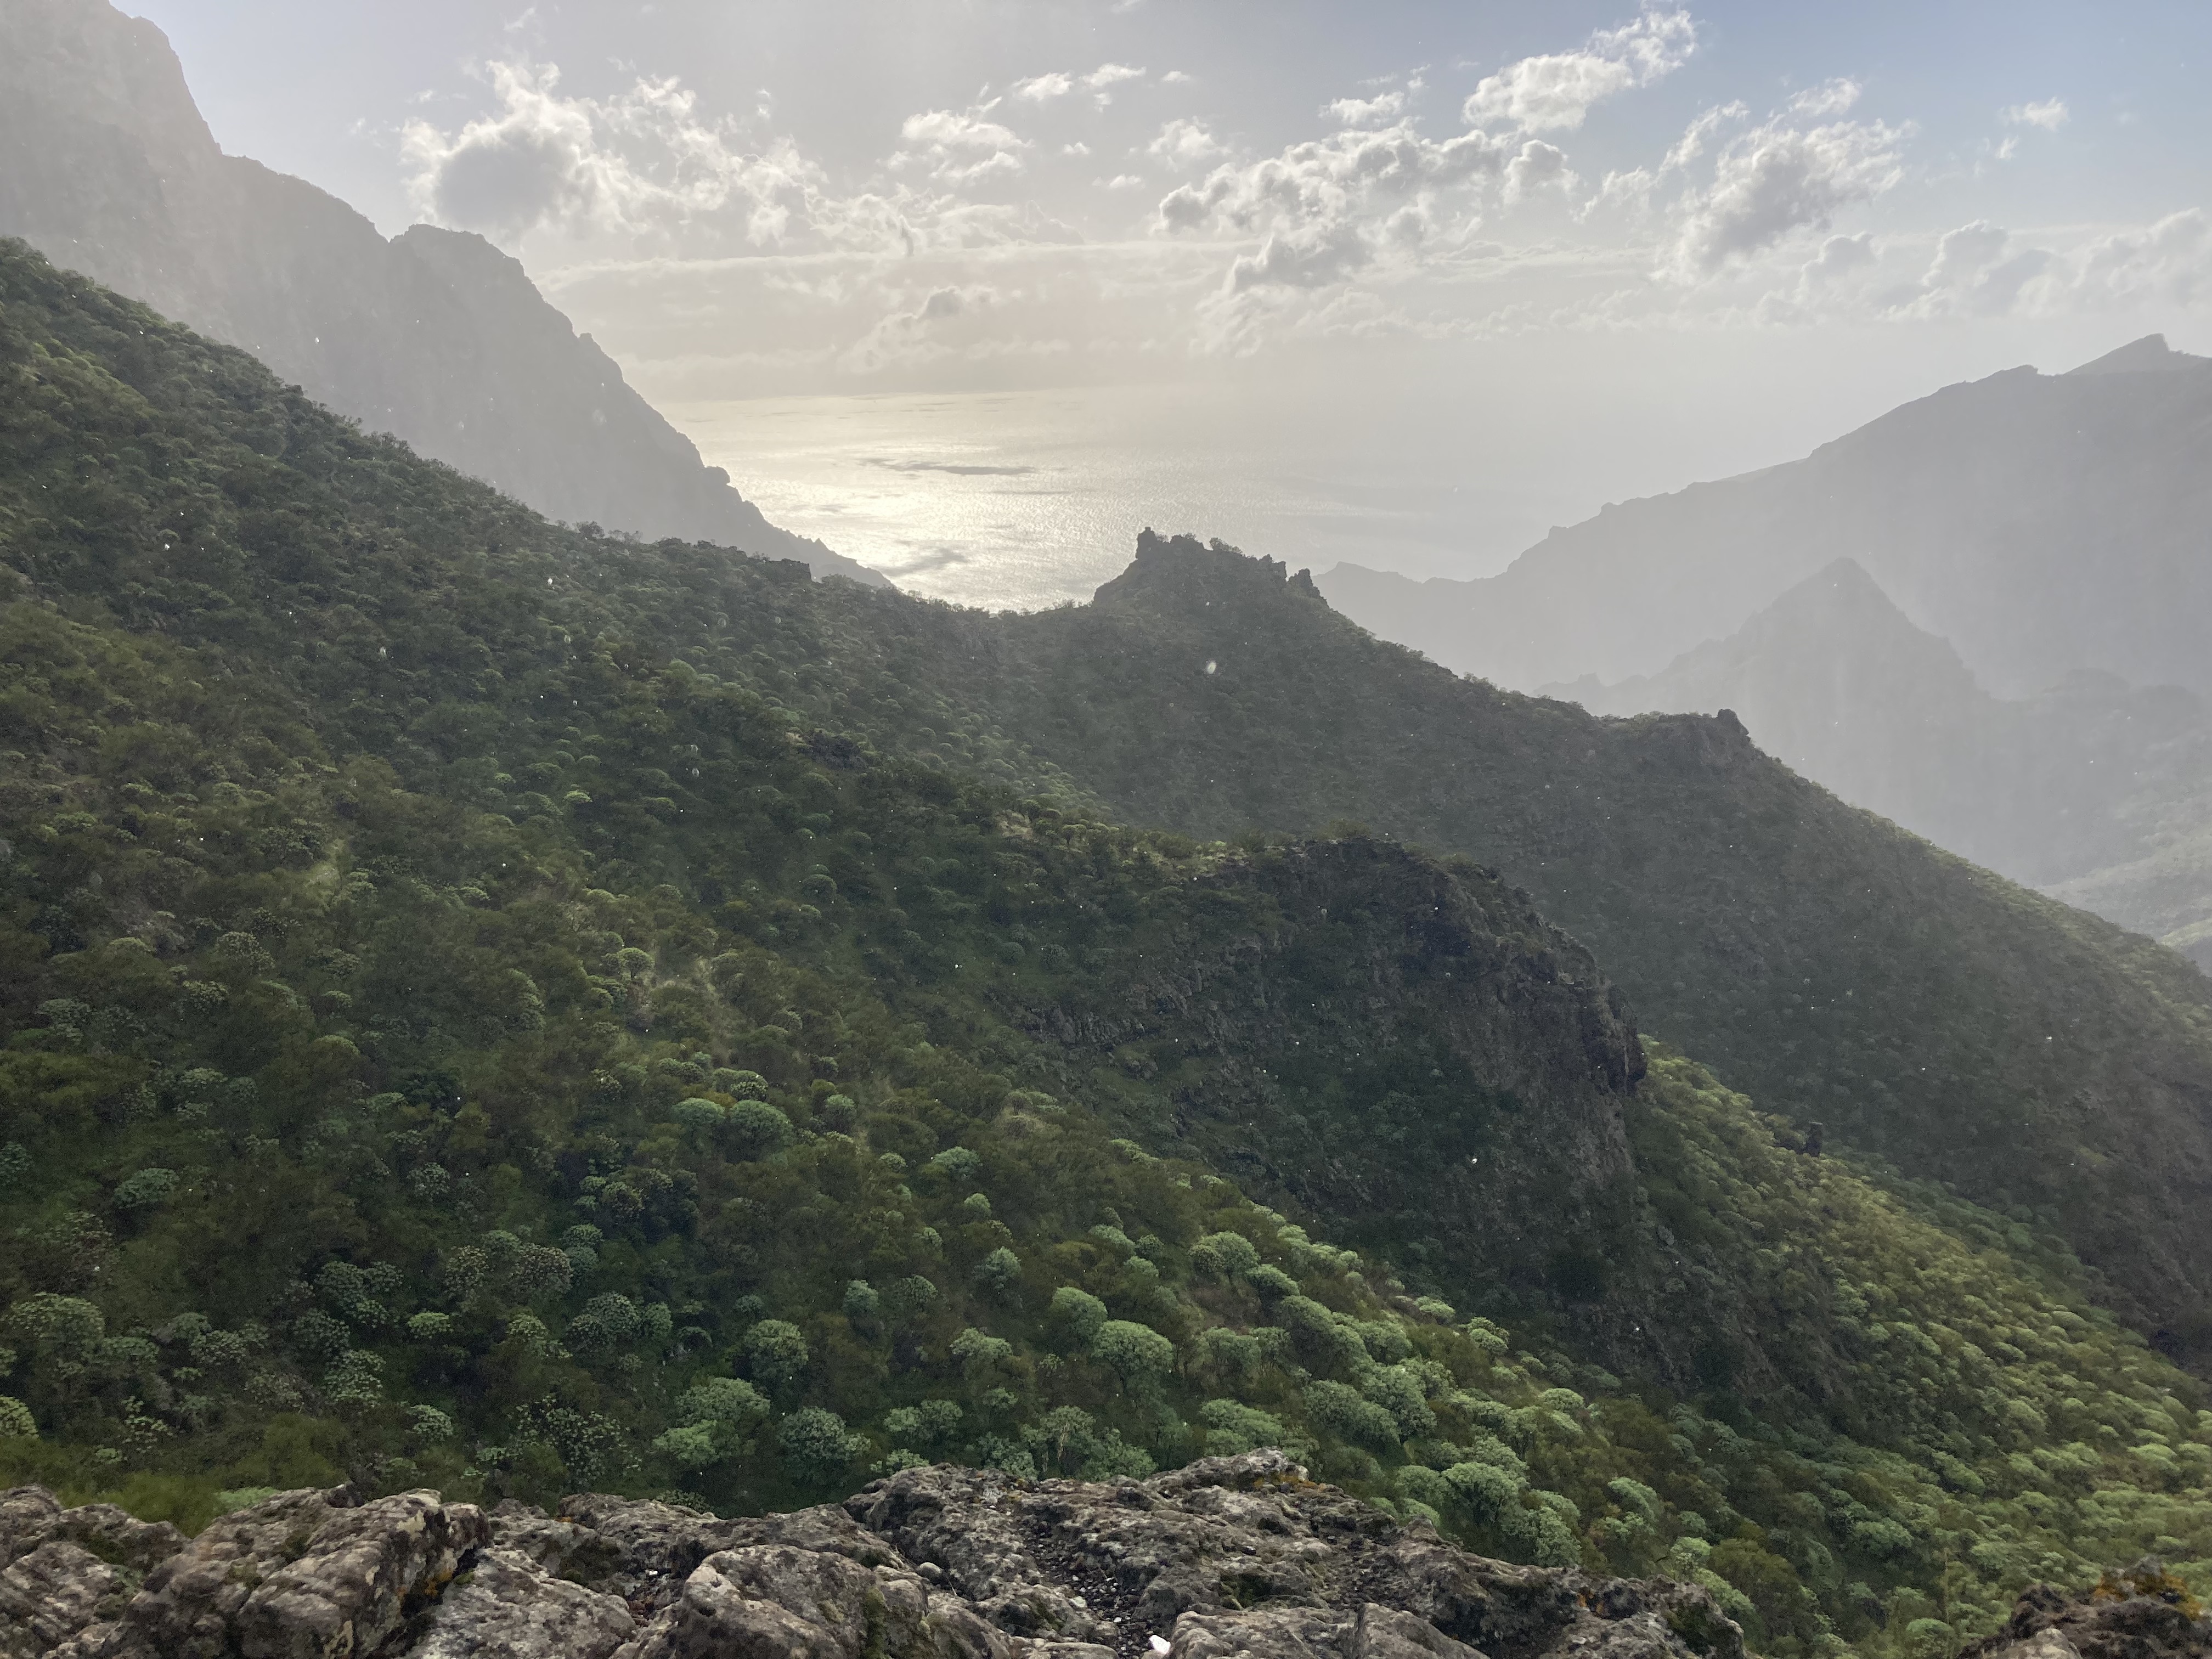
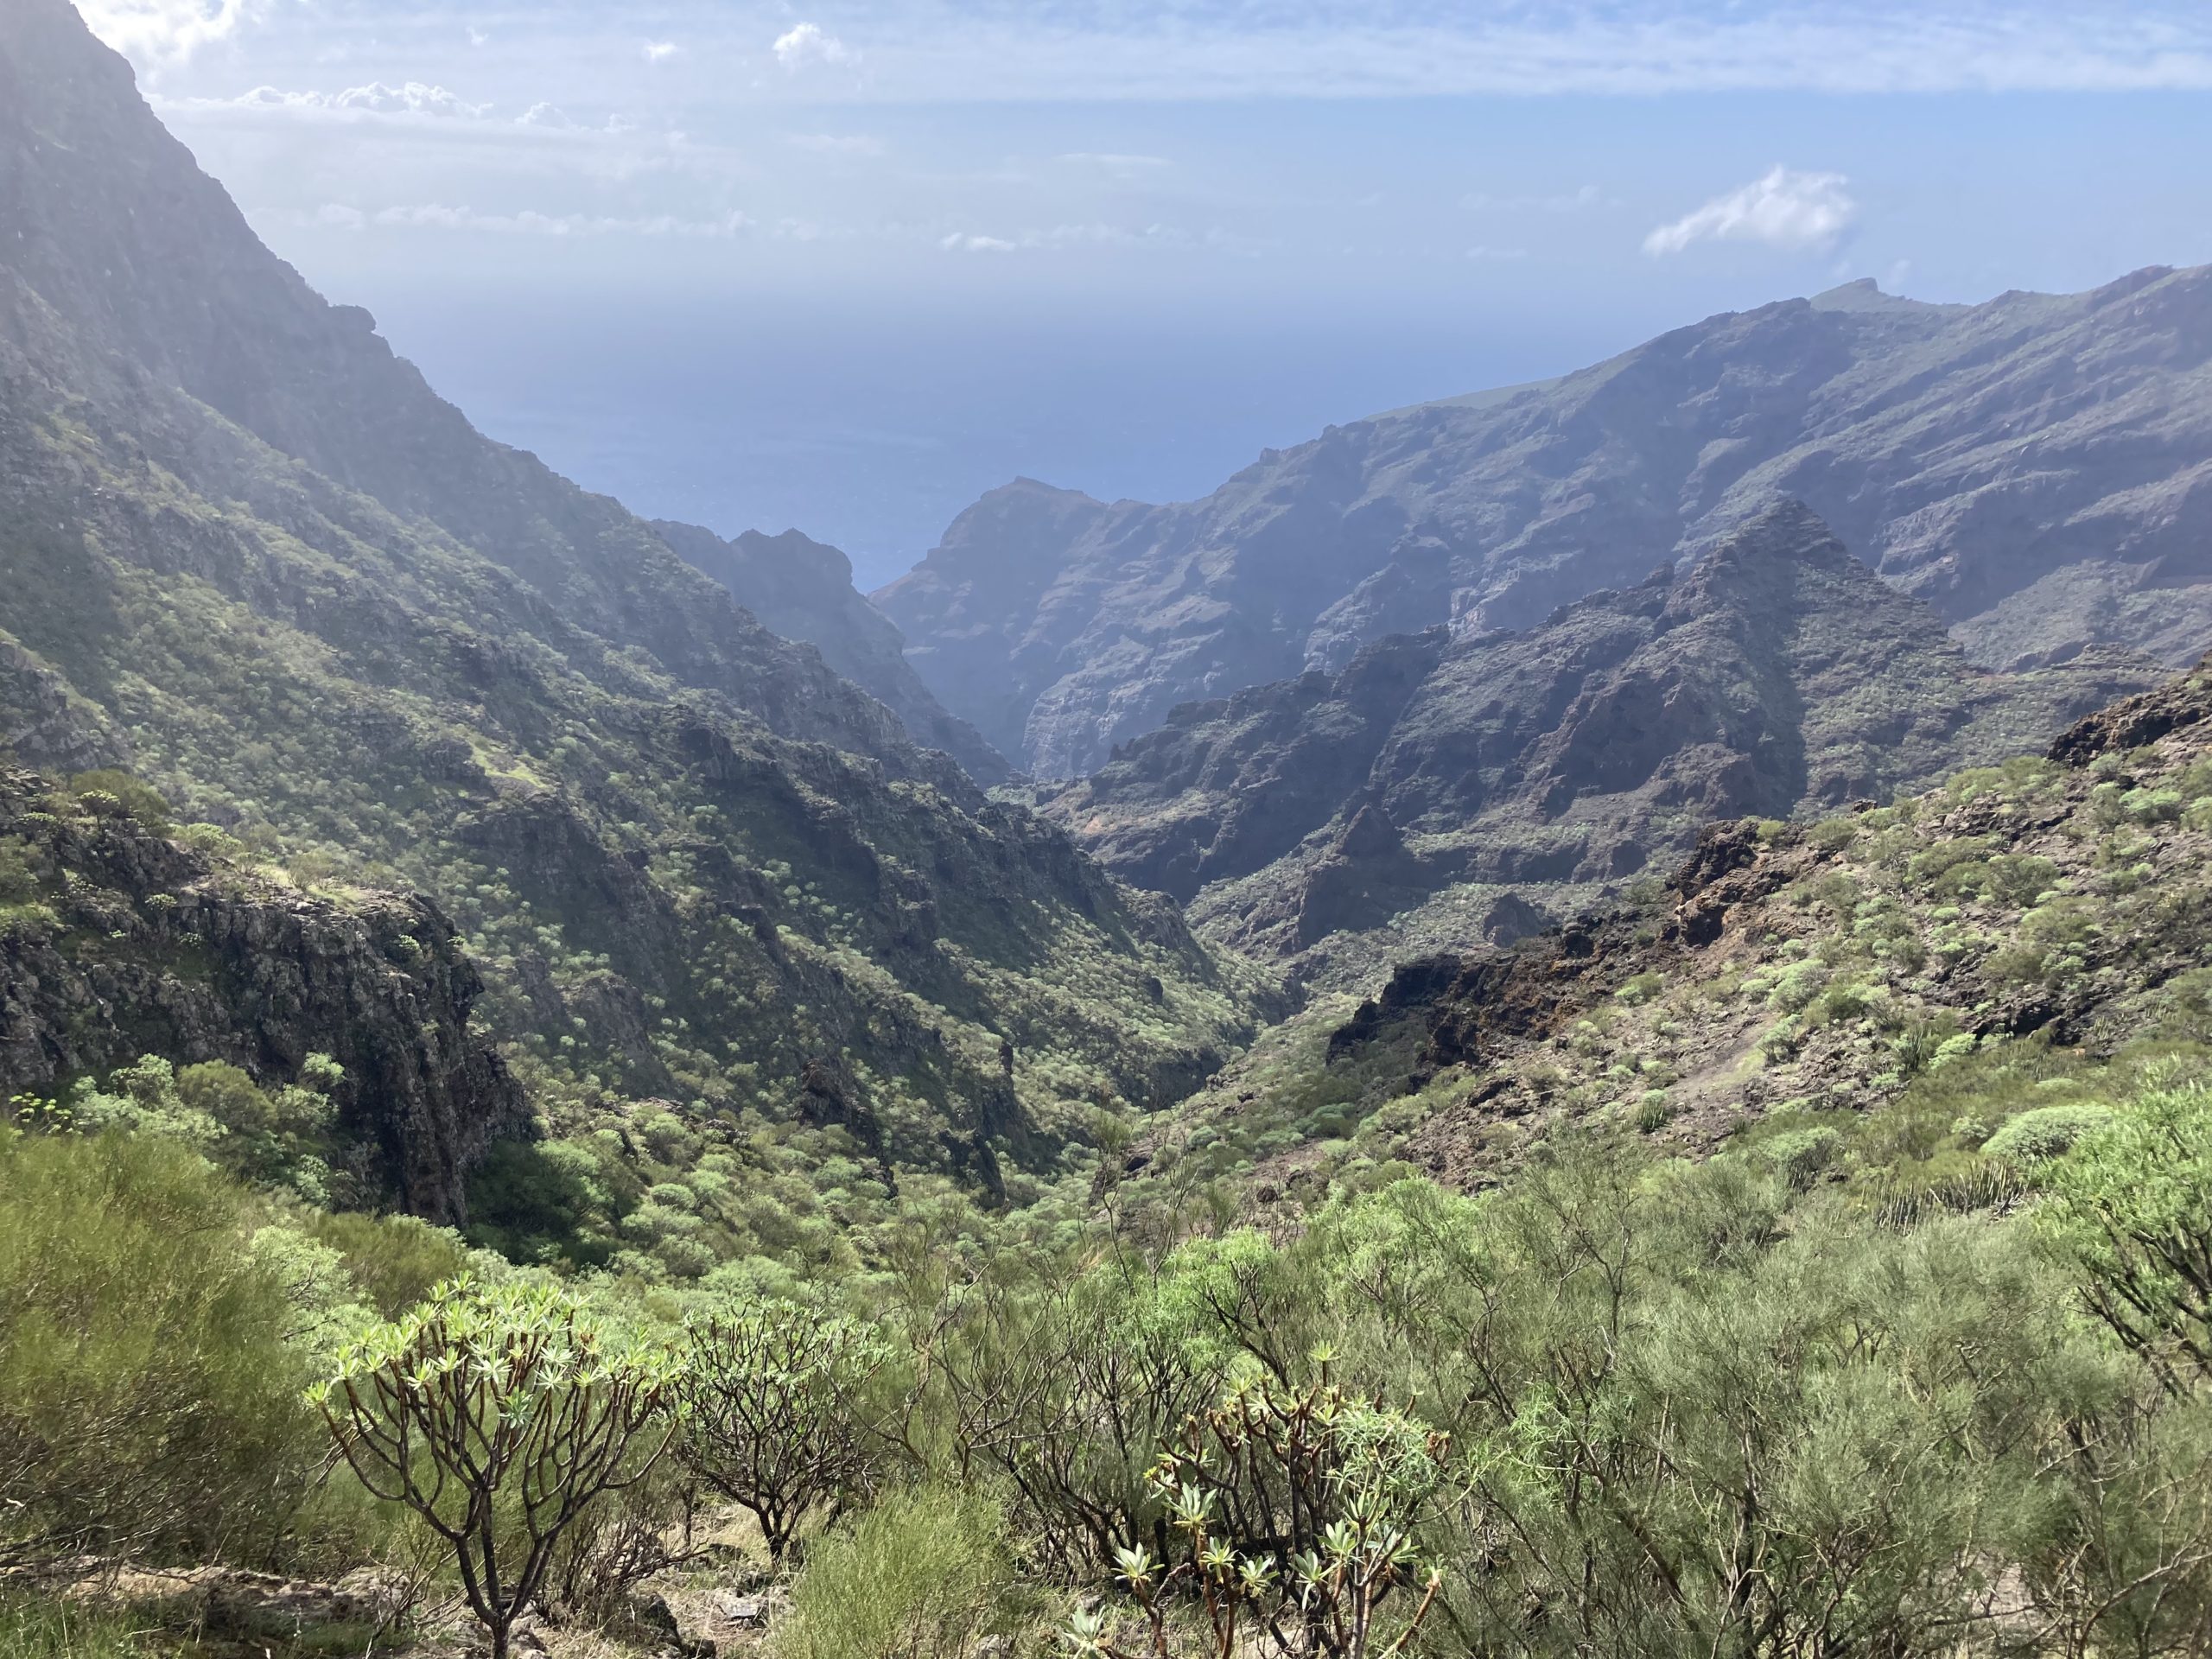
Spectacular! The Barranco de Masca will take your breath away, guaranteed.
Unfortunately, we couldn’t descend from Masca to the beach, but we found an alternate route on Maps.me. Follow our steps to discover this stunning place for yourself!
Duration: 5 hours
Loop: No
Difficulty: 3/5
Distance: 7 km
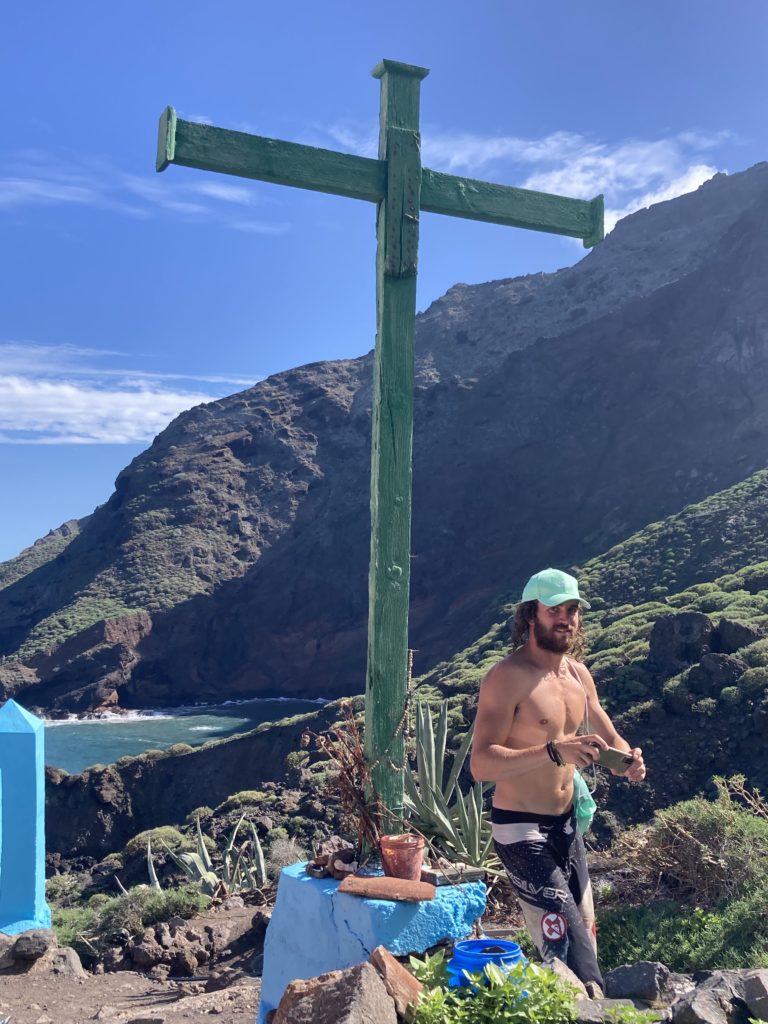
Step 1: Start at Mirador de Cruz de Hilda (Morro de la Galera on Google Maps) The trail begins at the Mirador de Cruz de Hilda, also known as Morro de la Galera. There’s a reasonably spacious parking area, and the trailhead is easy to spot. Follow the trail on Maps.me for ease. Early on, you’ll pass a large antenna and continue on a well-maintained and straightforward path.
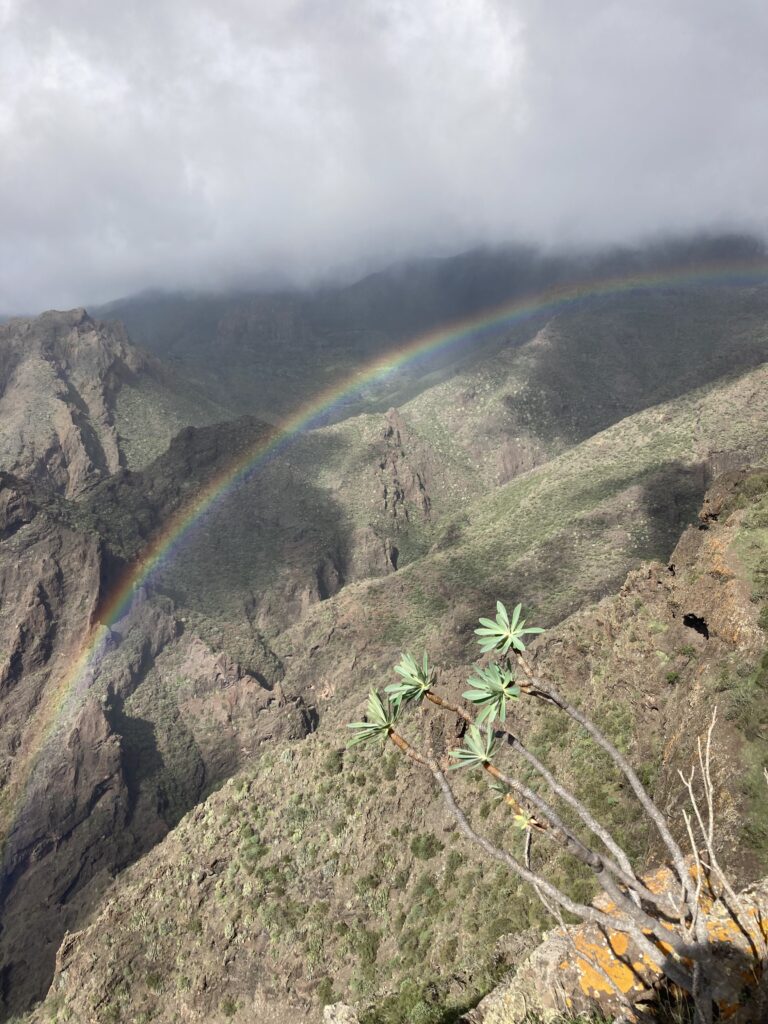
Step 2: Views Over Masca and the Ridge Crossing The ascent quickly brings you to stunning viewpoints of the village of Masca nestled in the mountains. We were lucky to witness a beautiful mix of rain and sunshine, creating amazing rainbows over the valley.
Step 3: Descent Along Pico Yeje and Roque de la Fortaleza The descent follows the ridgeline of Pico Yeje and Roque de la Fortaleza, gently descending into the valley on a pleasant slope.
Step 4: Climbing Steep Stairs After a lovely stretch along natural caves, you’ll reach a short but steep staircase section — a bit of a push, but manageable.
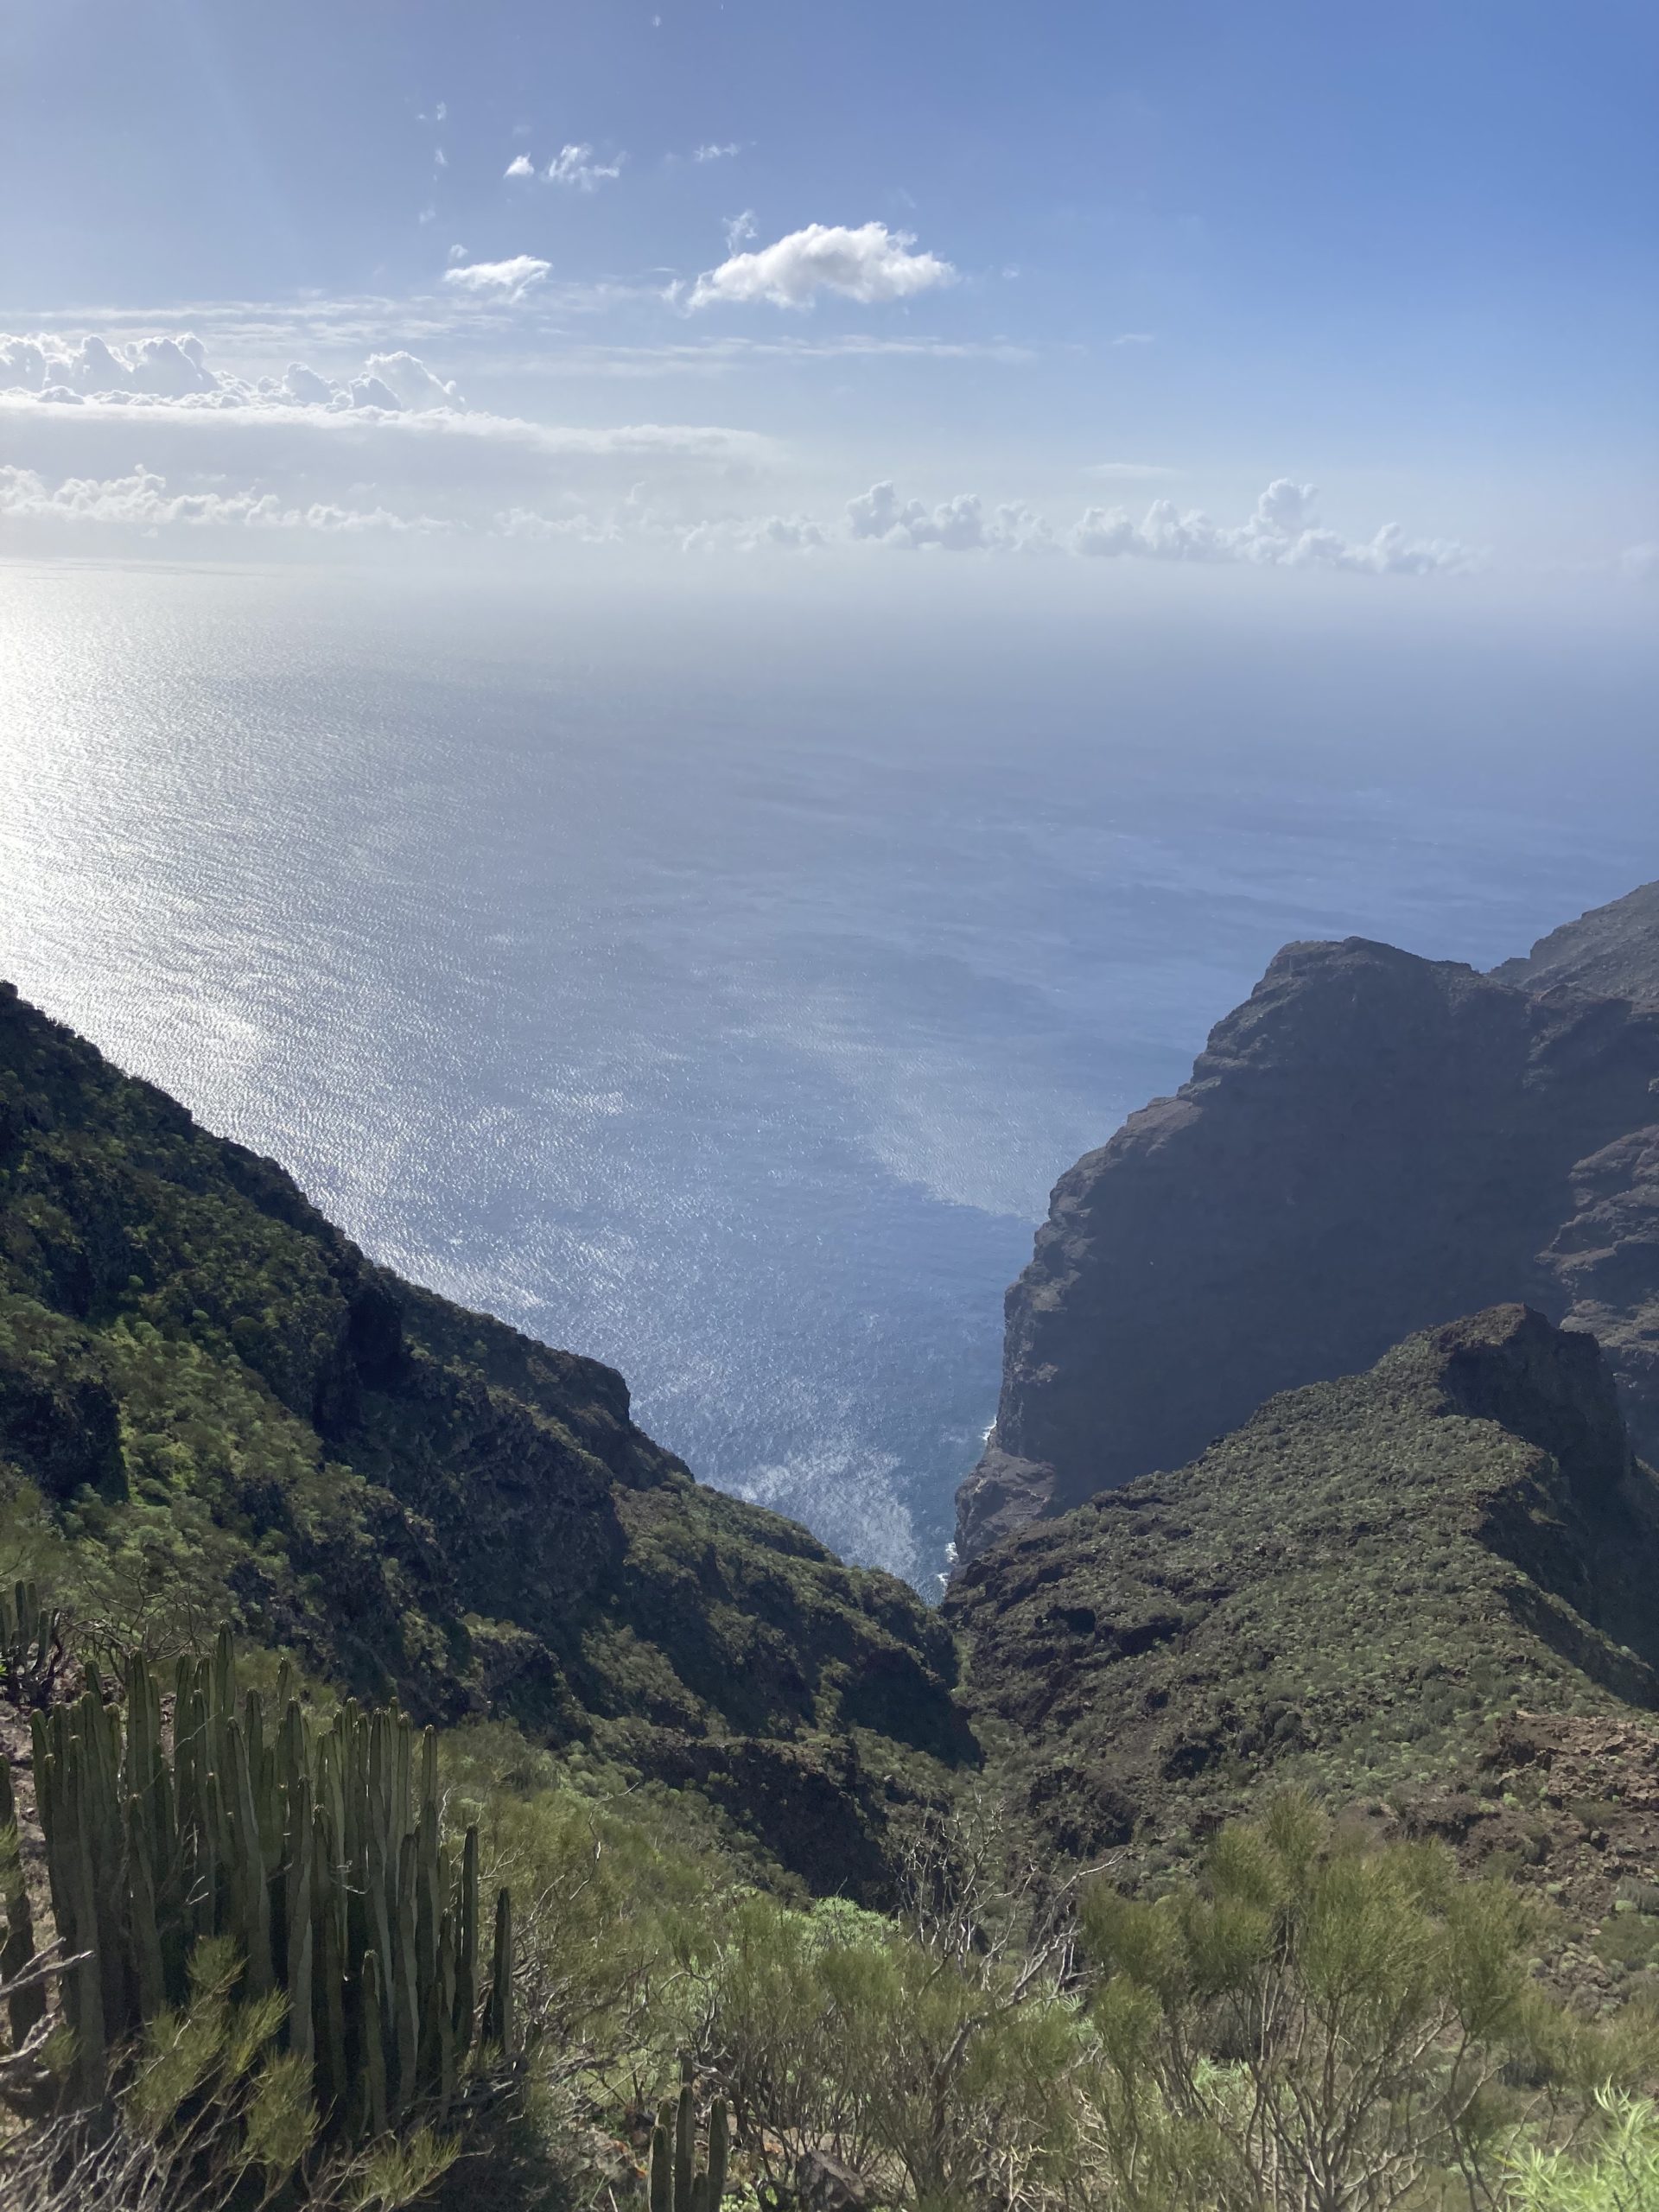
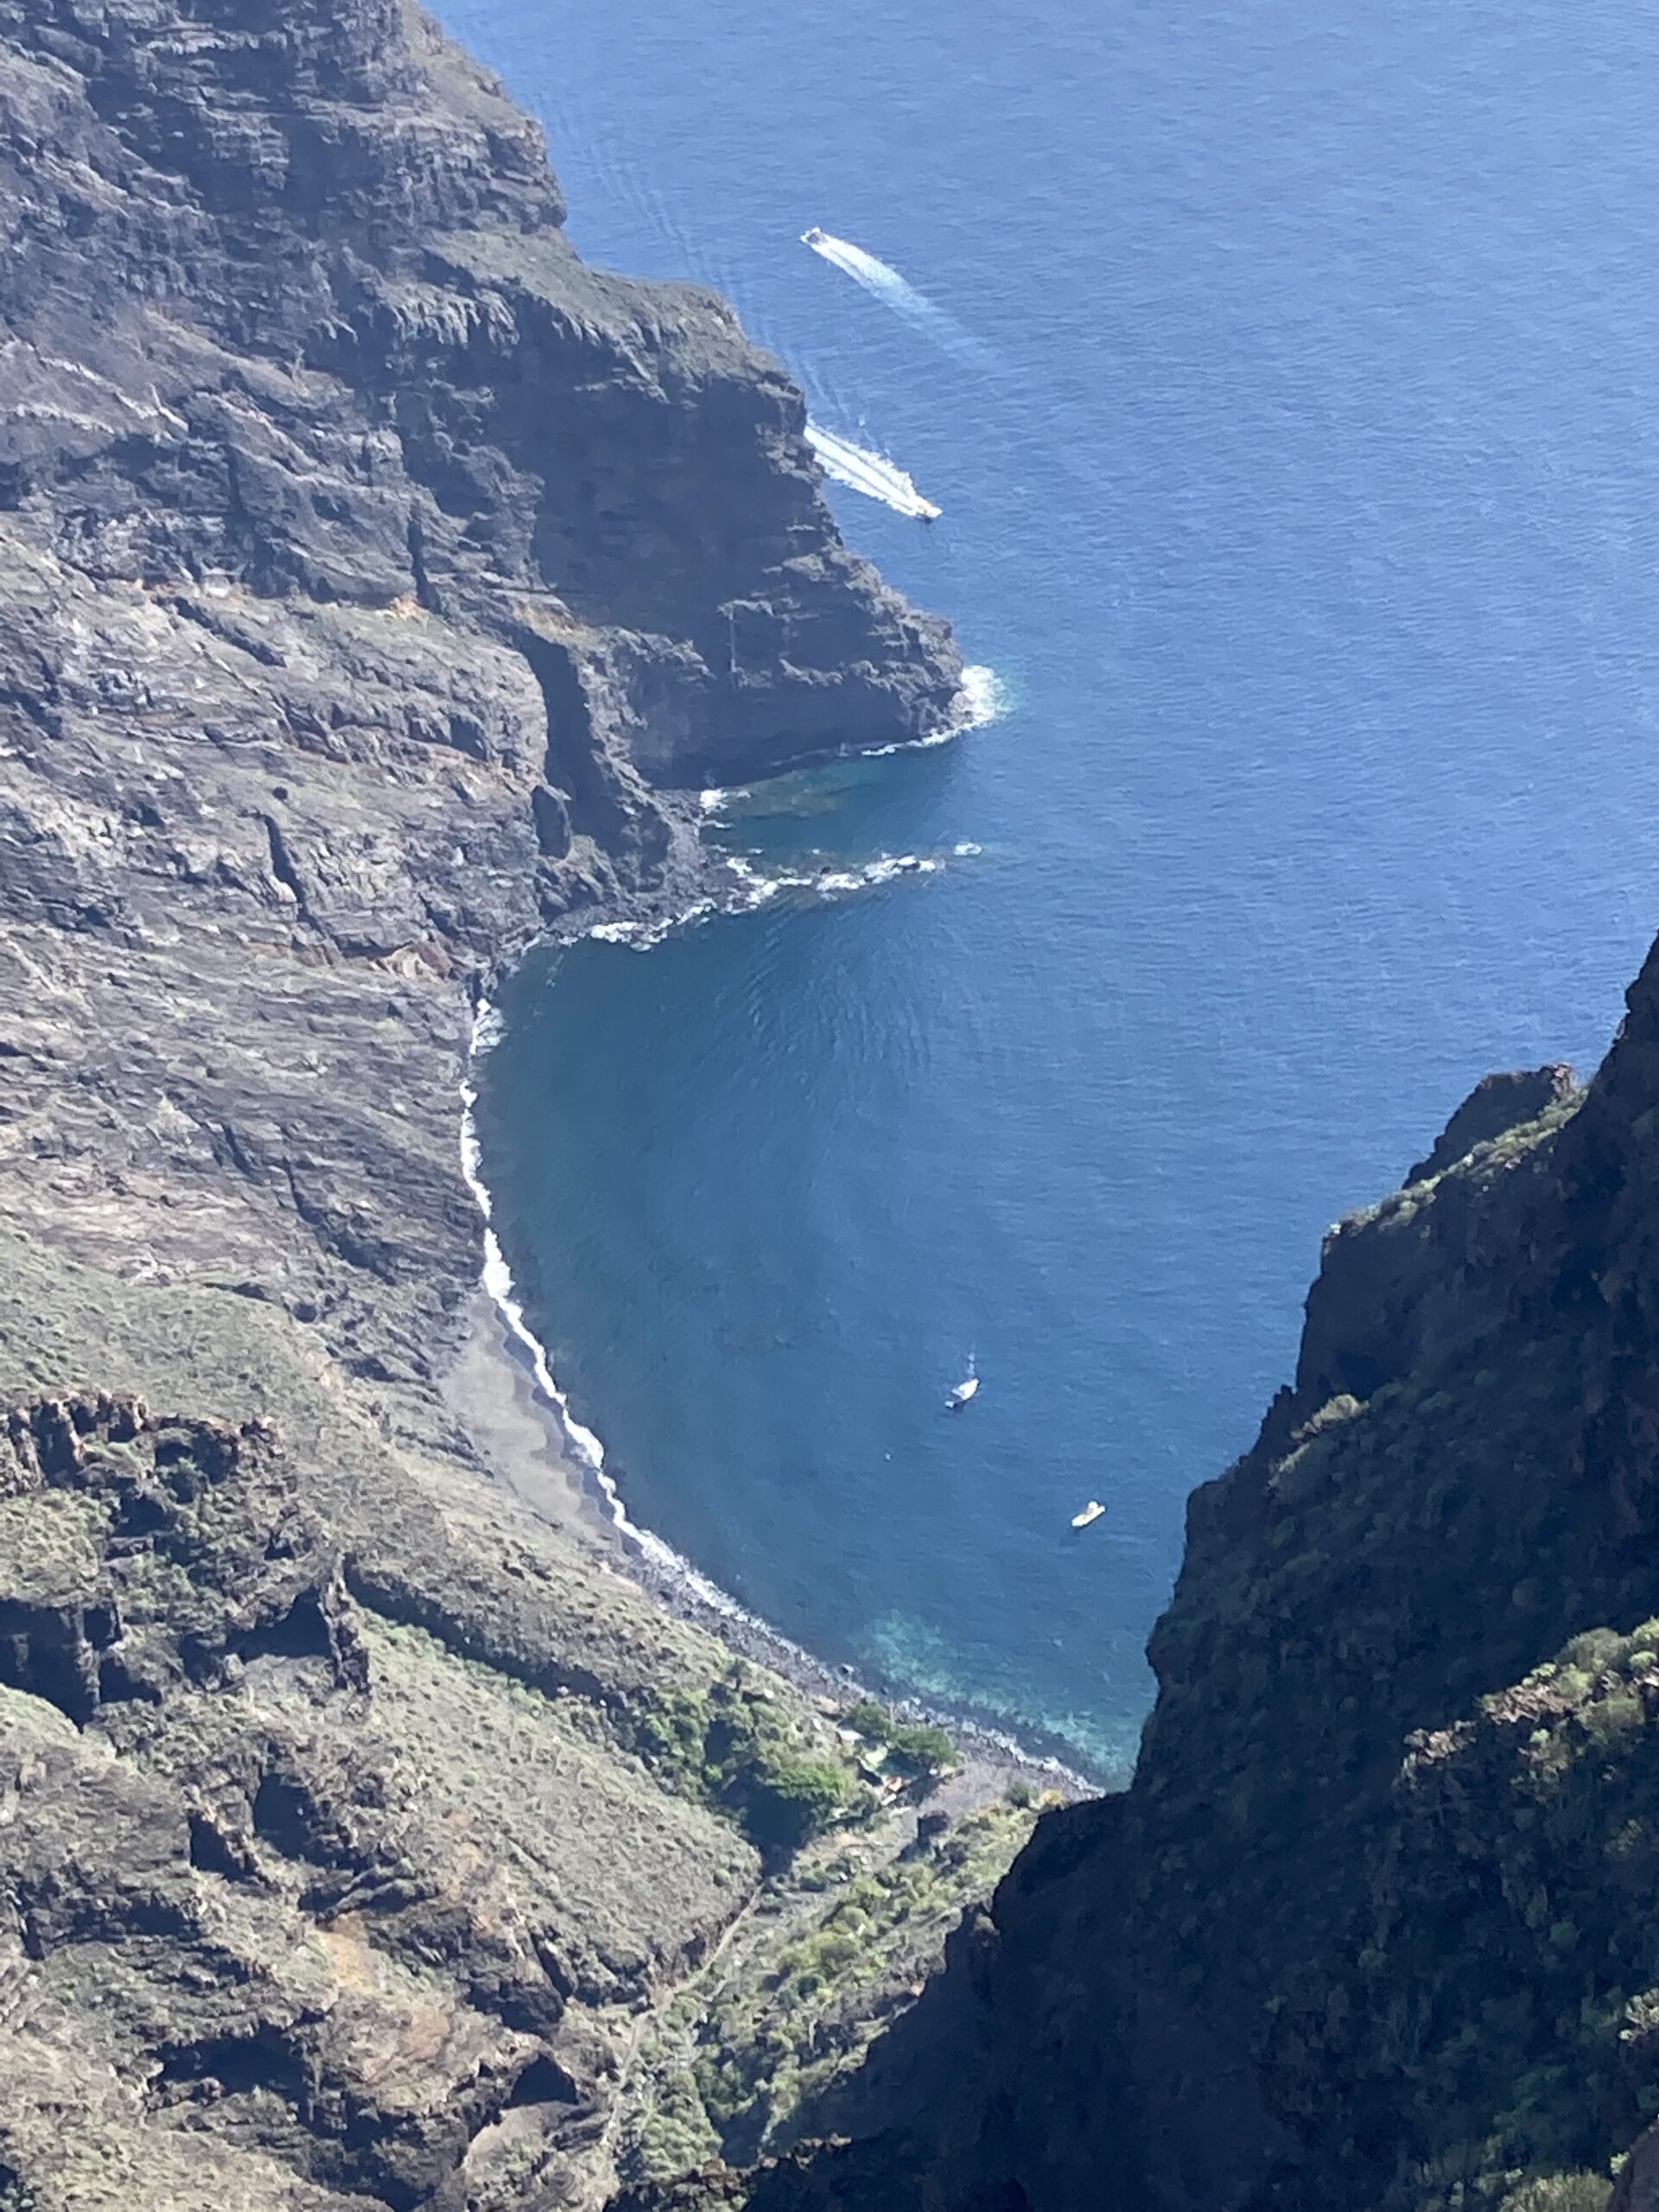
Step 5: Plateau and View Over Masca Beach As you reach the plateau, the view opens up dramatically over Masca Beach below. You can continue to Morro de la Galera following the Maps.me trail, but we turned around due to worsening weather.
#2 • Teide via Montana Blanca
Full details in our dedicated article: Climbing Teide via Montaña Blanca
Ah, Teide… what a challenge! But what an incredible experience! Be warned — climbing Spain’s highest peak requires effort. Set aside a full day and bring your determination.
Duration: 9 hours
Loop: No
Difficulty: 5/5
Distance: 20 km
Prepare your hike: If you want to reach the summit, you must book a permit months in advance (2–3 months) via the Teide National Park website. It’s free. FYI: we hadn’t booked, but at 4:00 p.m. we found the gate open and no one around — we were able to reach the summit all alone.
Step 1: Parking Parking is tricky due to high demand. Ideally, park at the Montaña Blanca trailhead. We couldn’t find space and ended up at the cable car lot (Google Maps), which added 20 minutes of walking.
Step 2: Starting Toward Montaña Blanca A gentle beginning on a wide trail leads toward Montaña Blanca — a vast lunar-like desert at Teide’s base.
Step 3: The Real Climb Begins At a large wooden signboard, the real challenge begins — a steep, well-maintained trail that feels like climbing a wall. This section lasts over an hour.
Step 4: Break at the Refuge and Continue Up Many hikers rest or eat at the Refugio de Altavista (closed since the pandemic). The second climb is shorter and less steep, but altitude and fatigue start to hit — take breaks!
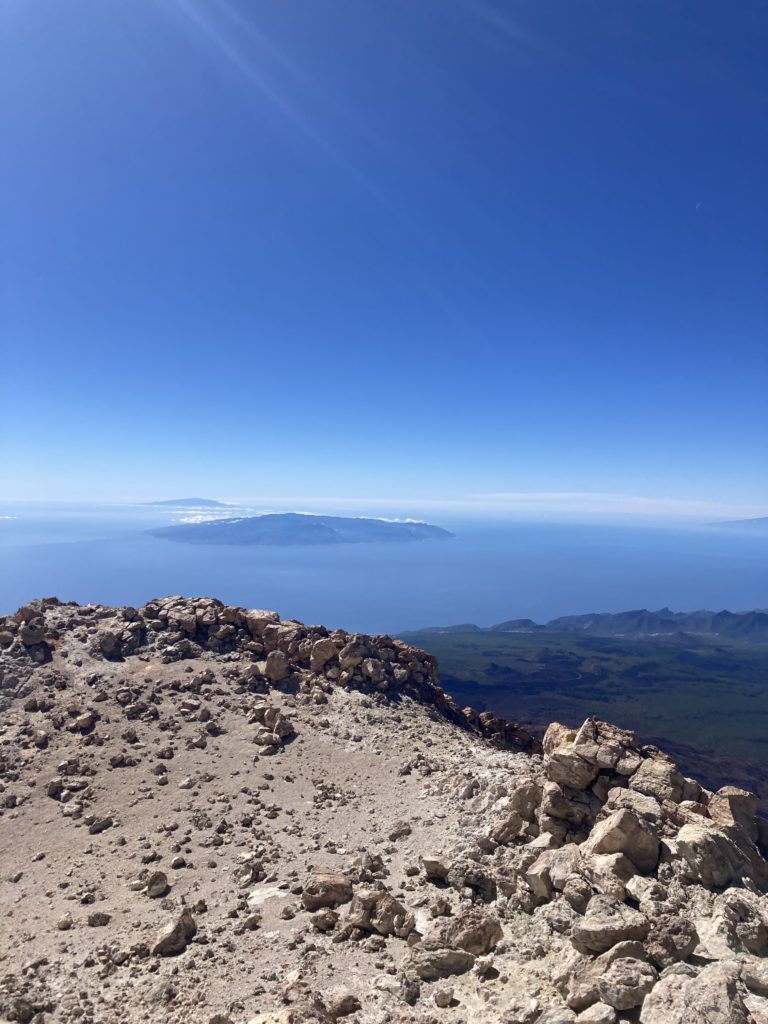
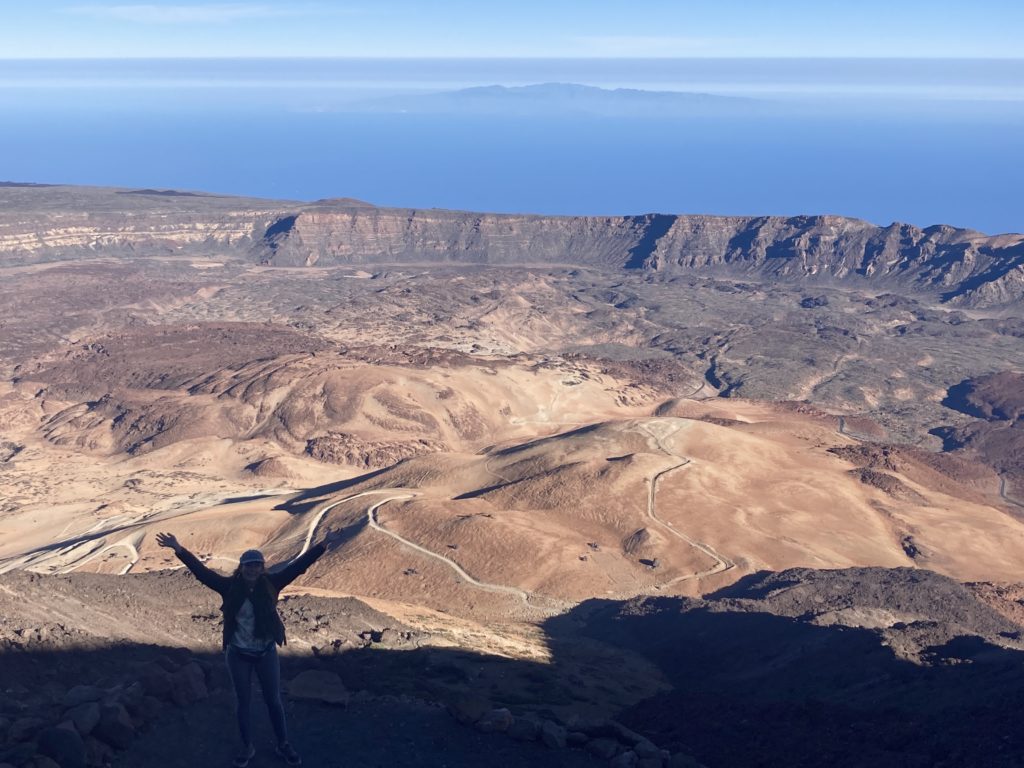
Step 5: Reaching the Cable Car Station & Viewpoints At last — the toughest part is over! Check out the Pico Viejo viewpoint, offering unforgettable views over La Gomera, El Hierro, and La Palma.
Step 6: Final Push to the Summit For the brave: continue to Pico del Teide (3,700m). This final ascent takes 30 minutes and is steep, exhausting, and breathtaking — in every sense. The crater and panoramic views are unforgettable.
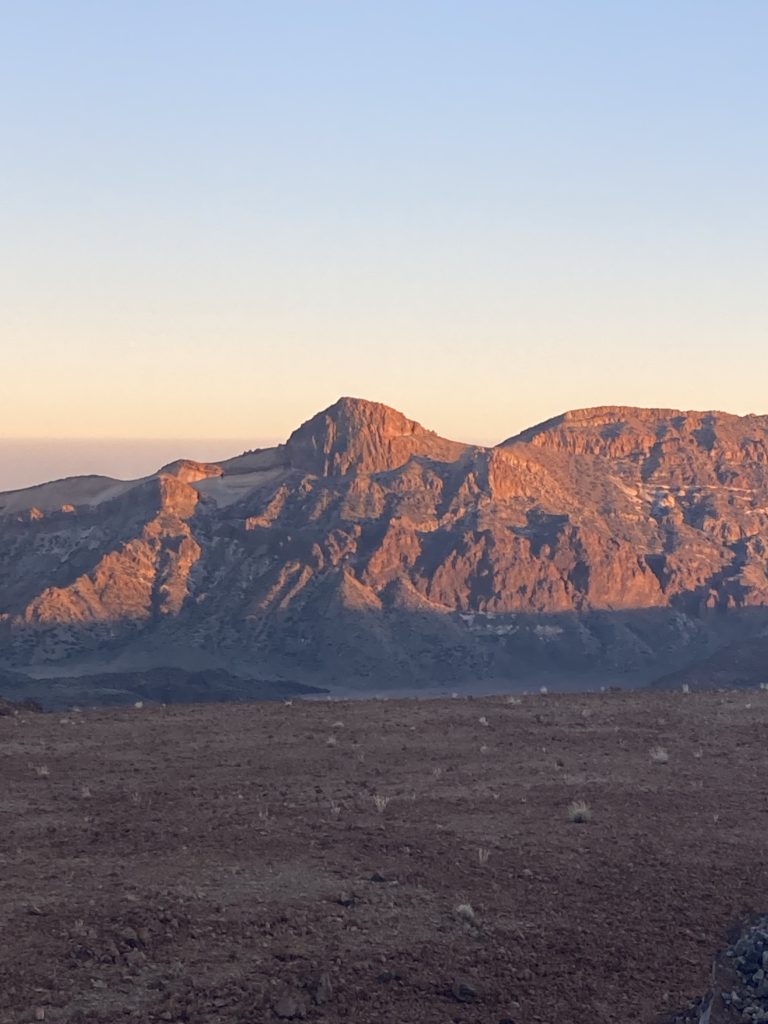
Bonus: Stargazing from Teide We stayed to watch the stars from the summit — pure magic.
How to Catch the Sunrise or Sunset from Teide: It’s very cold. Pack warm clothes, a sleeping bag, and dry gear.
Options:
- Hike up late afternoon, camp near the refuge, and see both sunset and sunrise.
- Drive or sleep at the parking lot and start at 2–3 a.m. with headlamps.
Either way — unforgettable. We opted for a more relaxed daytime ascent.
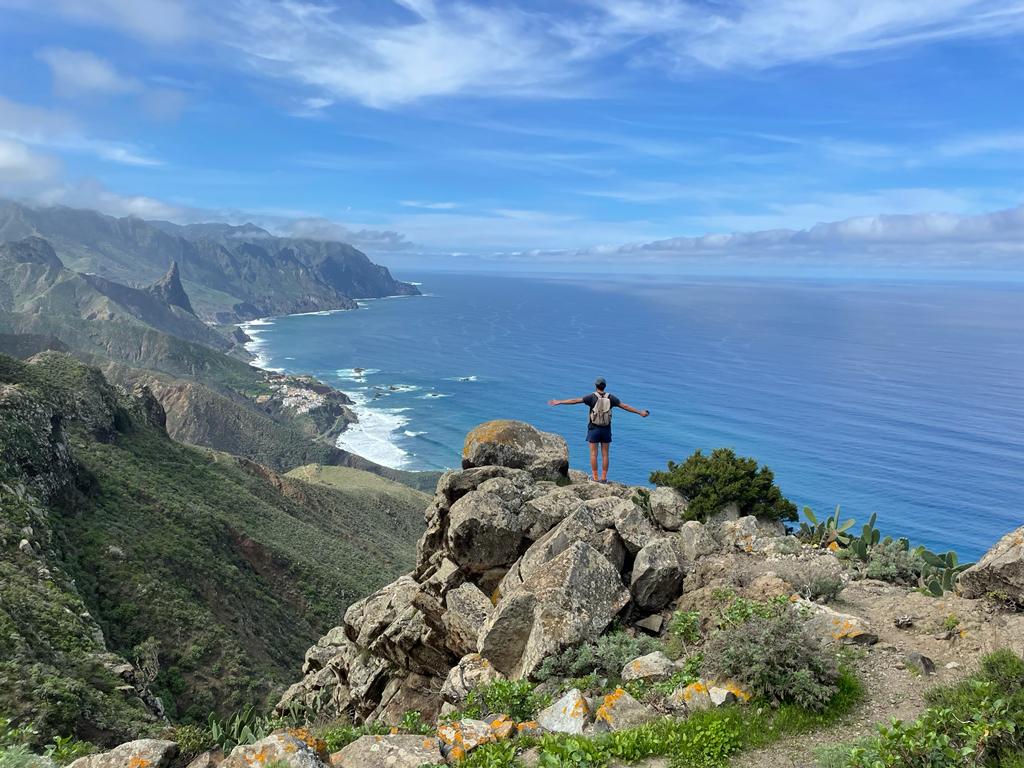
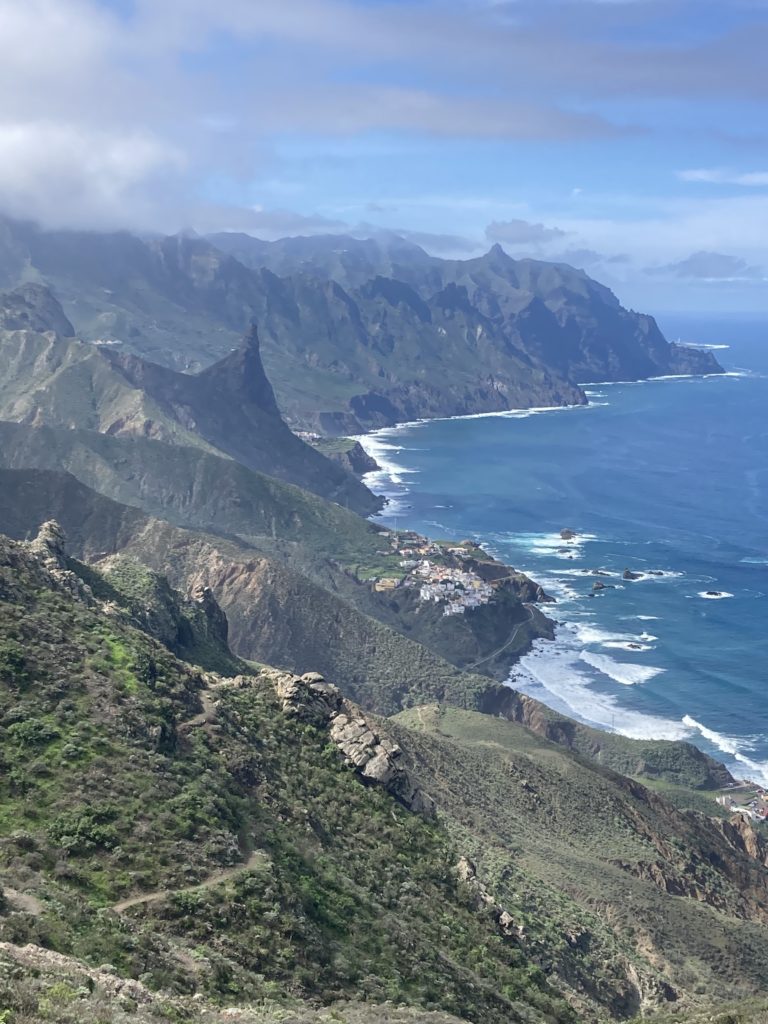
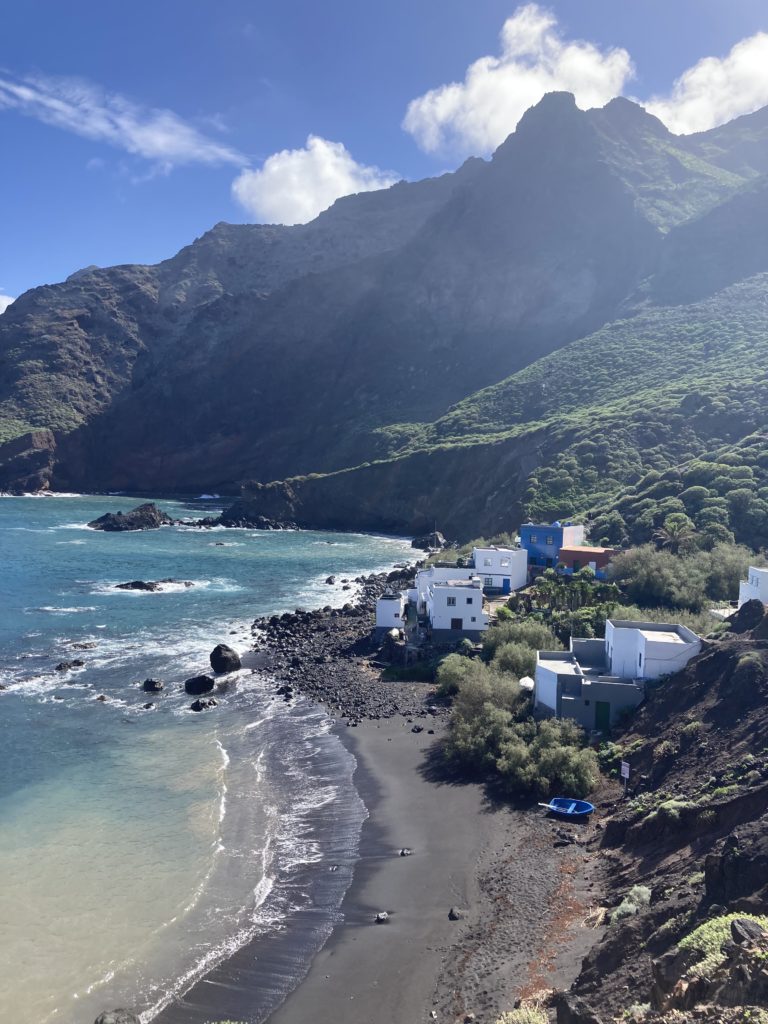
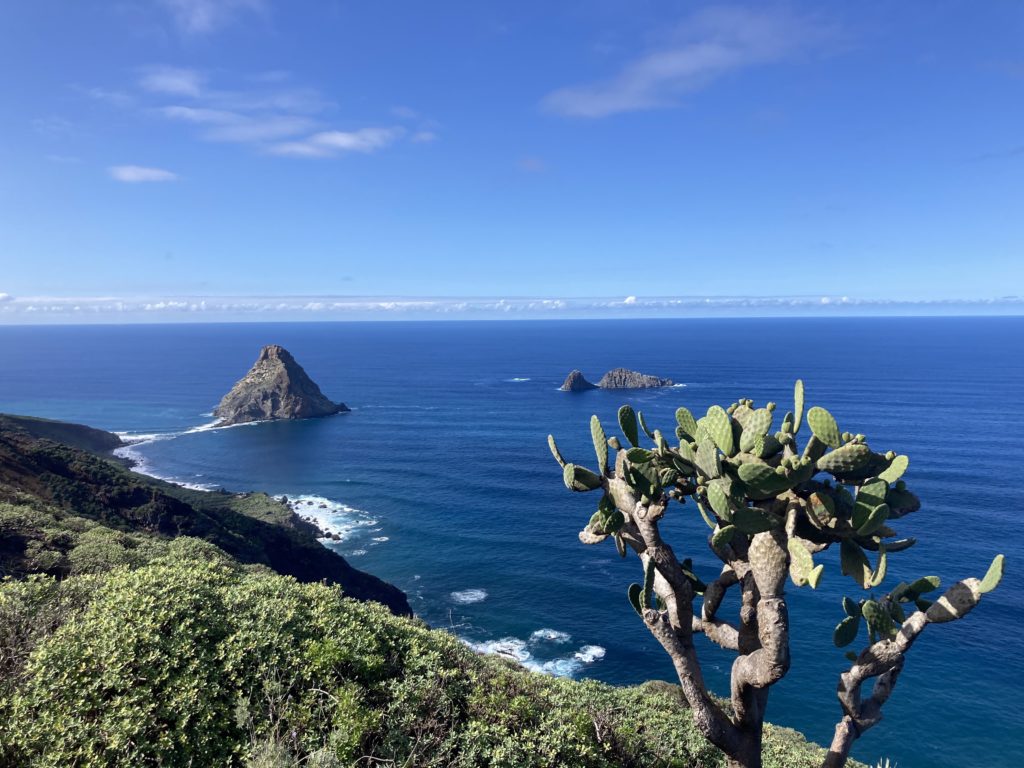
#3 • Benijo – El Draguillo (Incredible View of Roque de las Animas)
Full details in our dedicated article: Benijo Hike
Looking for a breathtaking hike? Don’t miss Benijo! It offers one of the best panoramas in Tenerife — including the iconic Roque de las Animas.
It’s short, accessible, and leaves time for beach hopping in Almaciga and Benijo.
Duration: 3 hours
Loop: Yes
Difficulty: 2/5
Distance: 5 km
Step 1: Parking Park at the Mirador (Google Maps) or along the road leading to it.
Step 2: Toward El Draguillo A gentle trail leads toward El Draguillo — easy and scenic.
Step 3: The Climb At El Draguillo, follow Maps.me or trail signs up a fairly steep but short climb — with rewarding views!
Step 4: Descent to Benijo At the junction, descend toward Benijo — the coastal views and Roque de las Animas are jaw-dropping.
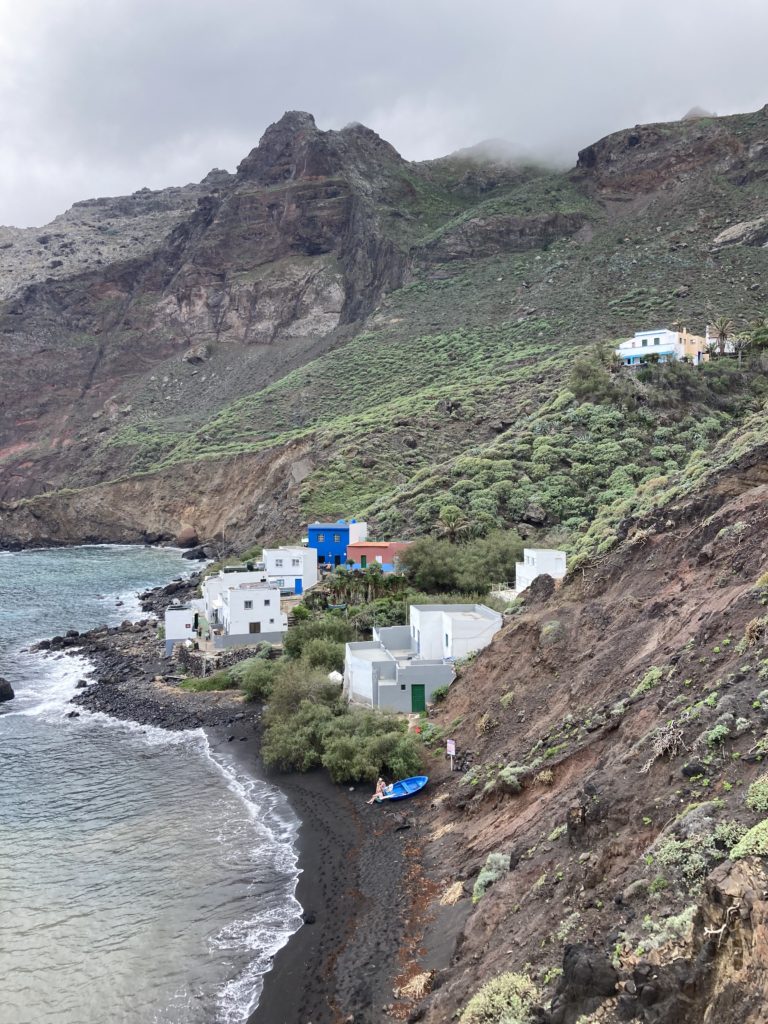
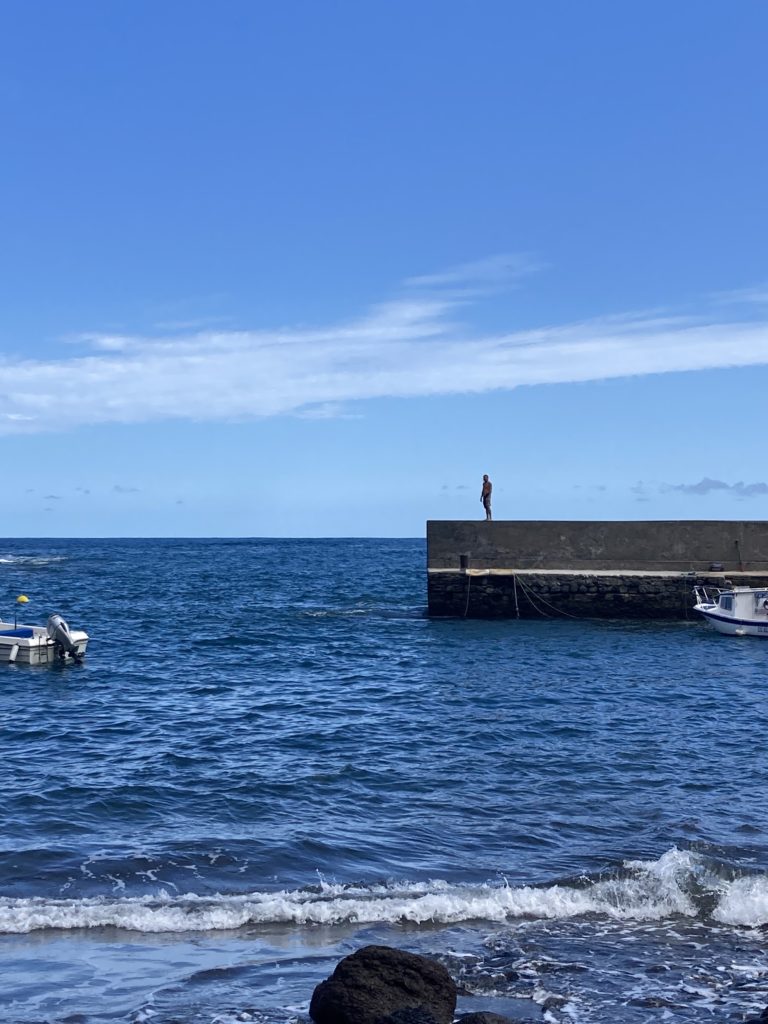
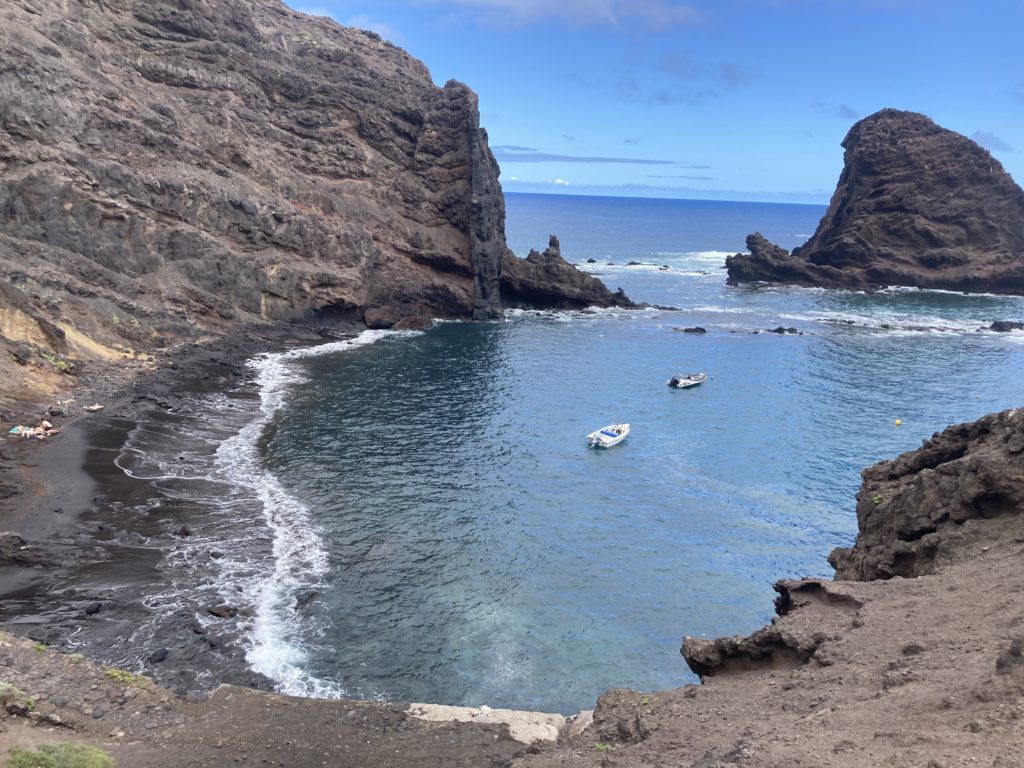
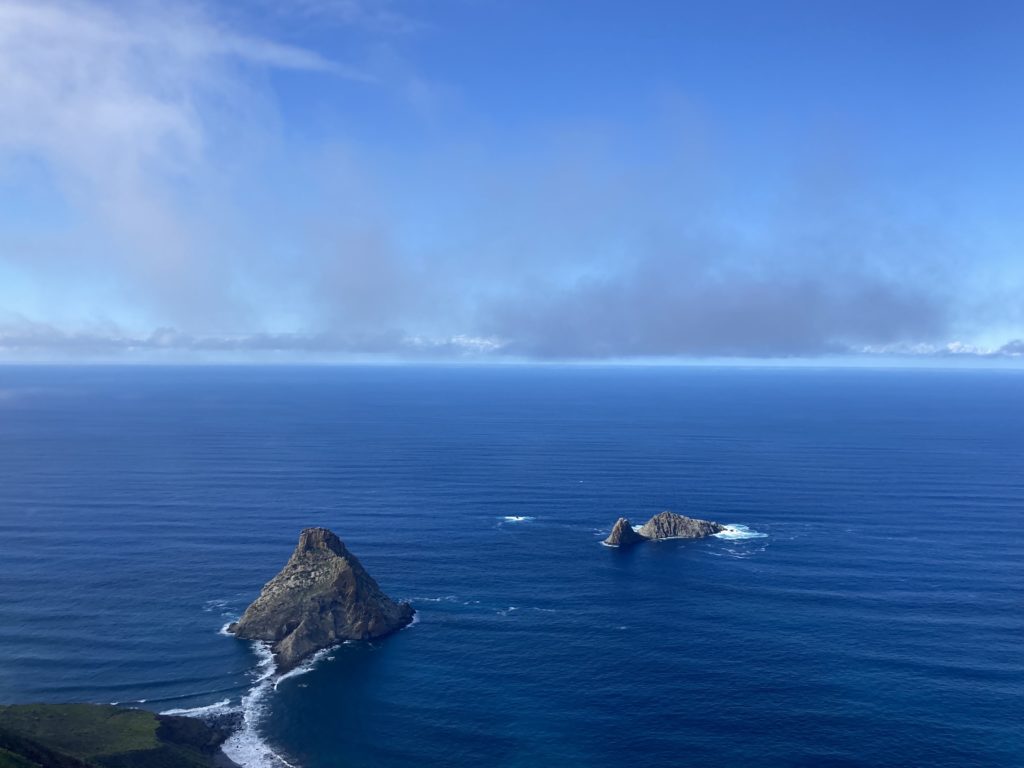
#4 • Chamorga – Faro de Anaga
Full details in our dedicated article: Chamorga – Faro de Anaga Hike
From the northeastern tip of Tenerife, this hike starts in Chamorga and loops past Roque de Bermejo and the Anaga Lighthouse.
Duration: 5 hours
Loop: Yes
Difficulty: 3/5
Distance: 8 km
Step 1: Start from Chamorga There’s decent parking at the bend just before the trailhead in the village. Or park near the bus stop. The hike begins near Bar Casa Álvaro, where you can eat or grab a coffee.
Step 2: Descend to Roque de Bermejo The descent is easy and pleasant. You’ll pass the tiny village of Roque de Bermejo and its chapel, then reach Playa de Roque Bermejo. Another beach with a small port is a great sheltered swim spot.
Step 3: Climb to Faro de Anaga The ascent begins with the Anaga Lighthouse. It’s steep but stunning — with views of the Roques de Anaga.
Step 4: Return to Chamorga The climb continues with sweeping views. You’ll pass local trees, Casas de Tafada, and descend back to Chamorga, completing the loop.
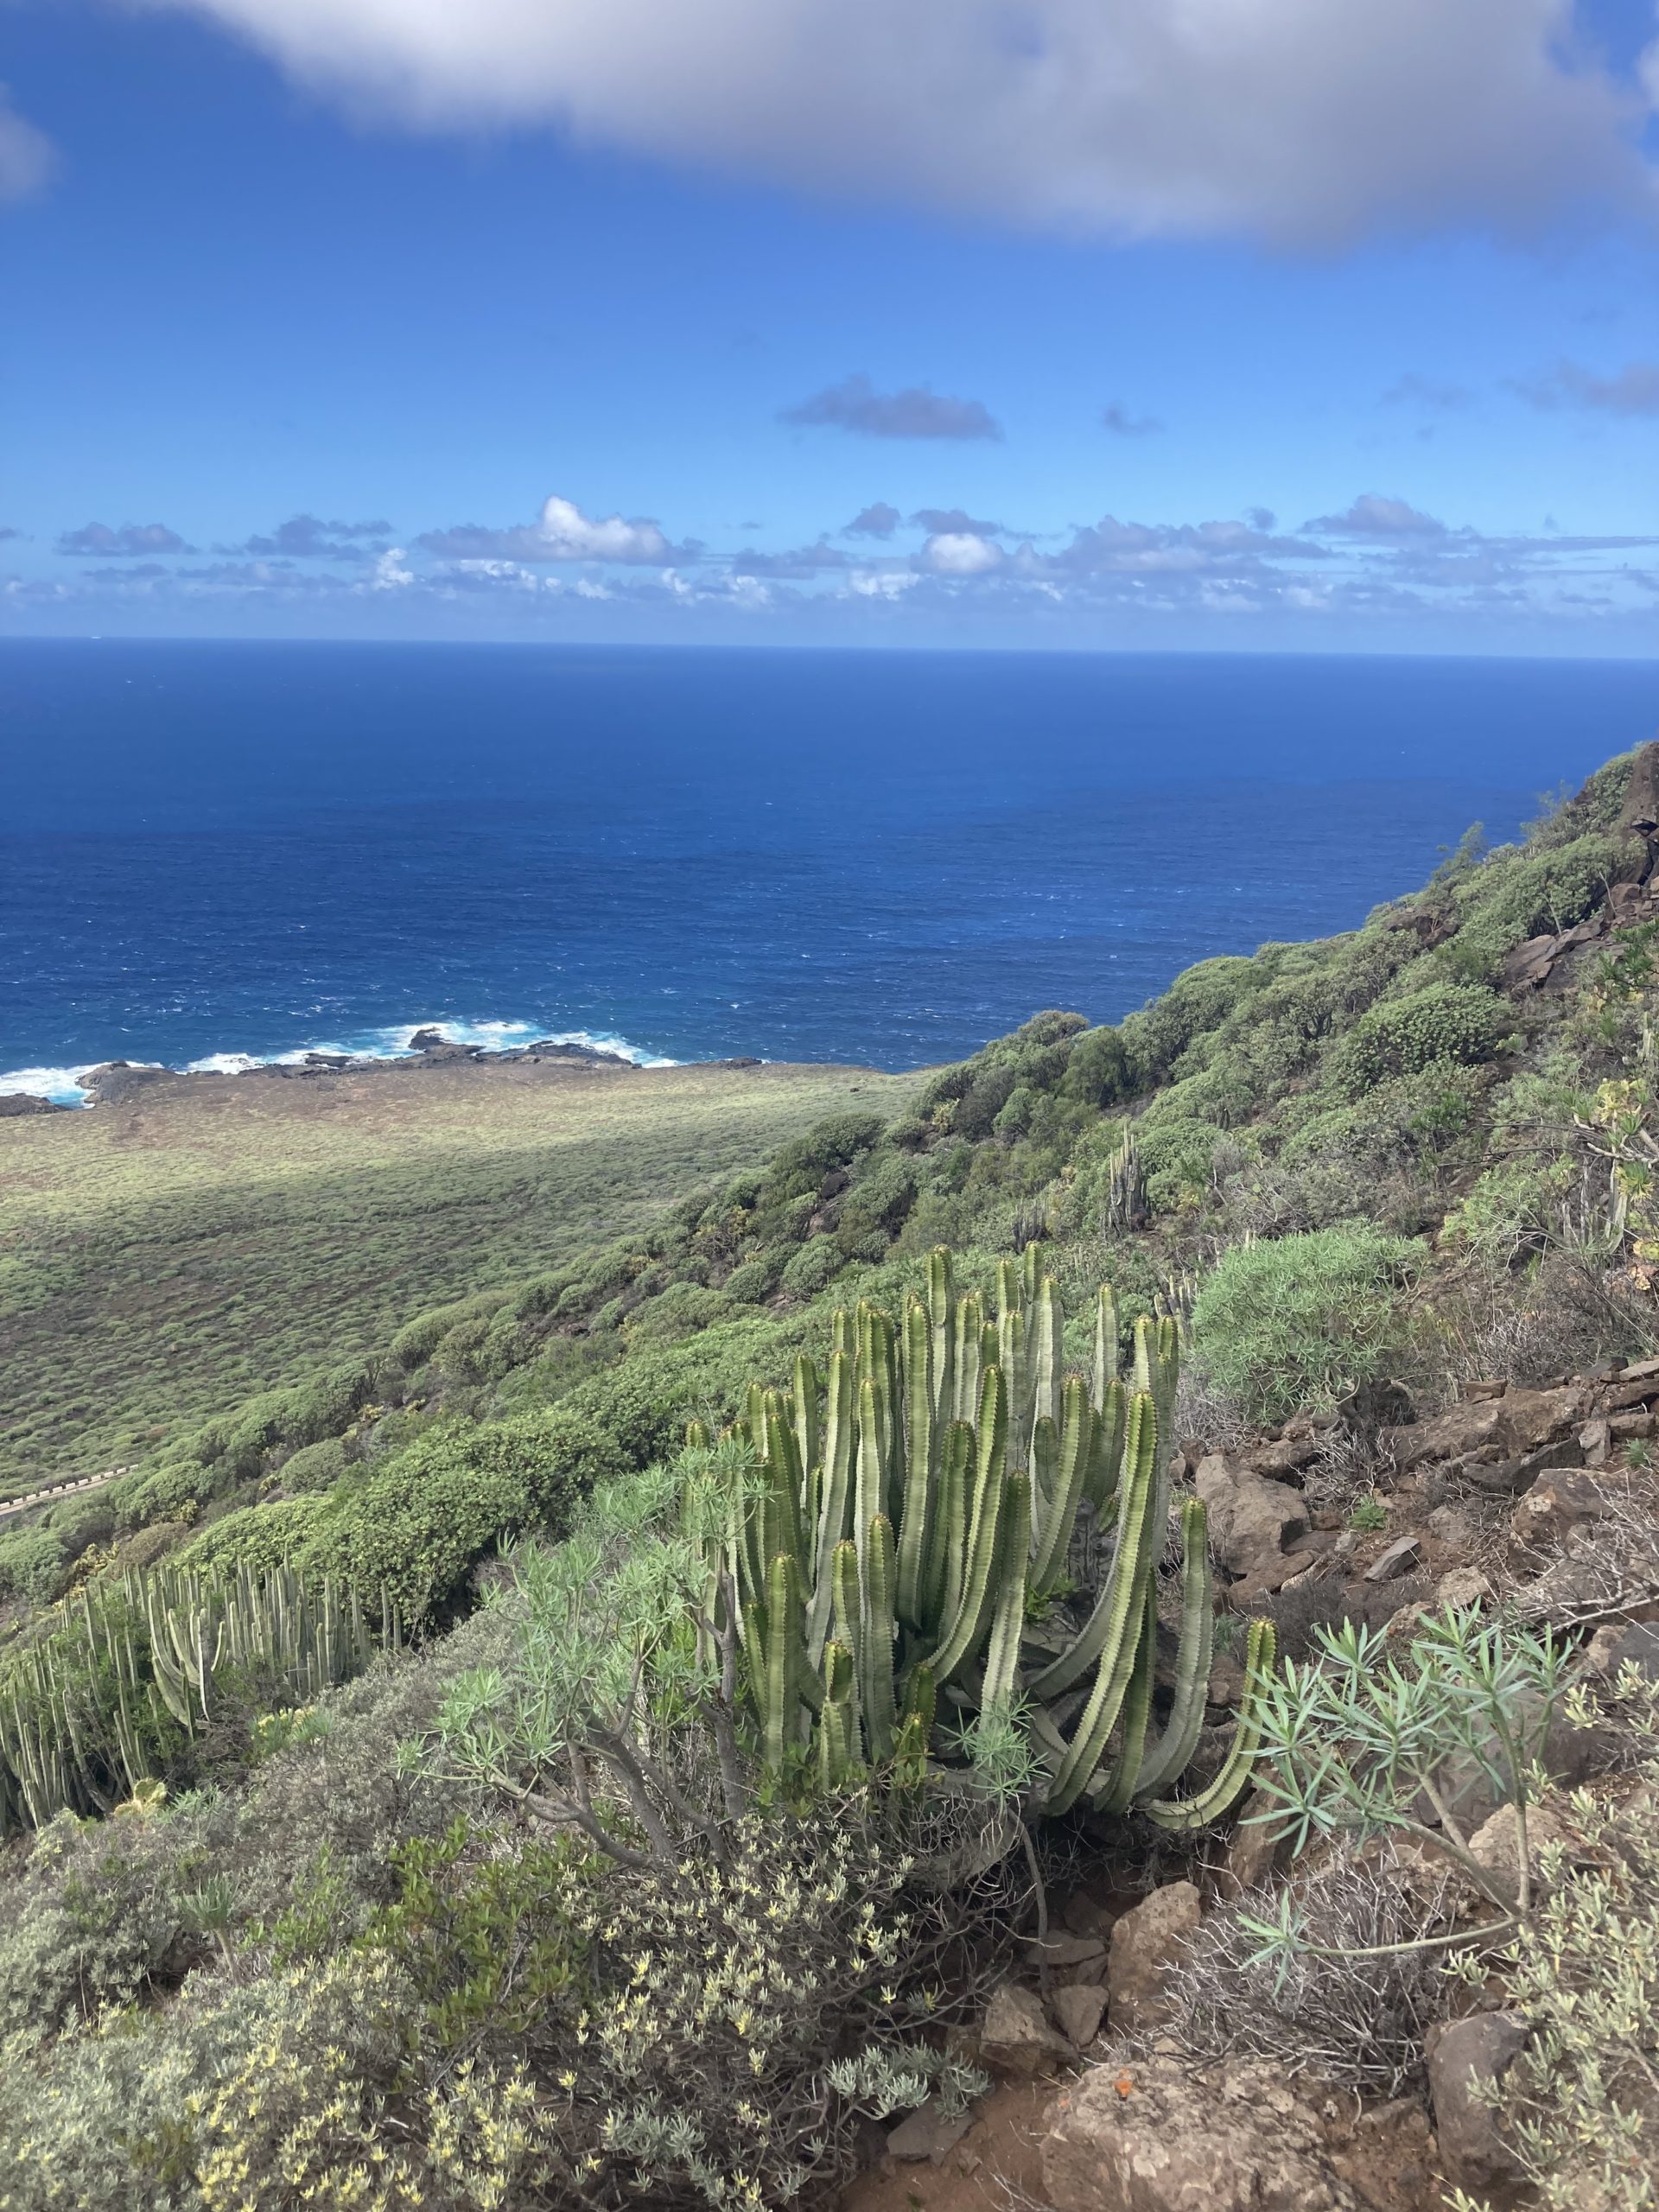
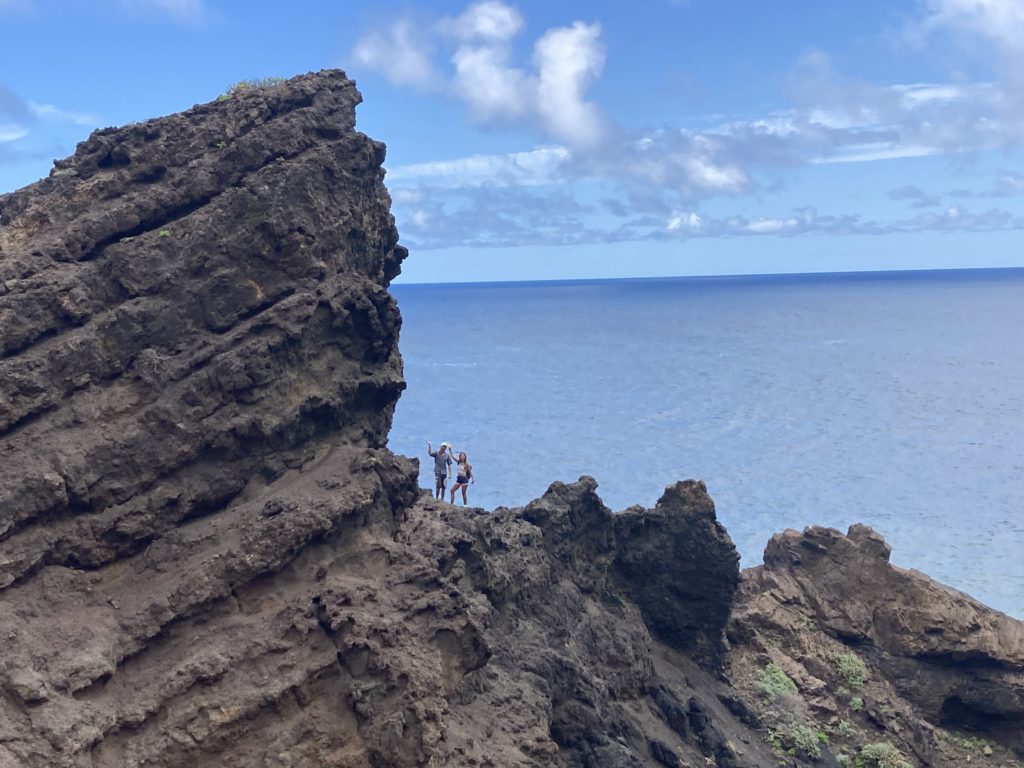
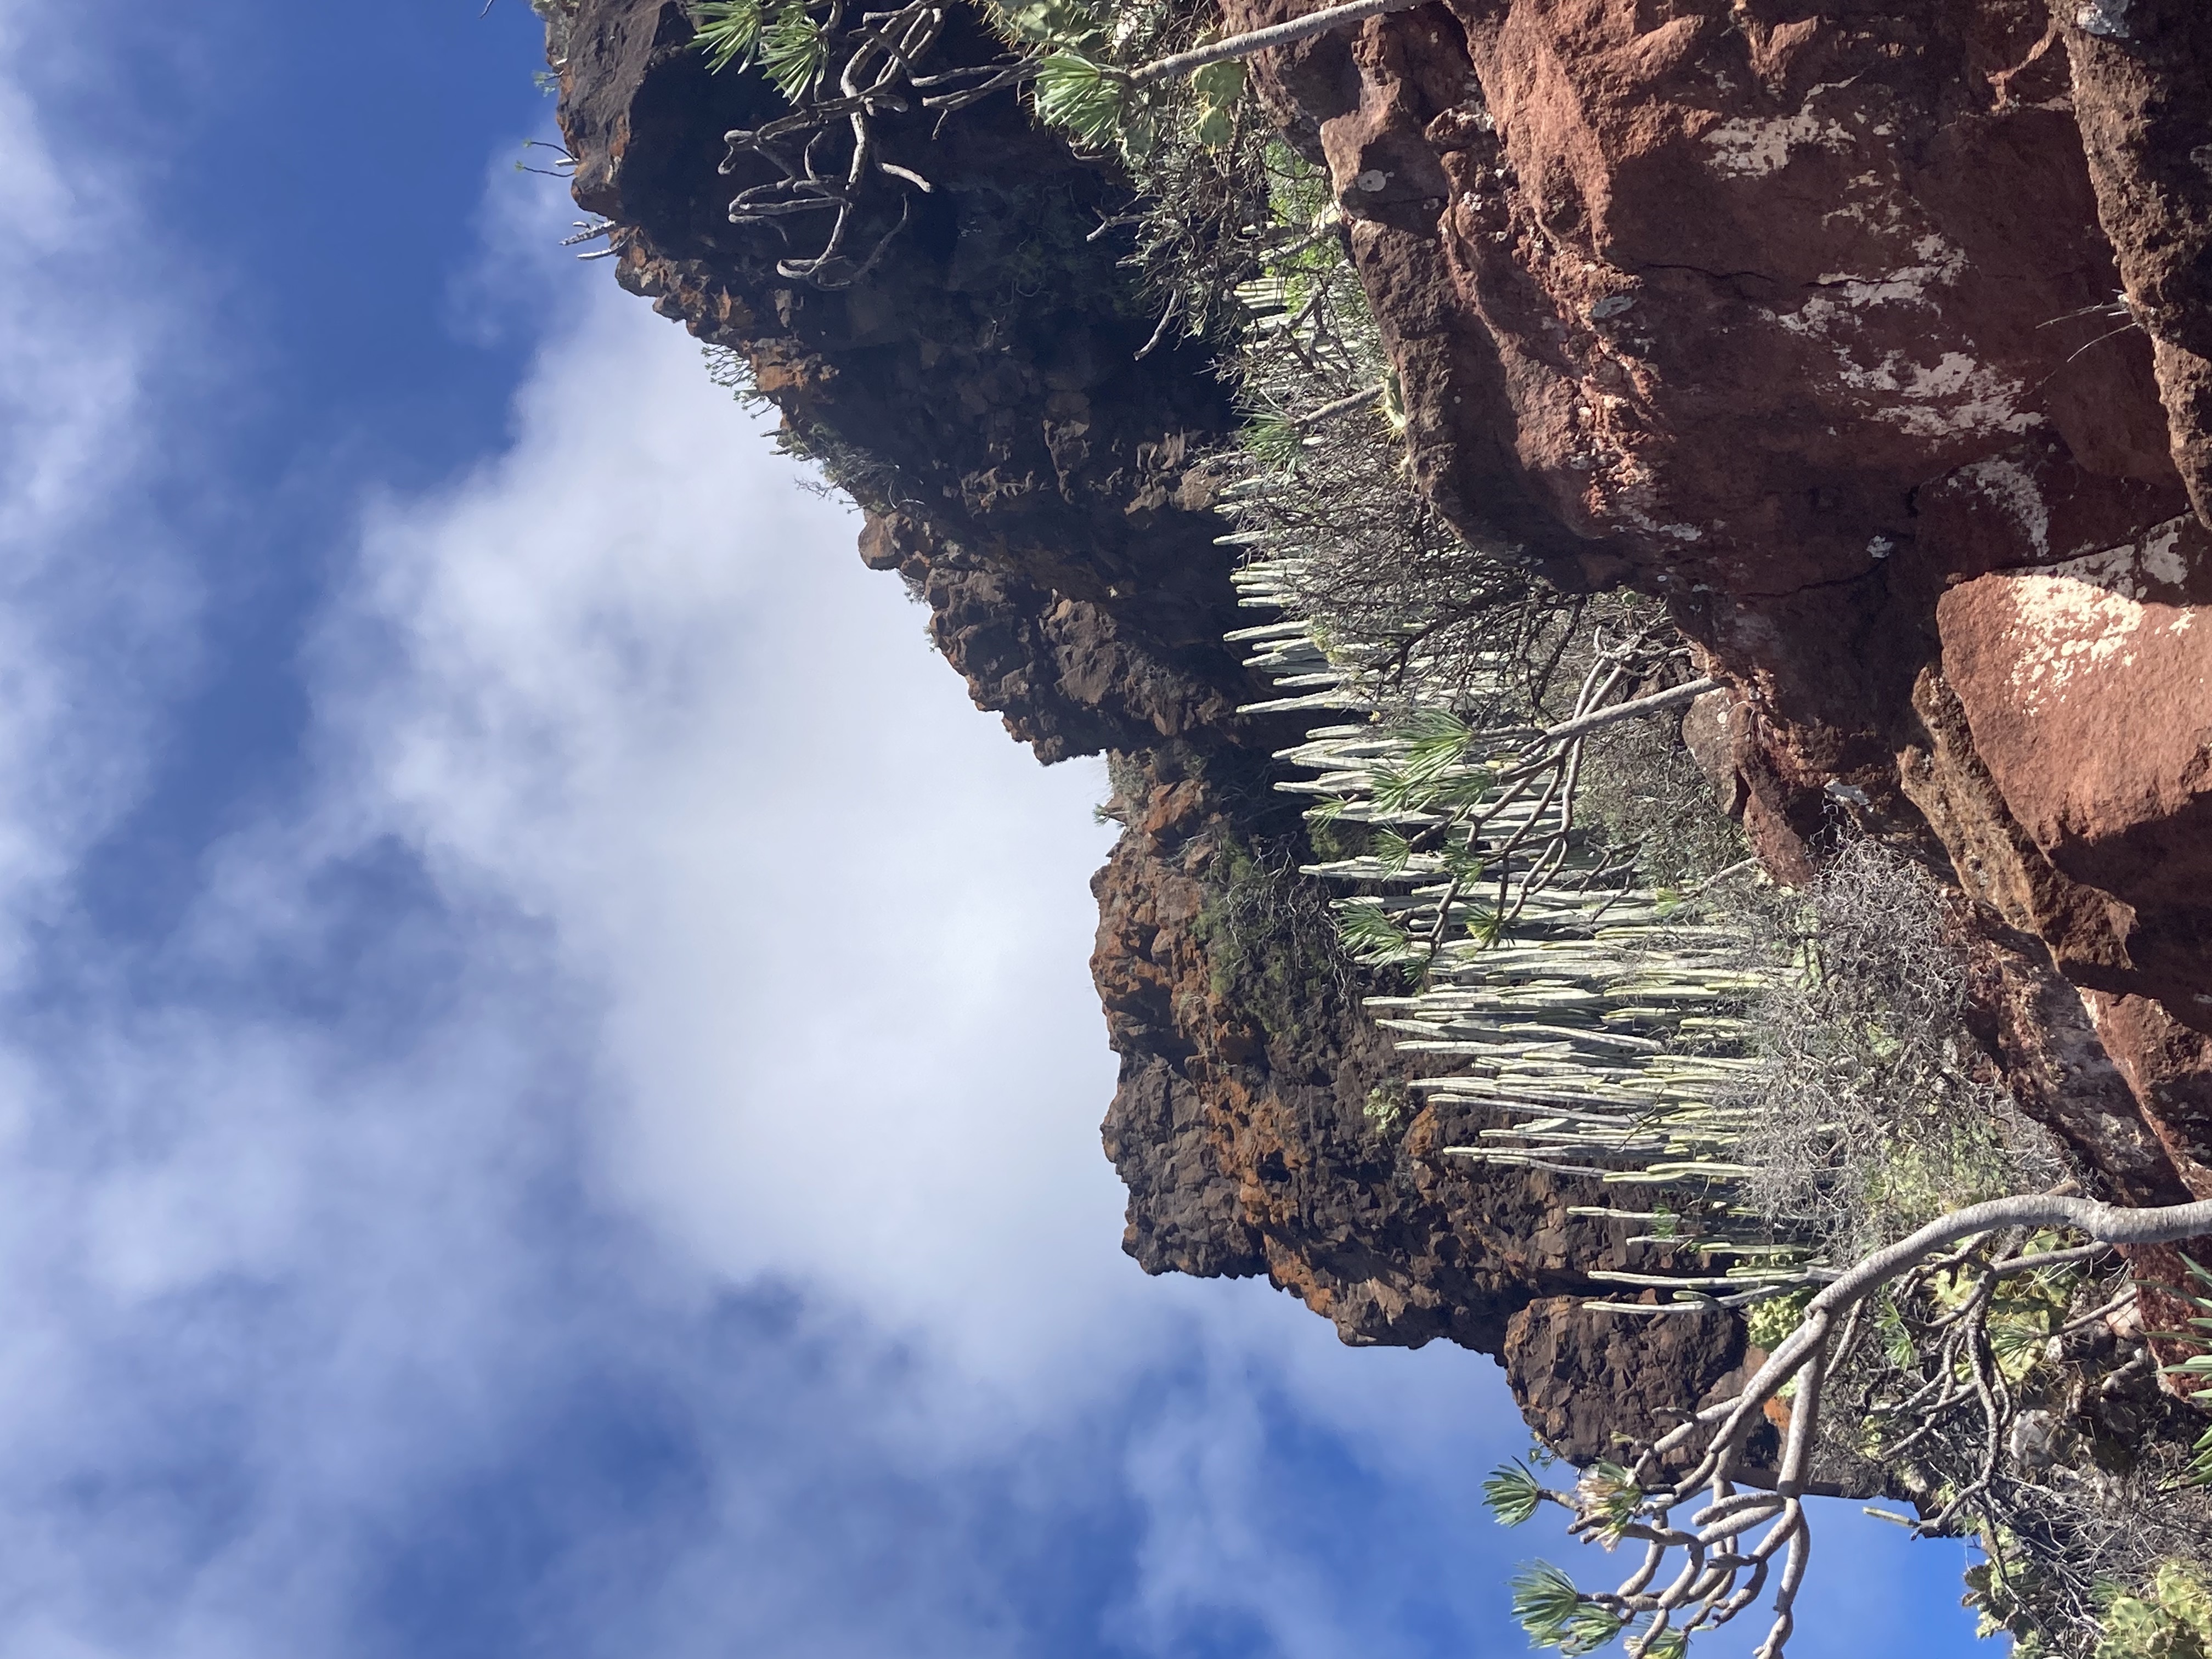
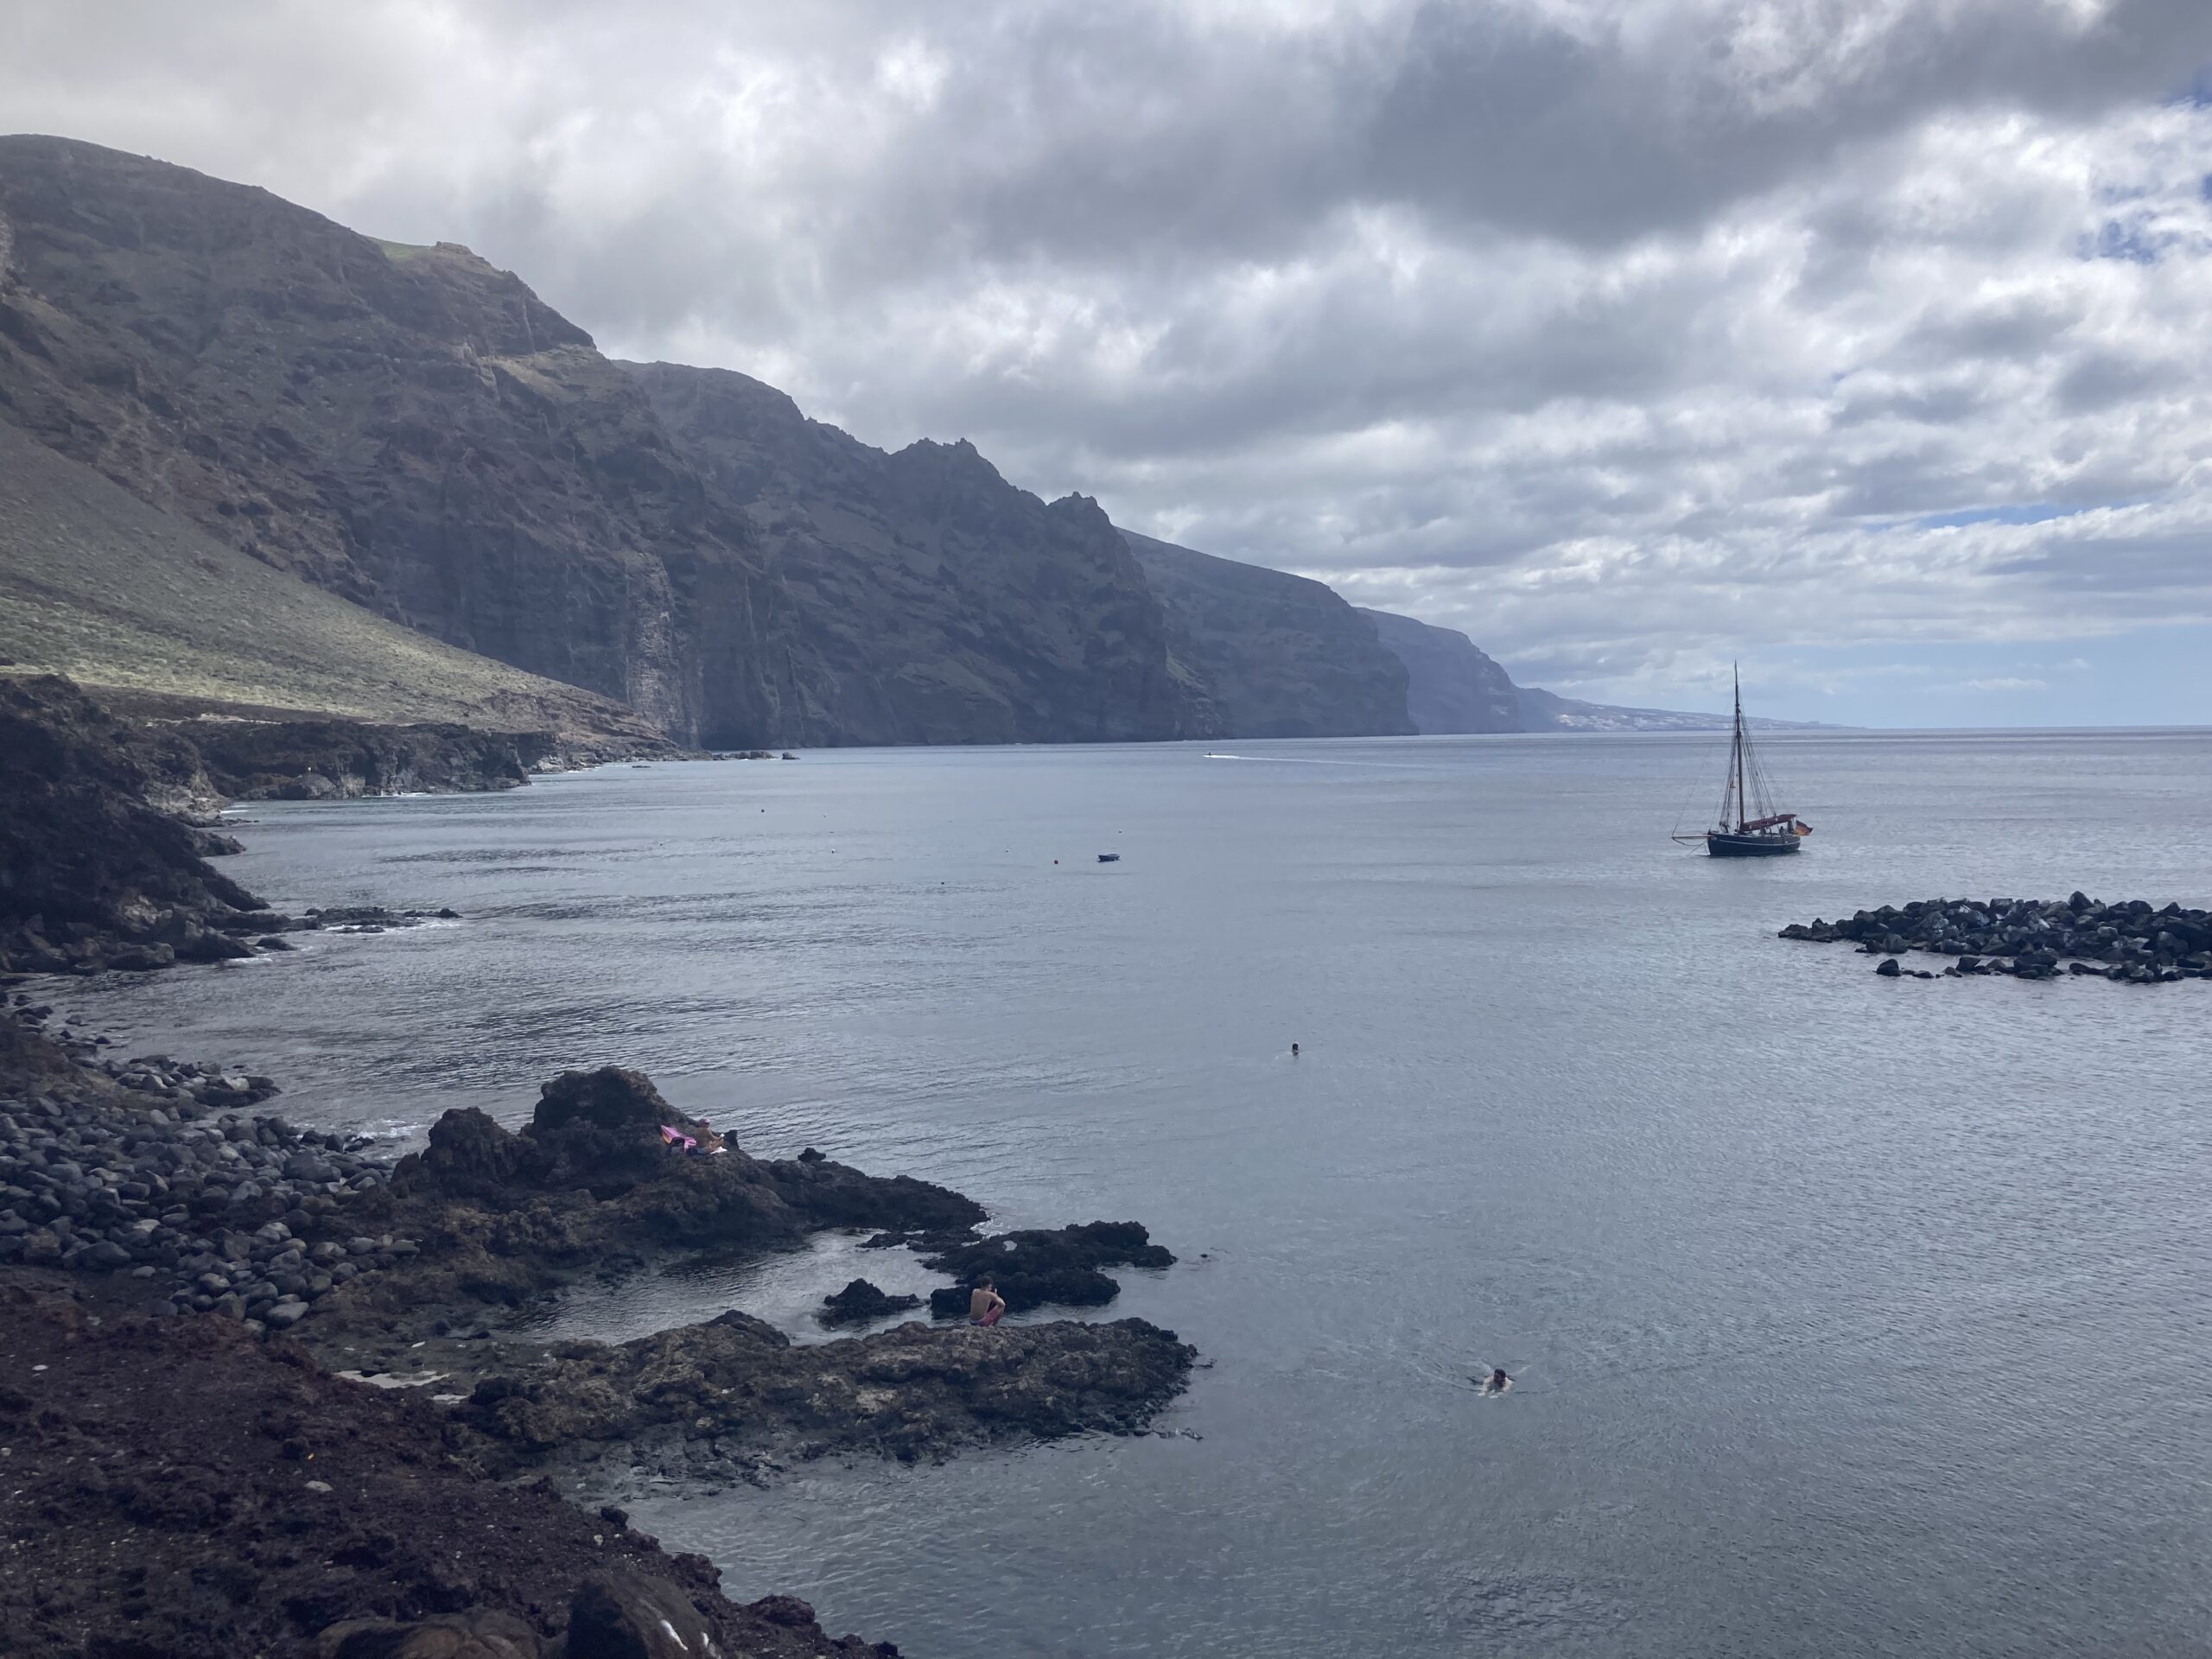
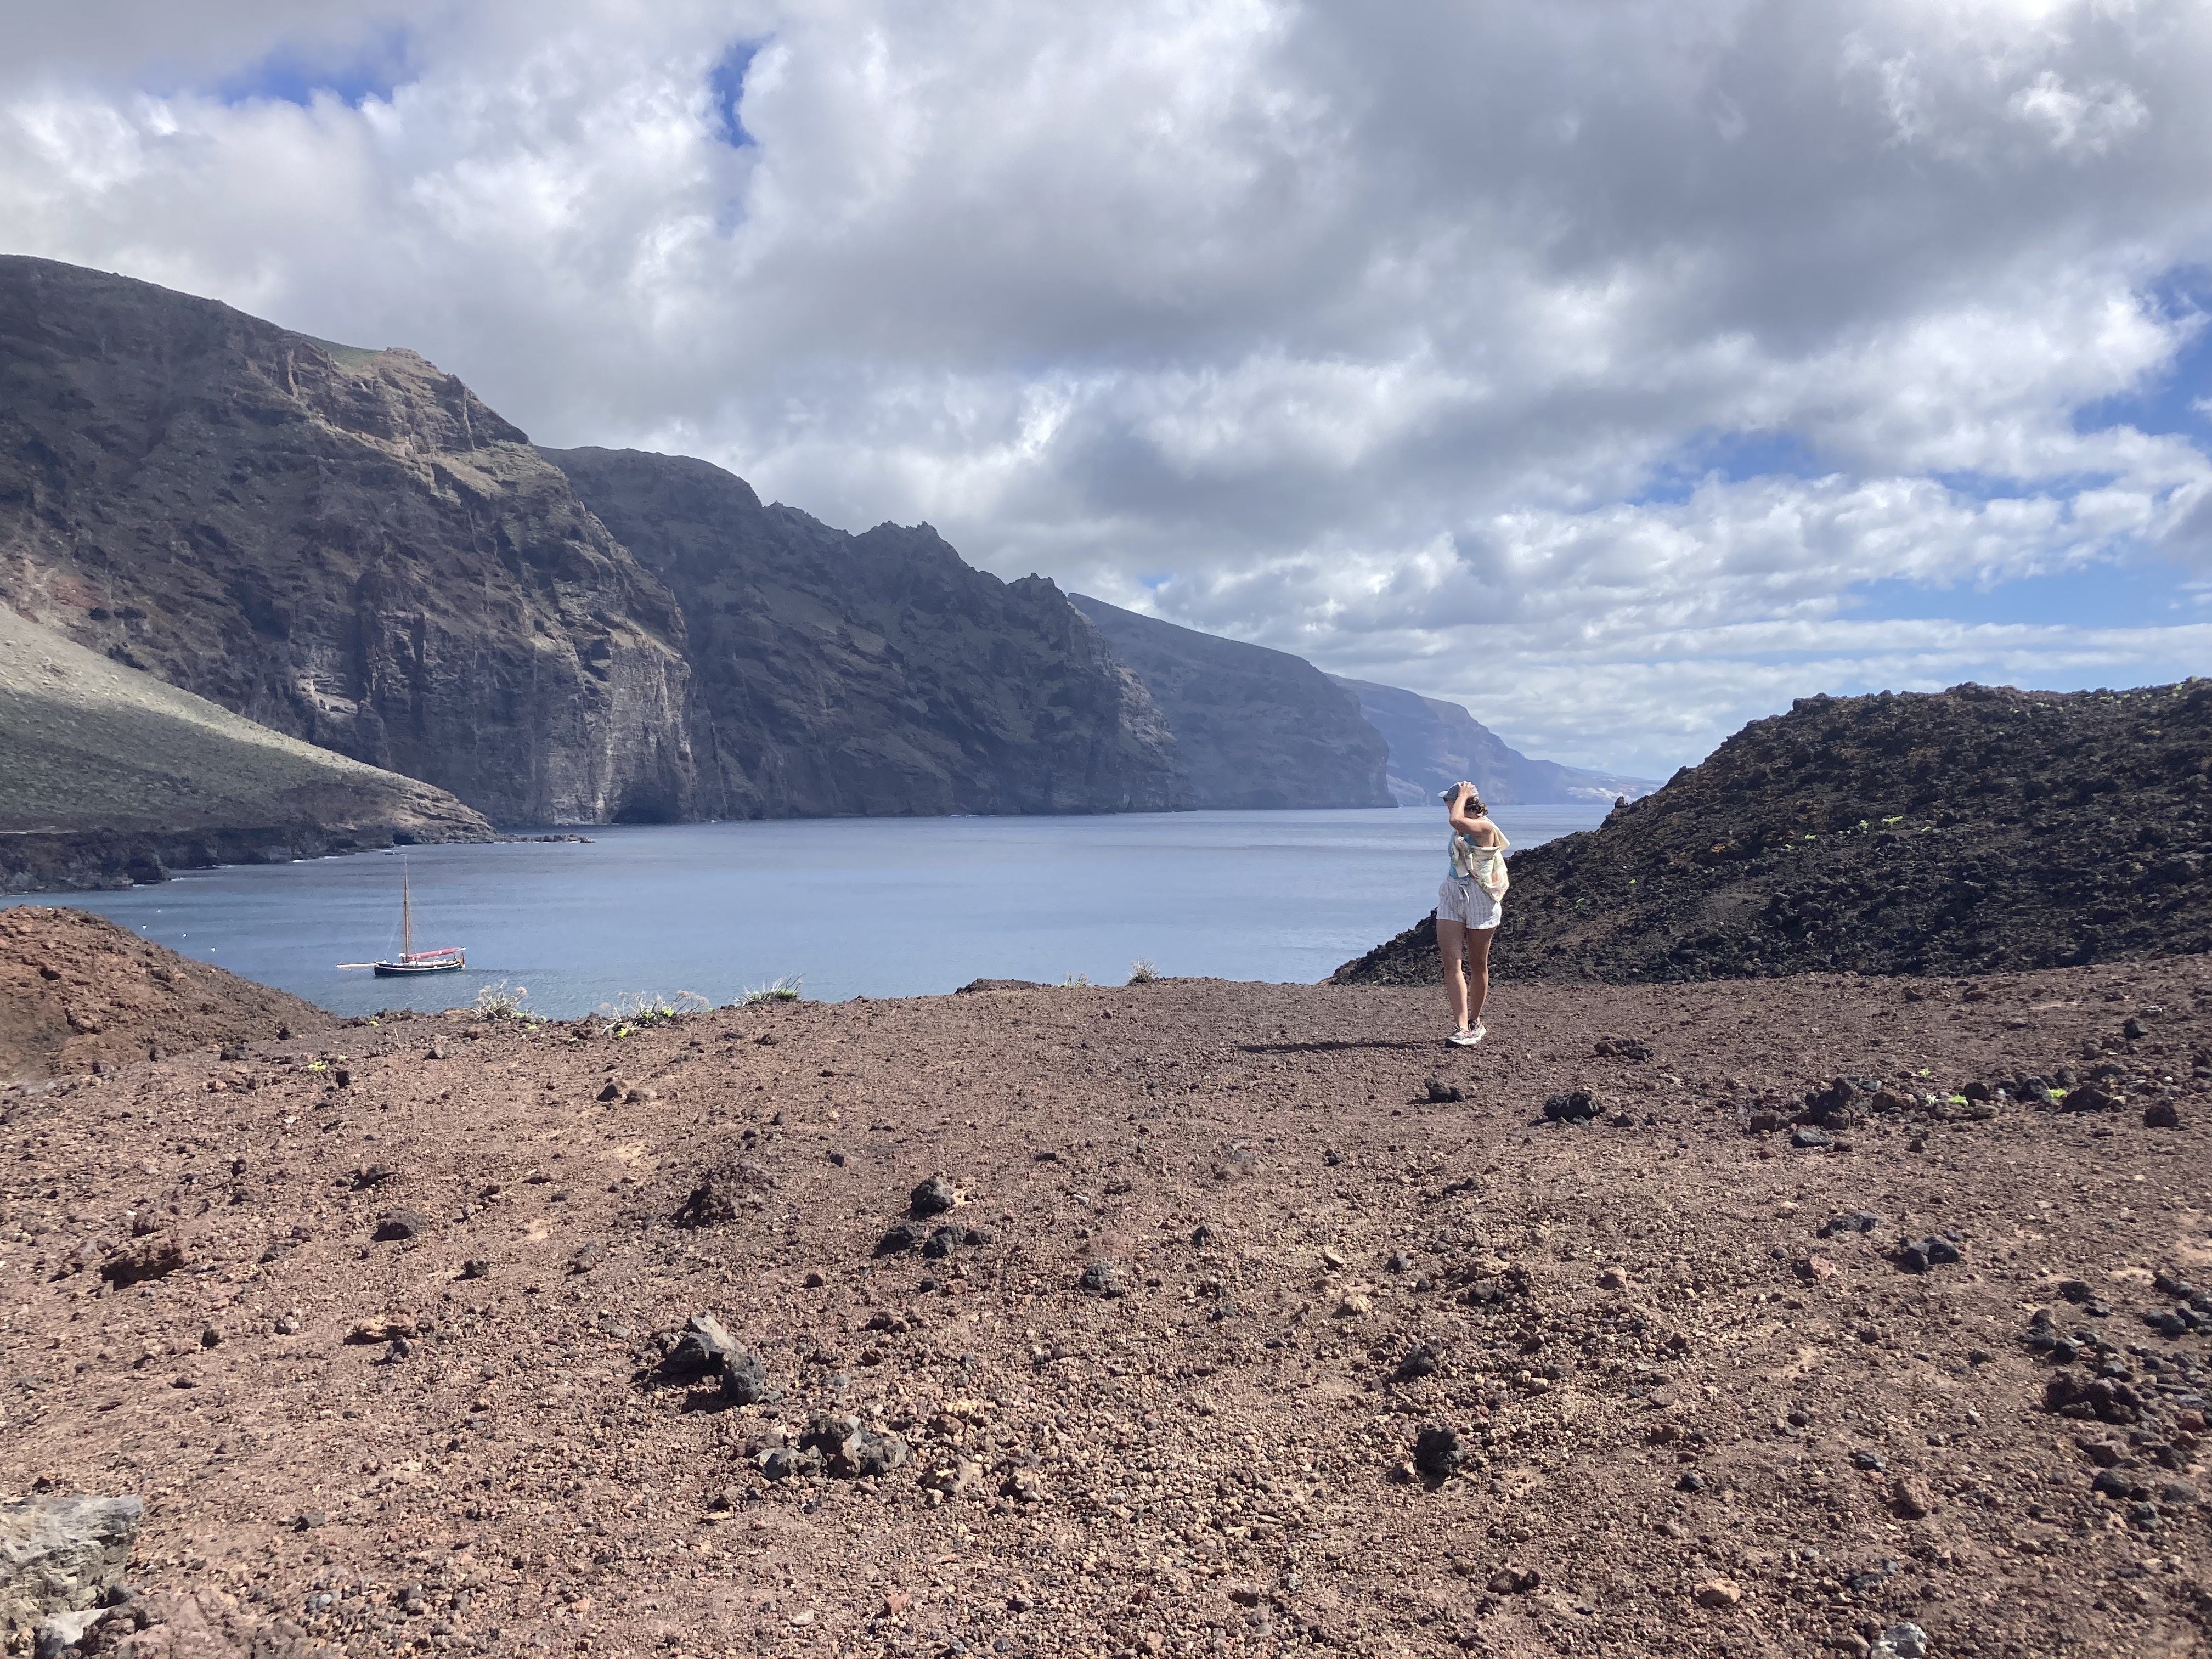
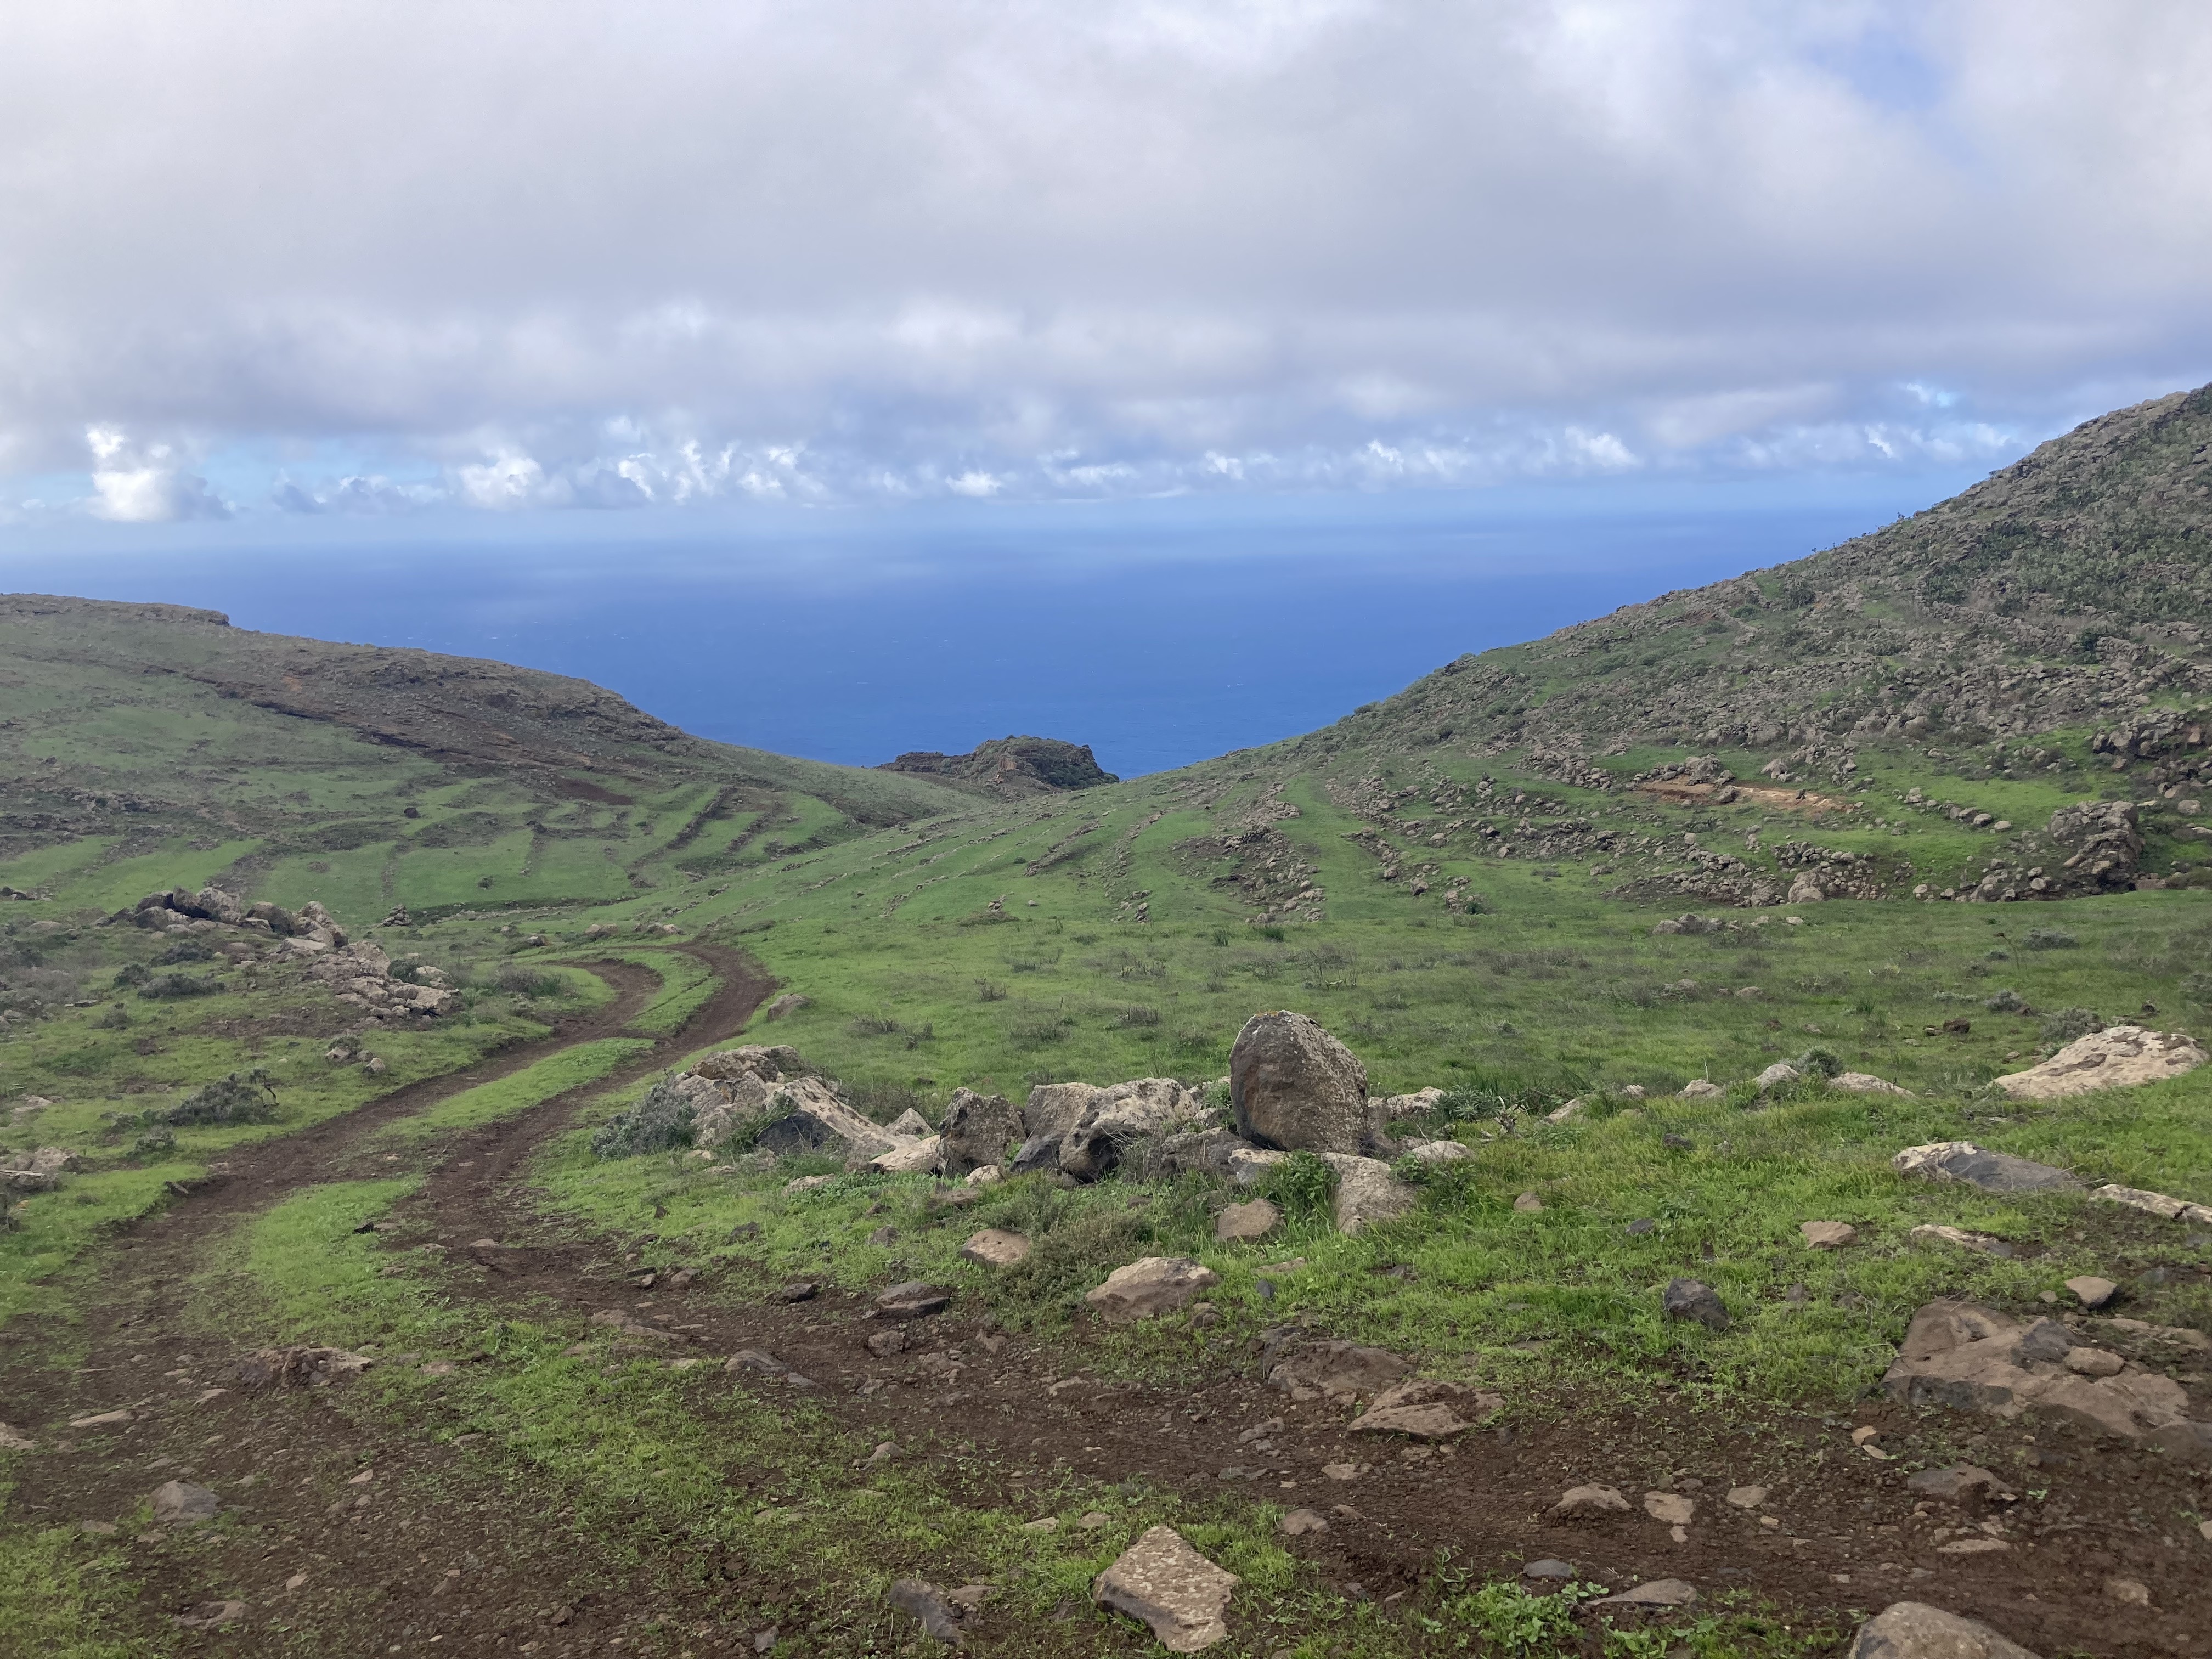
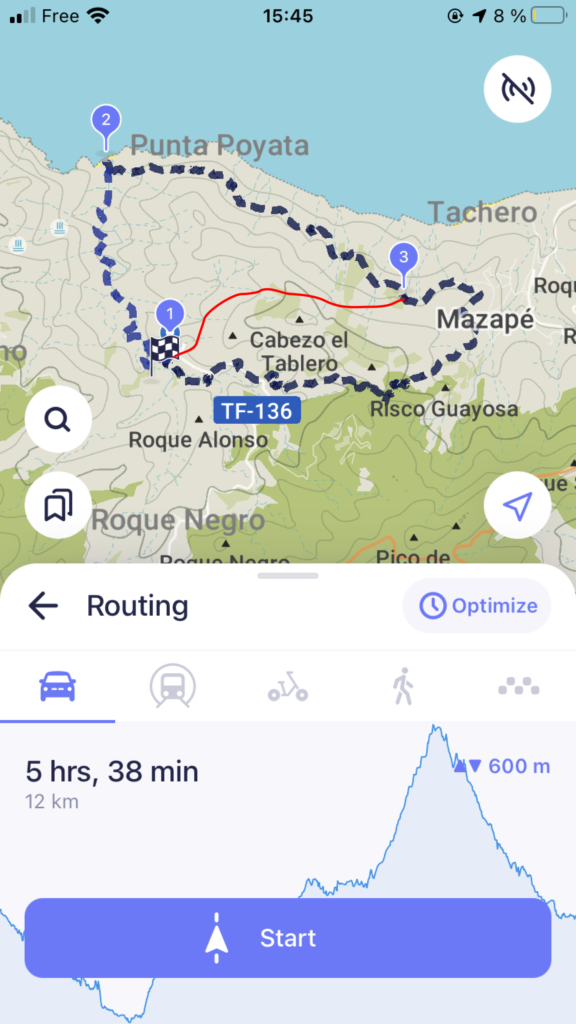
#5 Teno – Punta de Teno
Full details in our dedicated article: Hike from Teno to Punta de Teno
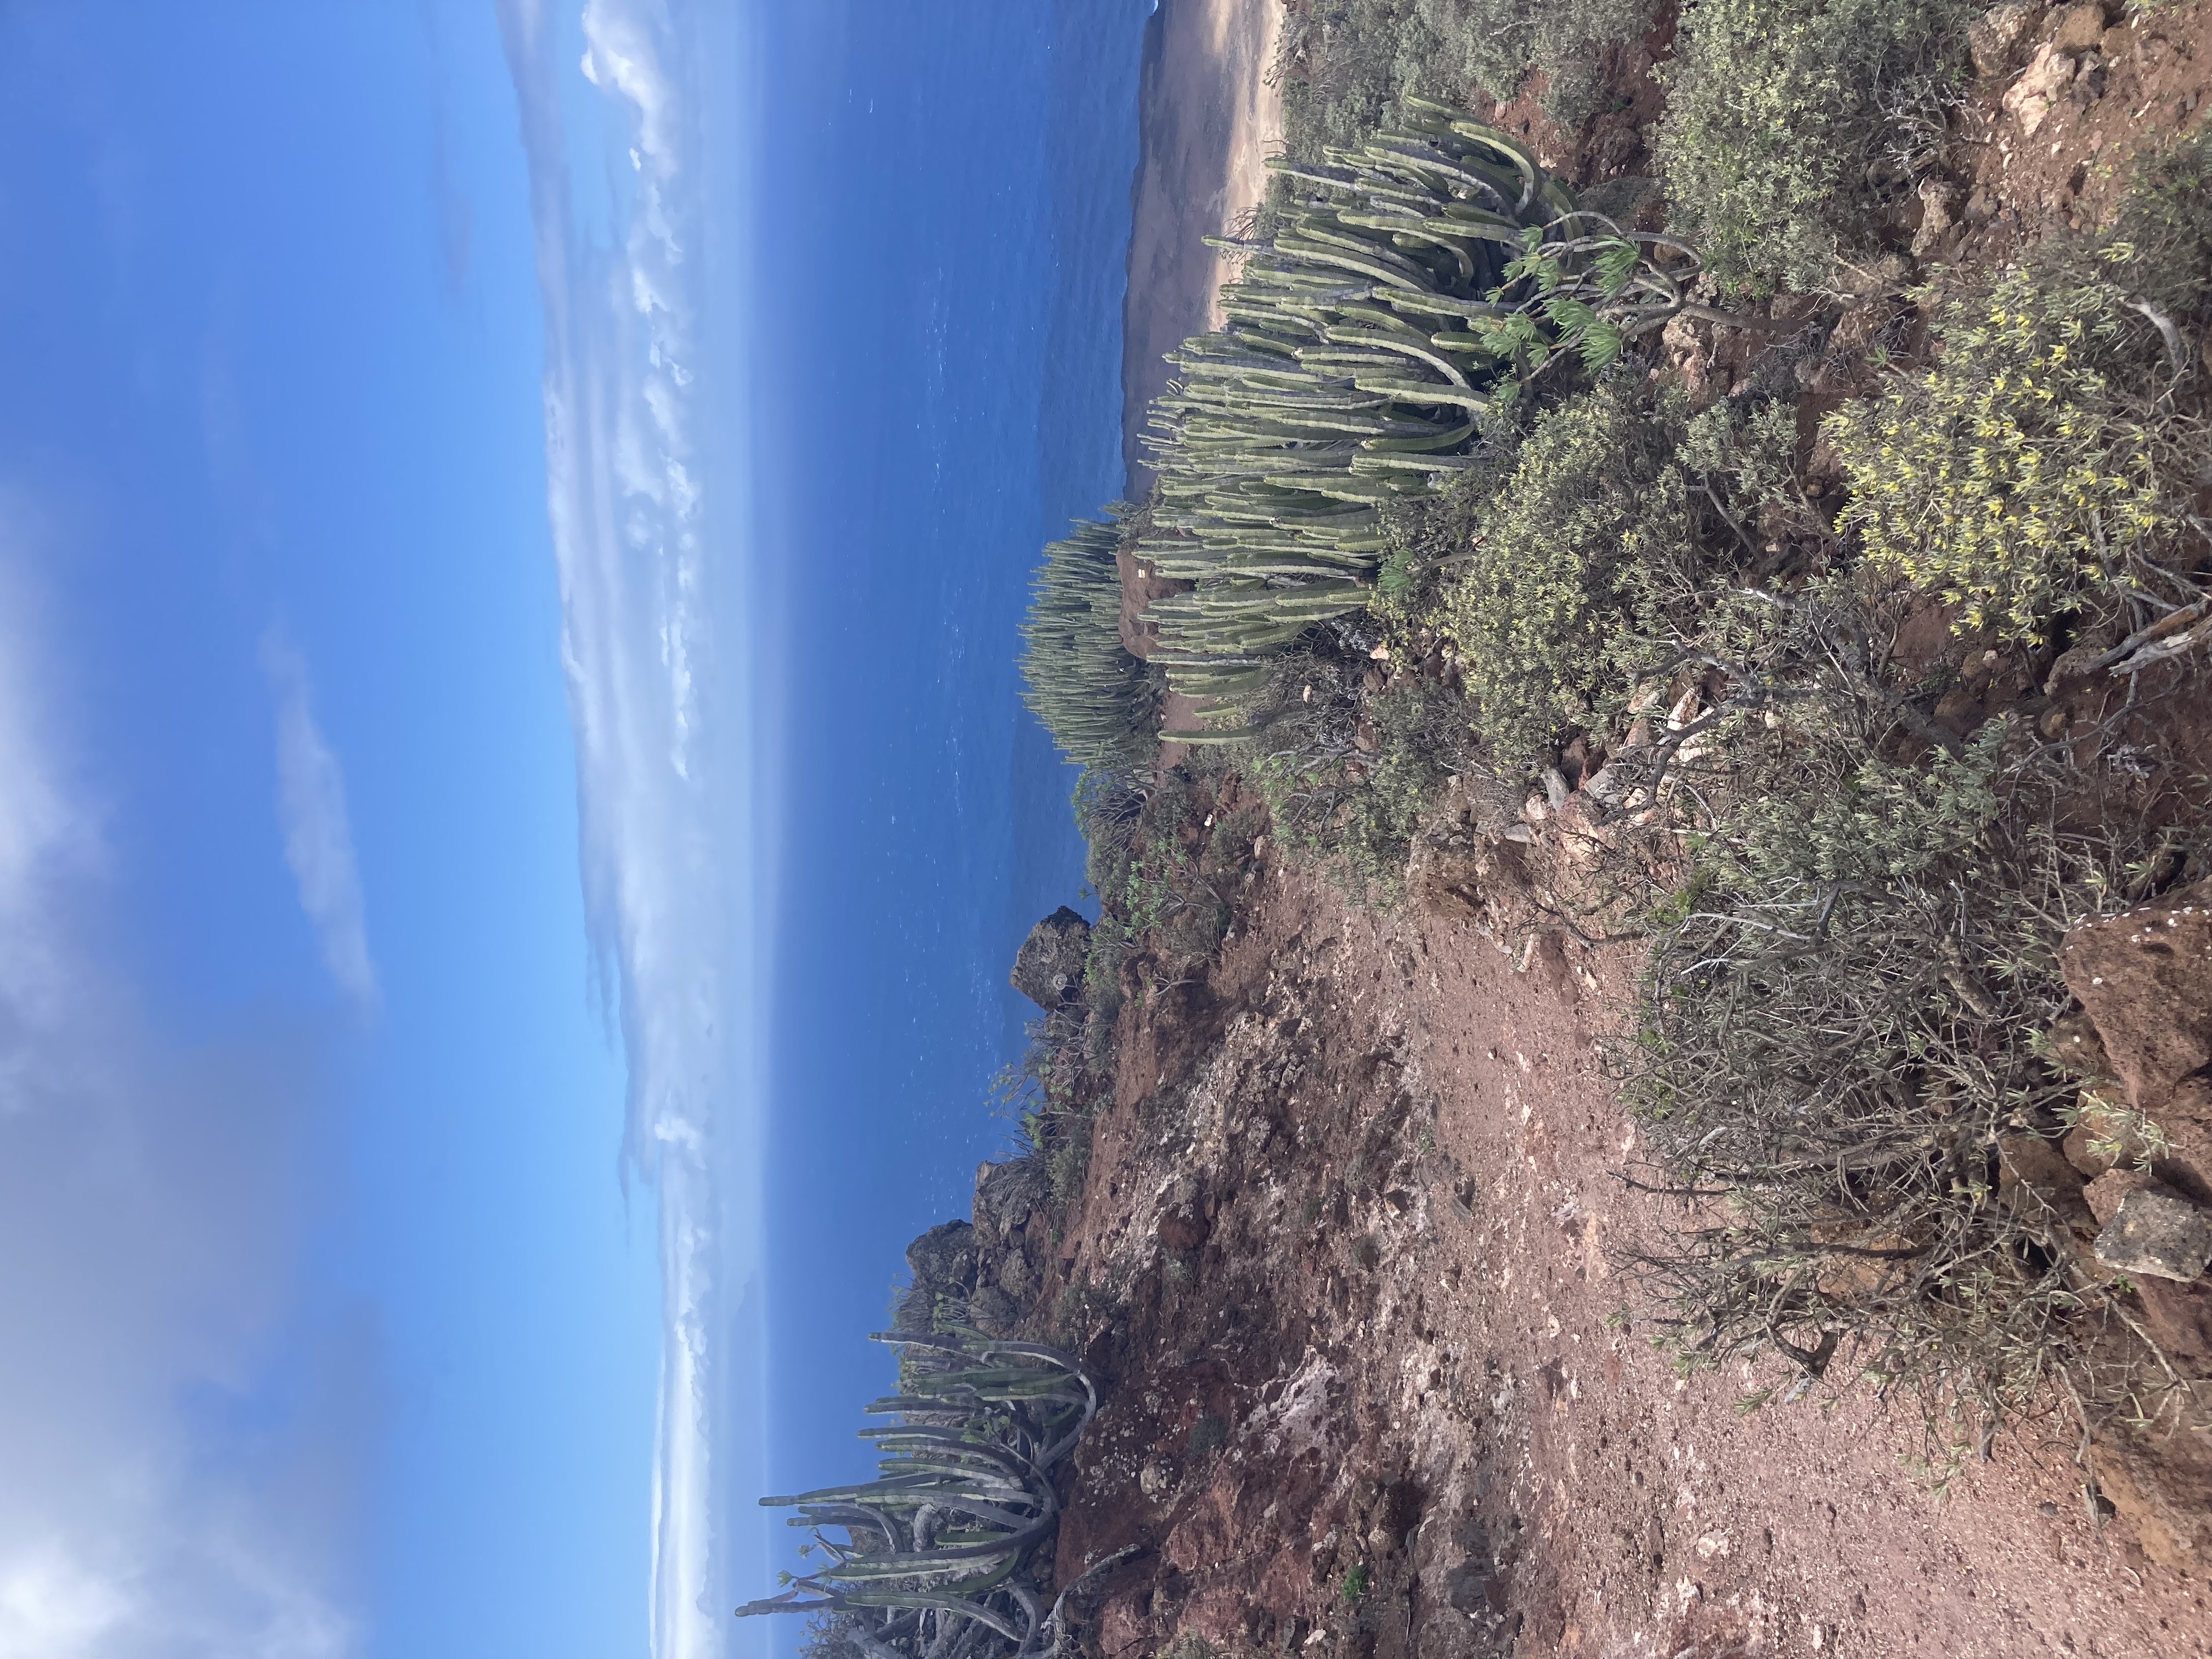
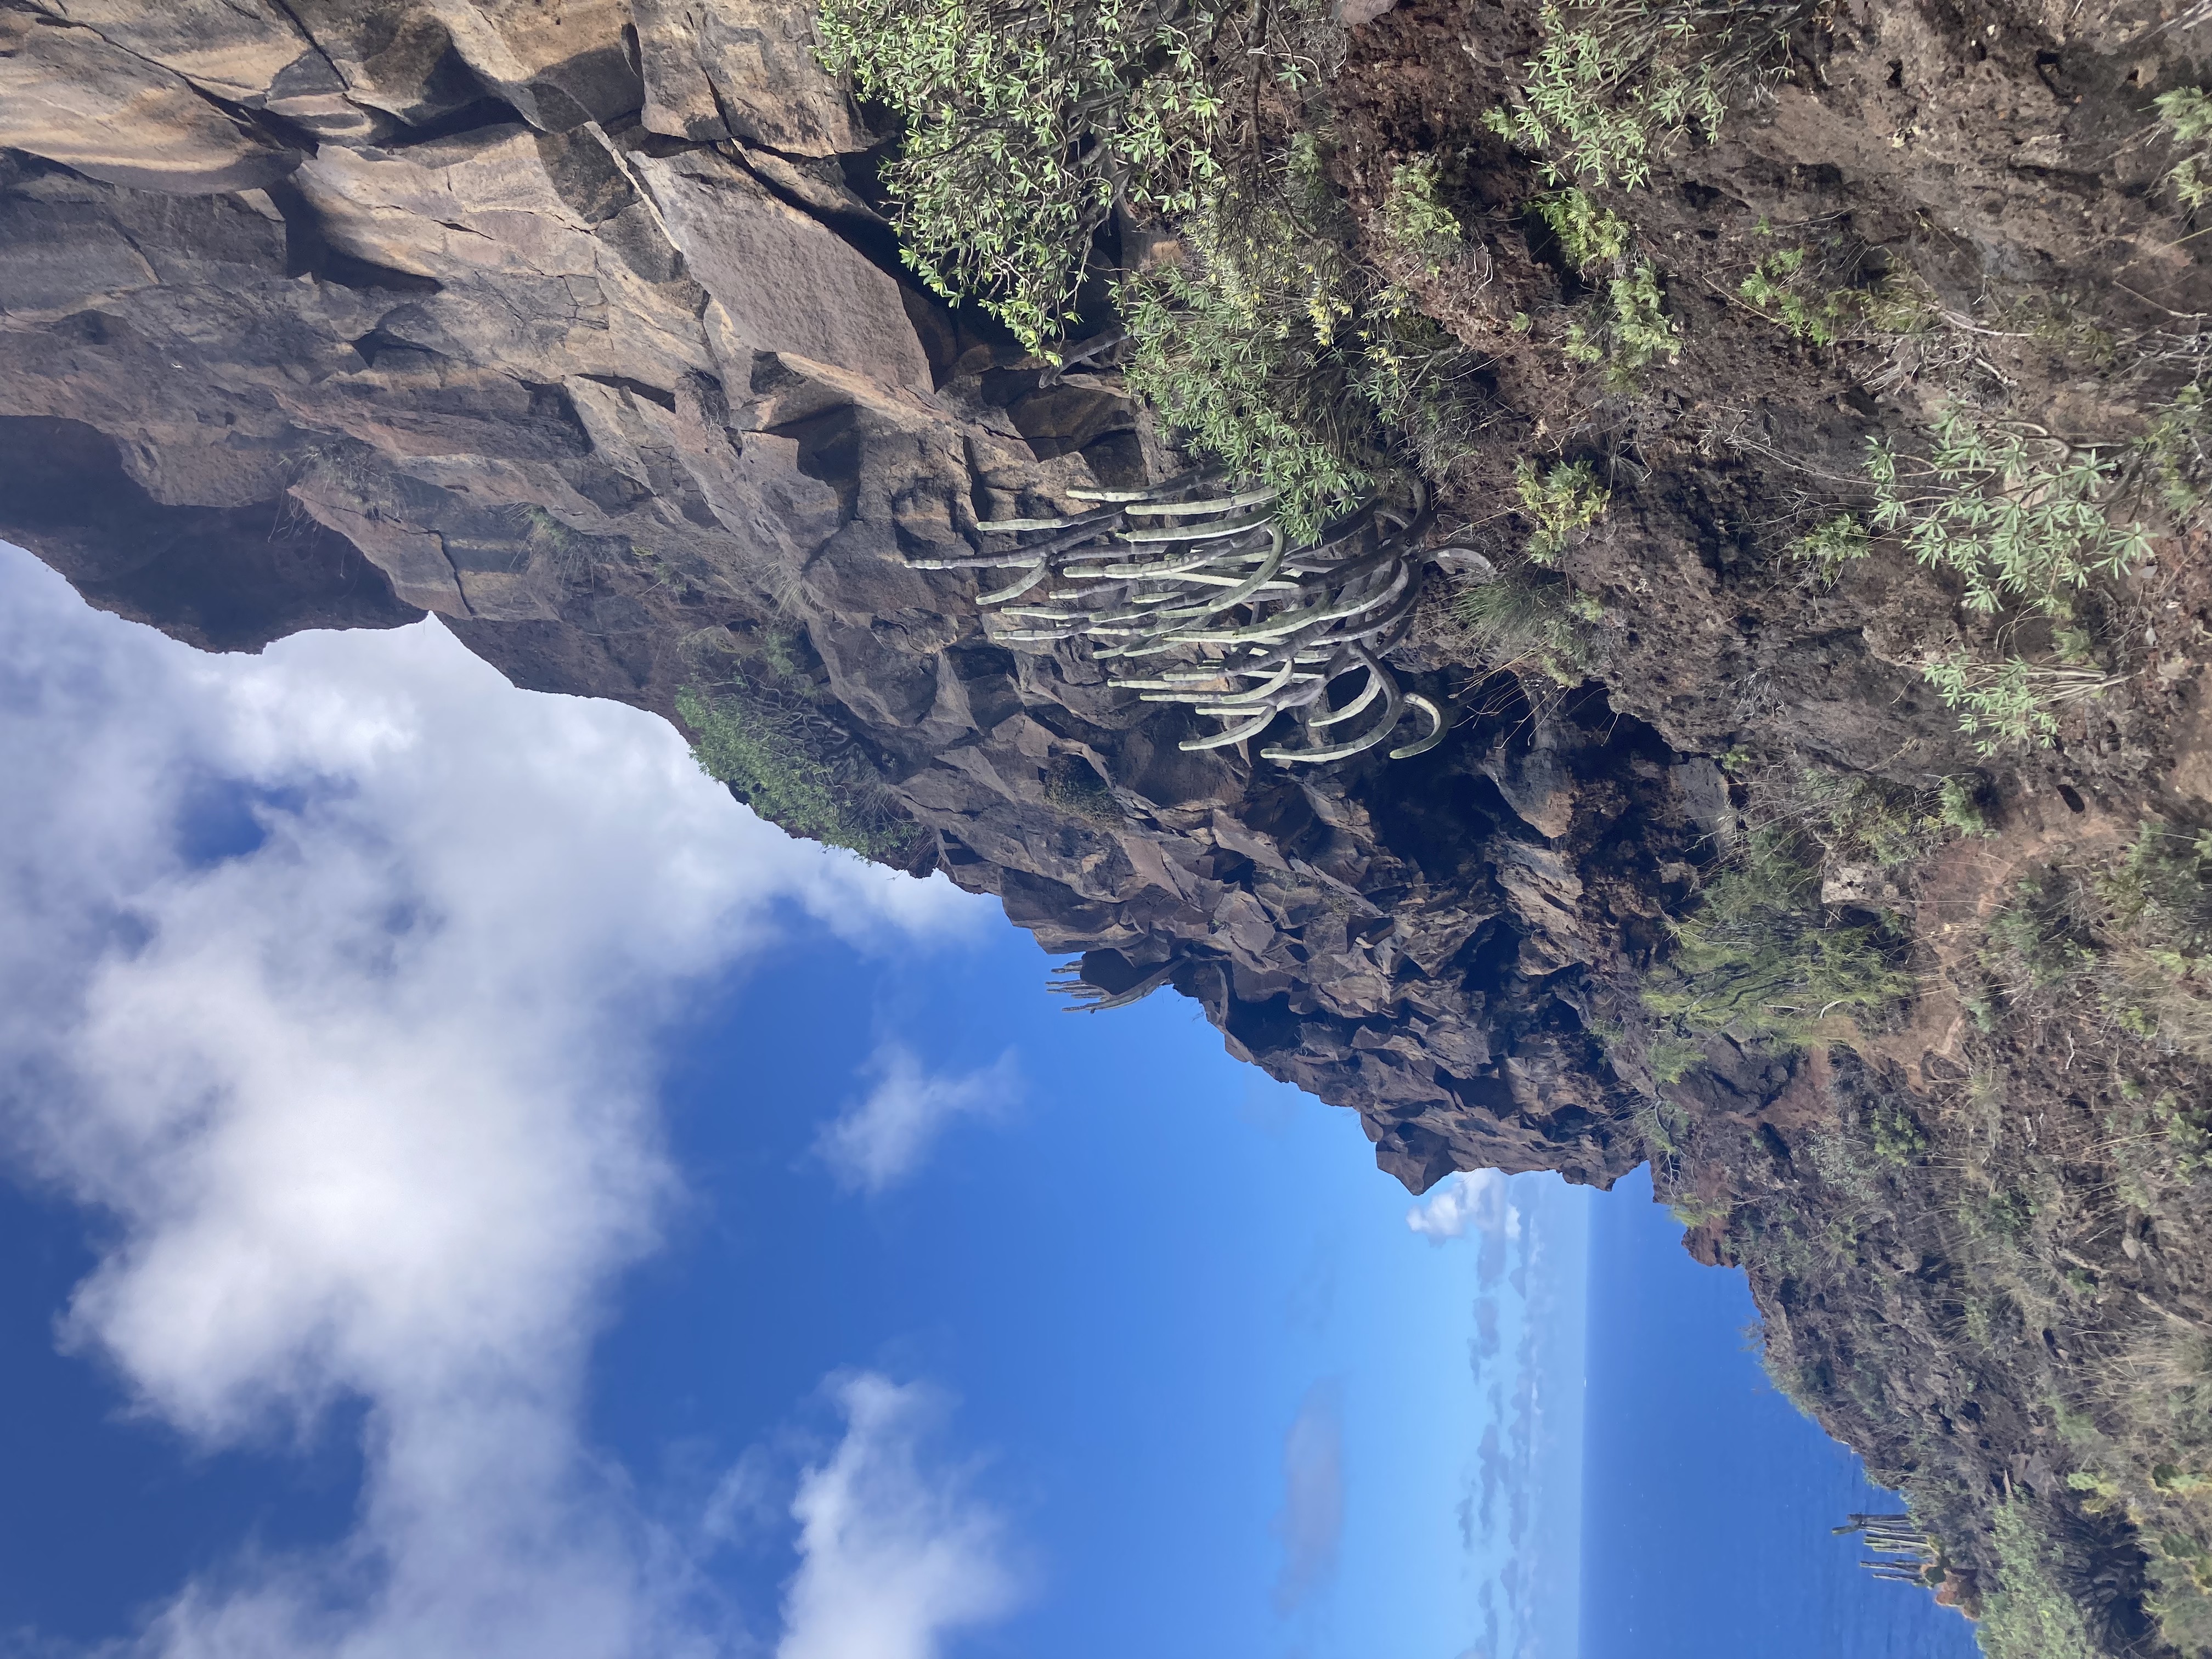
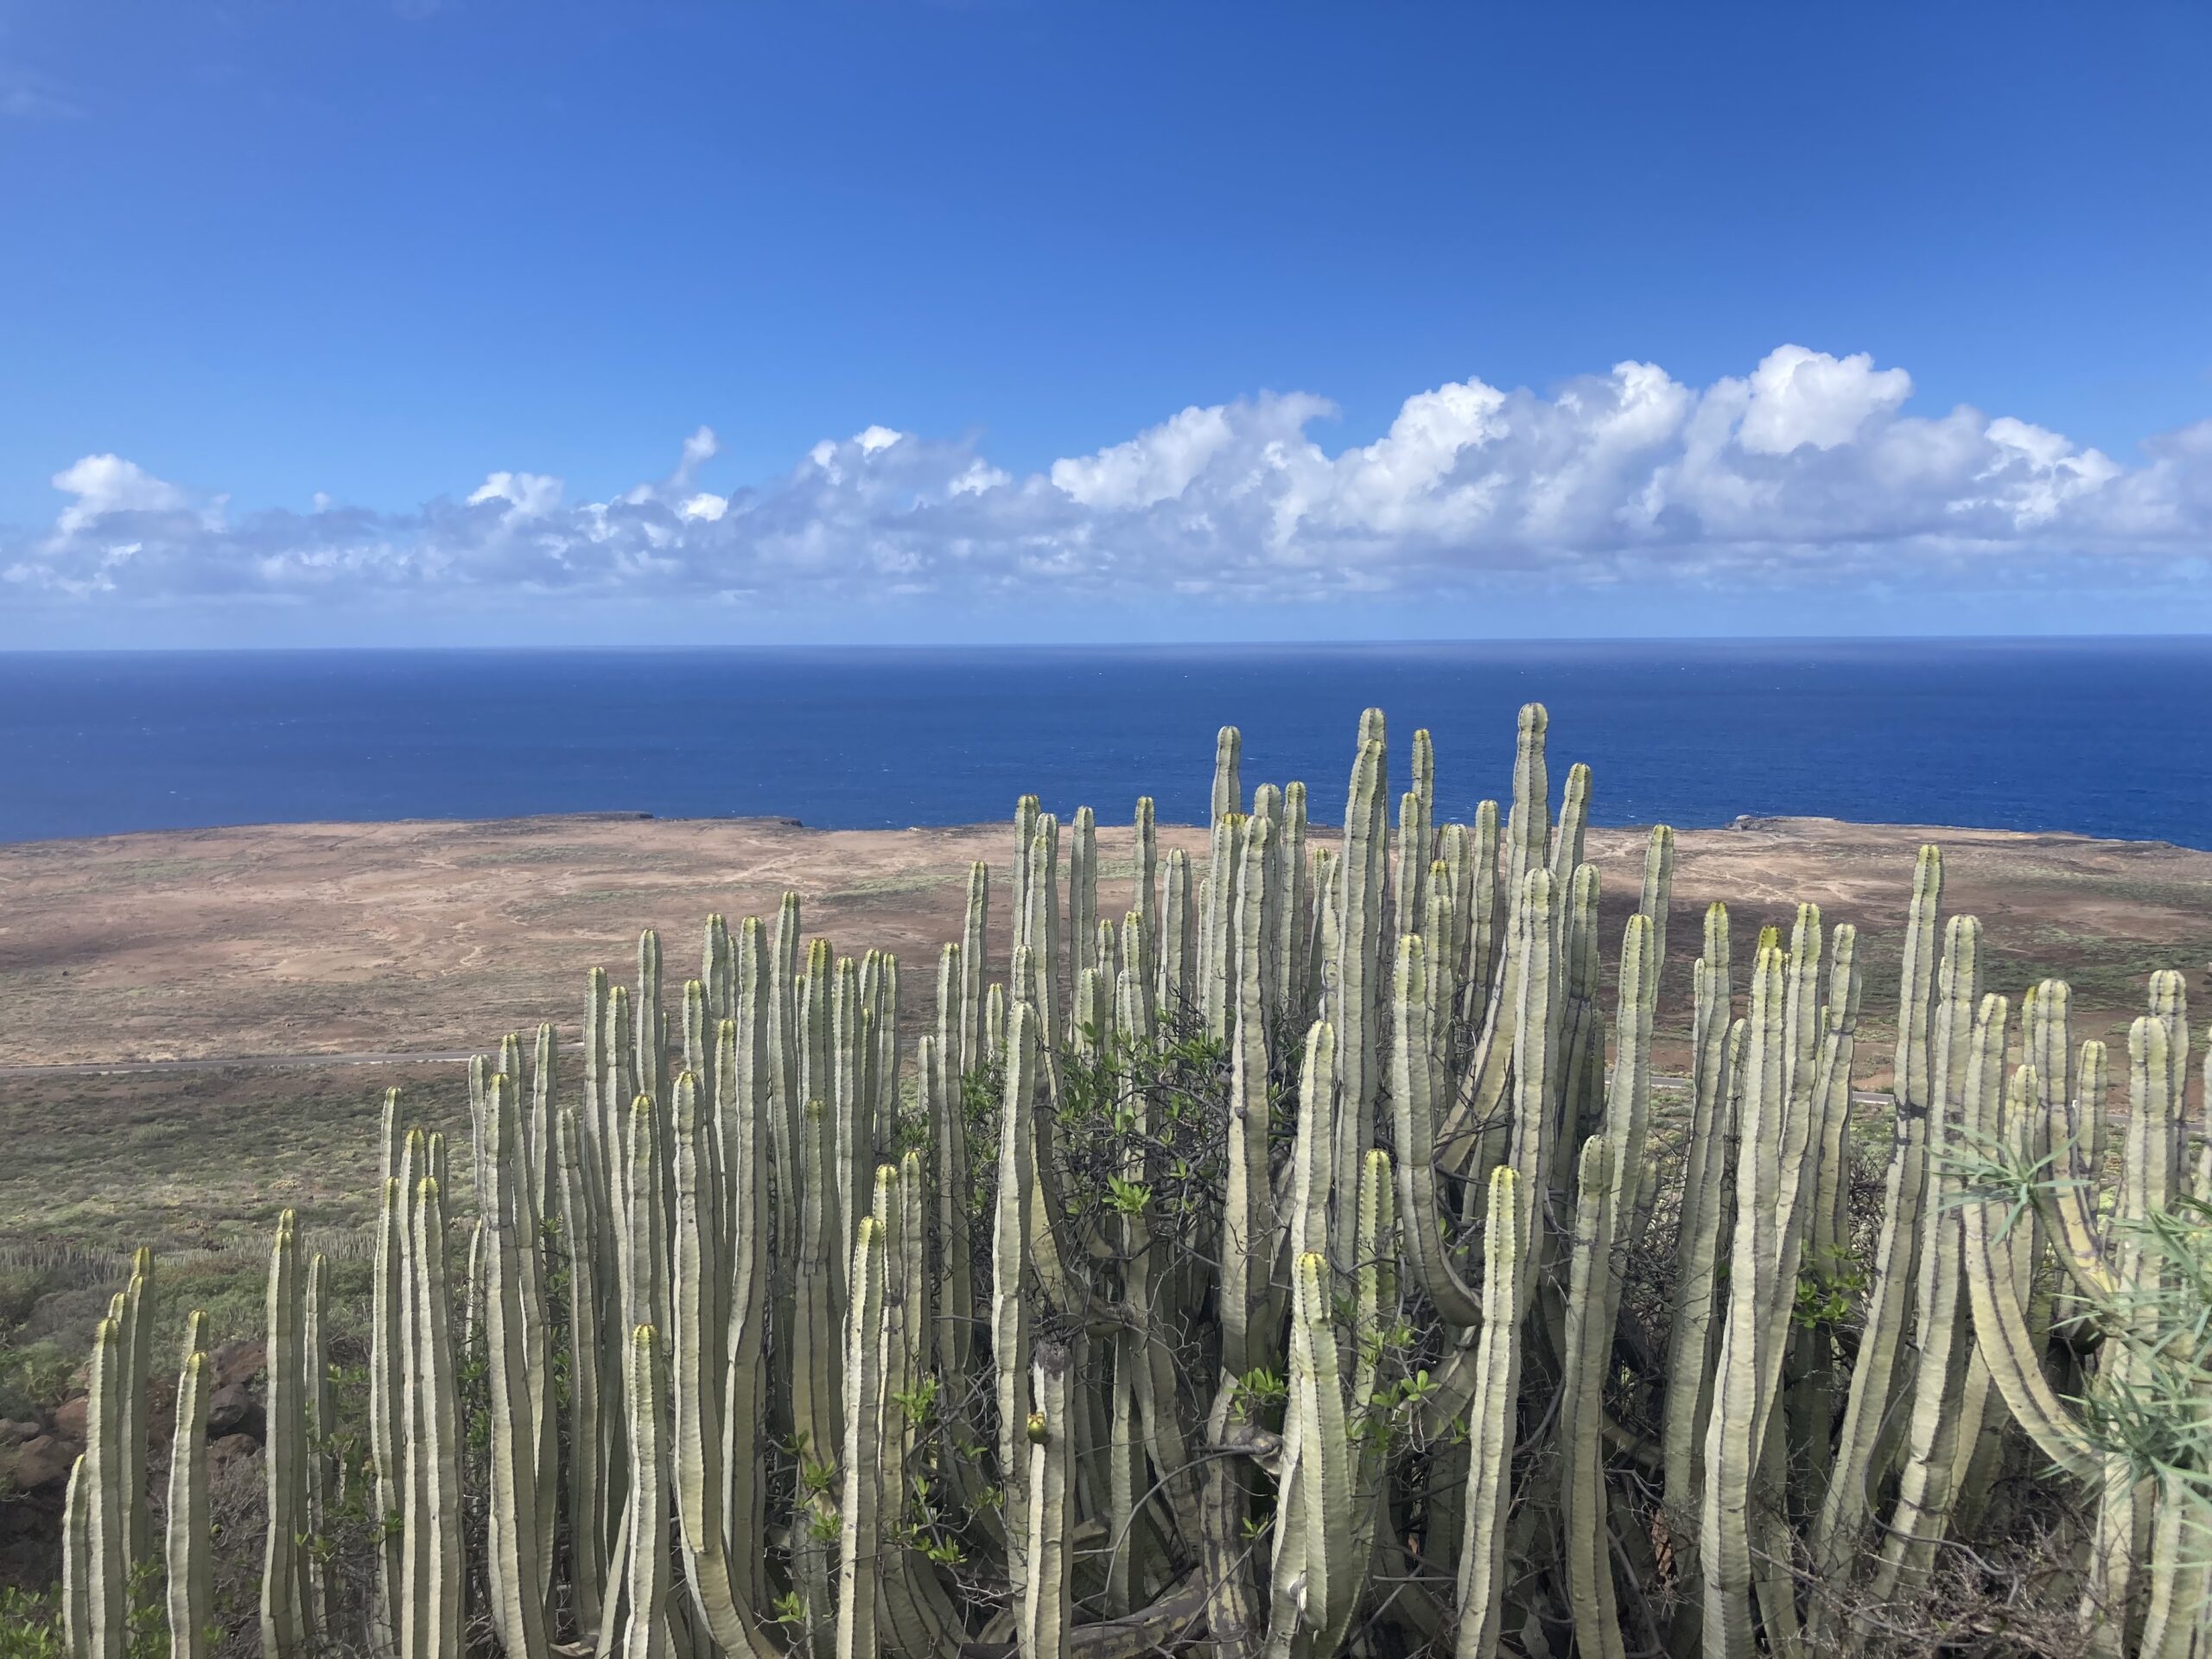
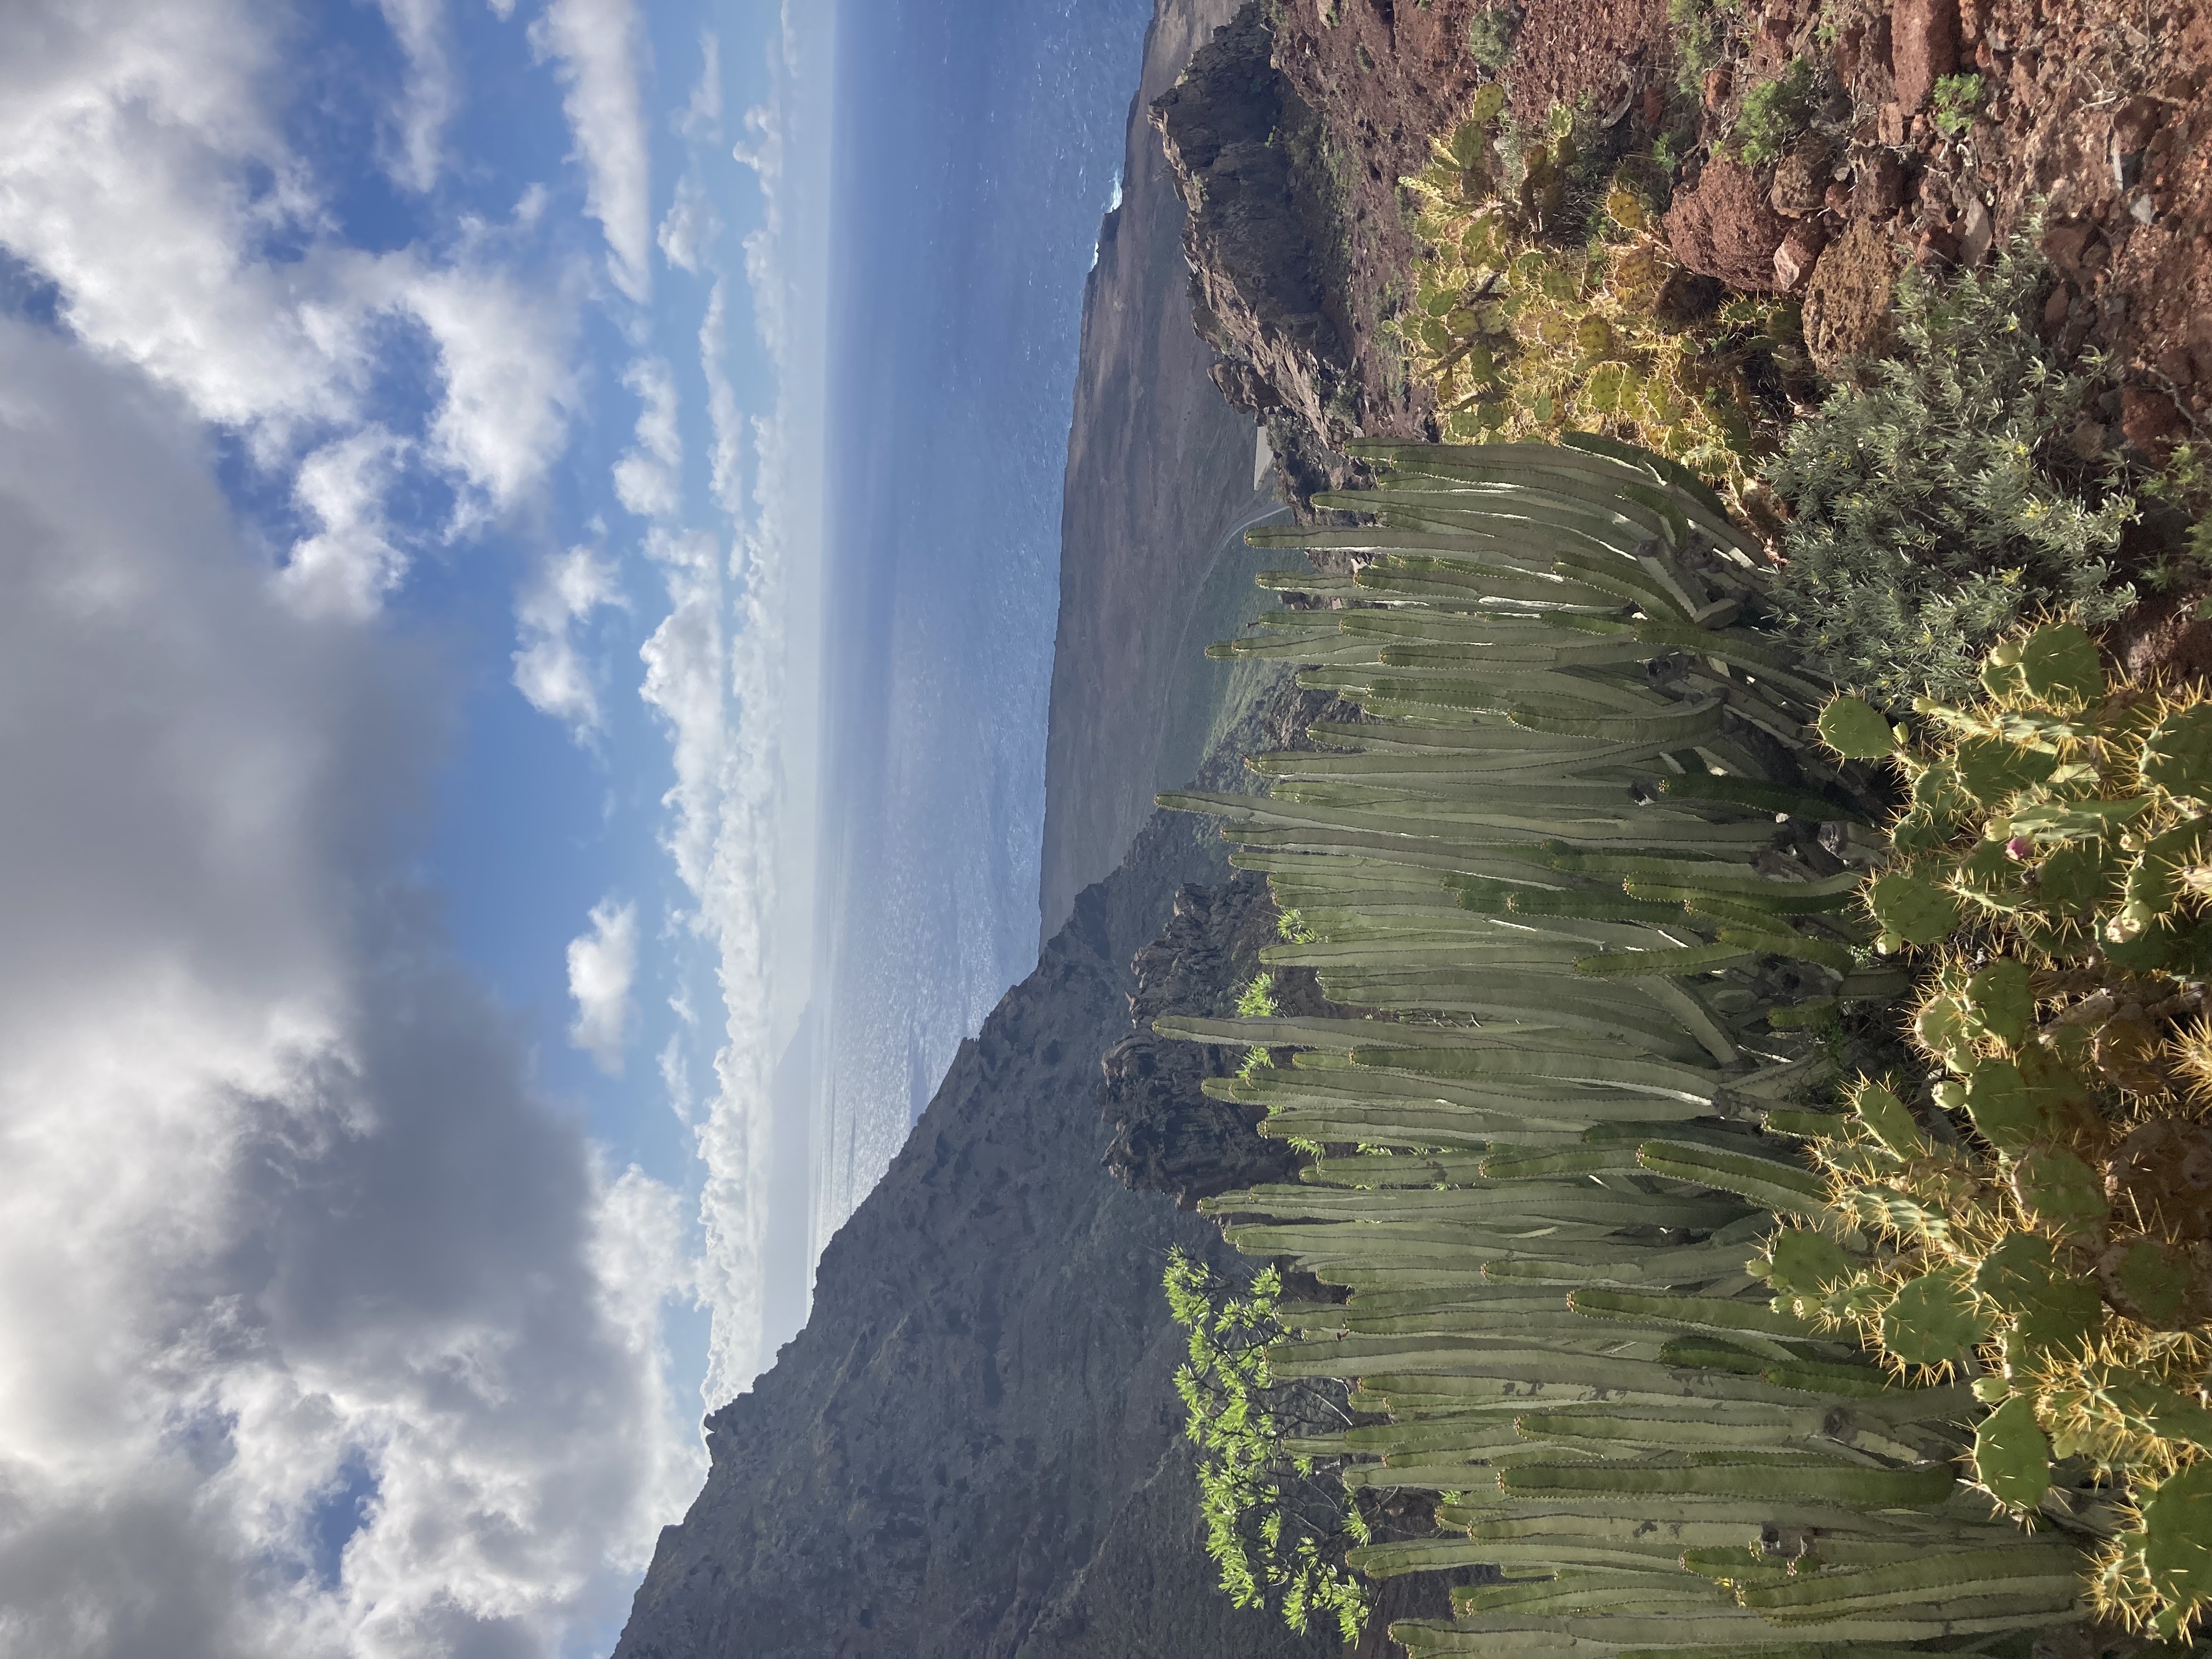
Welcome to the Wild West of Tenerife.
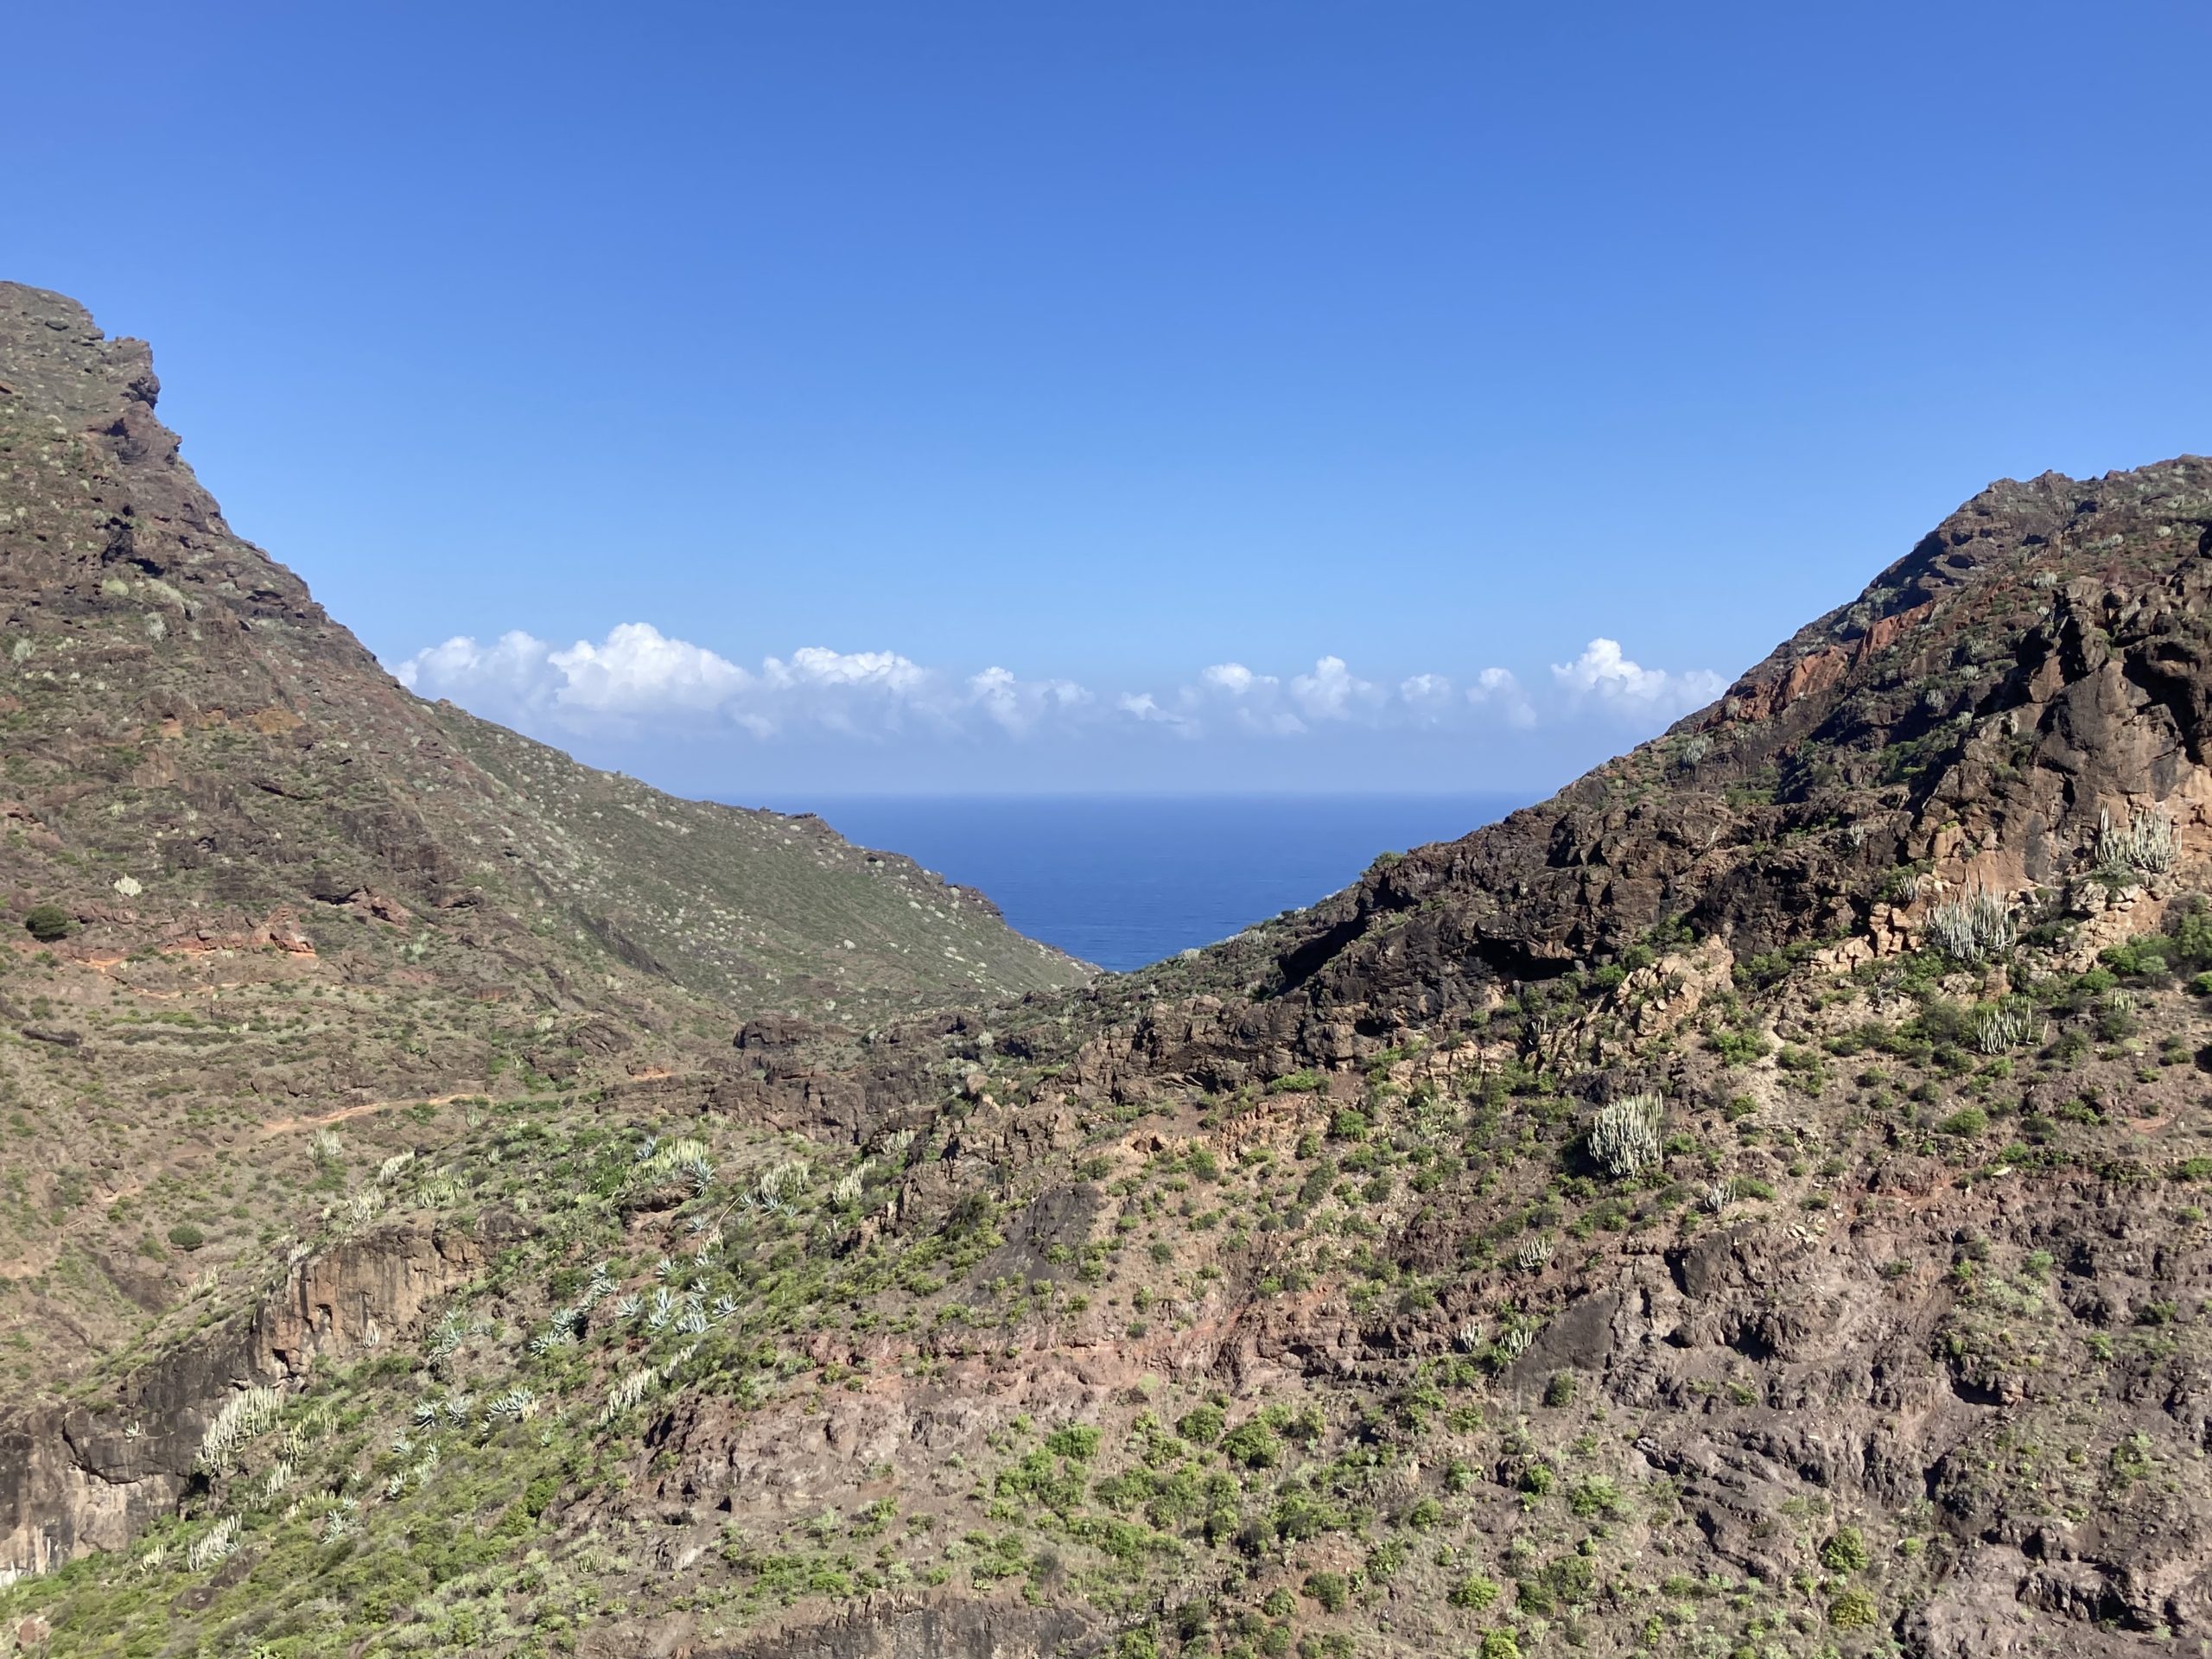
This hike is quite surprising. You begin in Teno, which has a lush, humid climate, and descend progressively to the western tip of Tenerife, which is dry, arid, and filled with cacti and red rock landscapes.
Duration: 5 hours
Loop: Yes
Difficulty: 3/5
Distance: 13 km
Step 1: Starting in Teno Parking is fairly easy in Teno (also called Teno Alto). We parked on Cam. Los Bailaderos.
Step 2: Descent Toward Punta de Teno At the crossroads in Teno, follow the signs toward Punta Teno.
After about 10–15 minutes walking along the road, you’ll find the trailhead on your right.
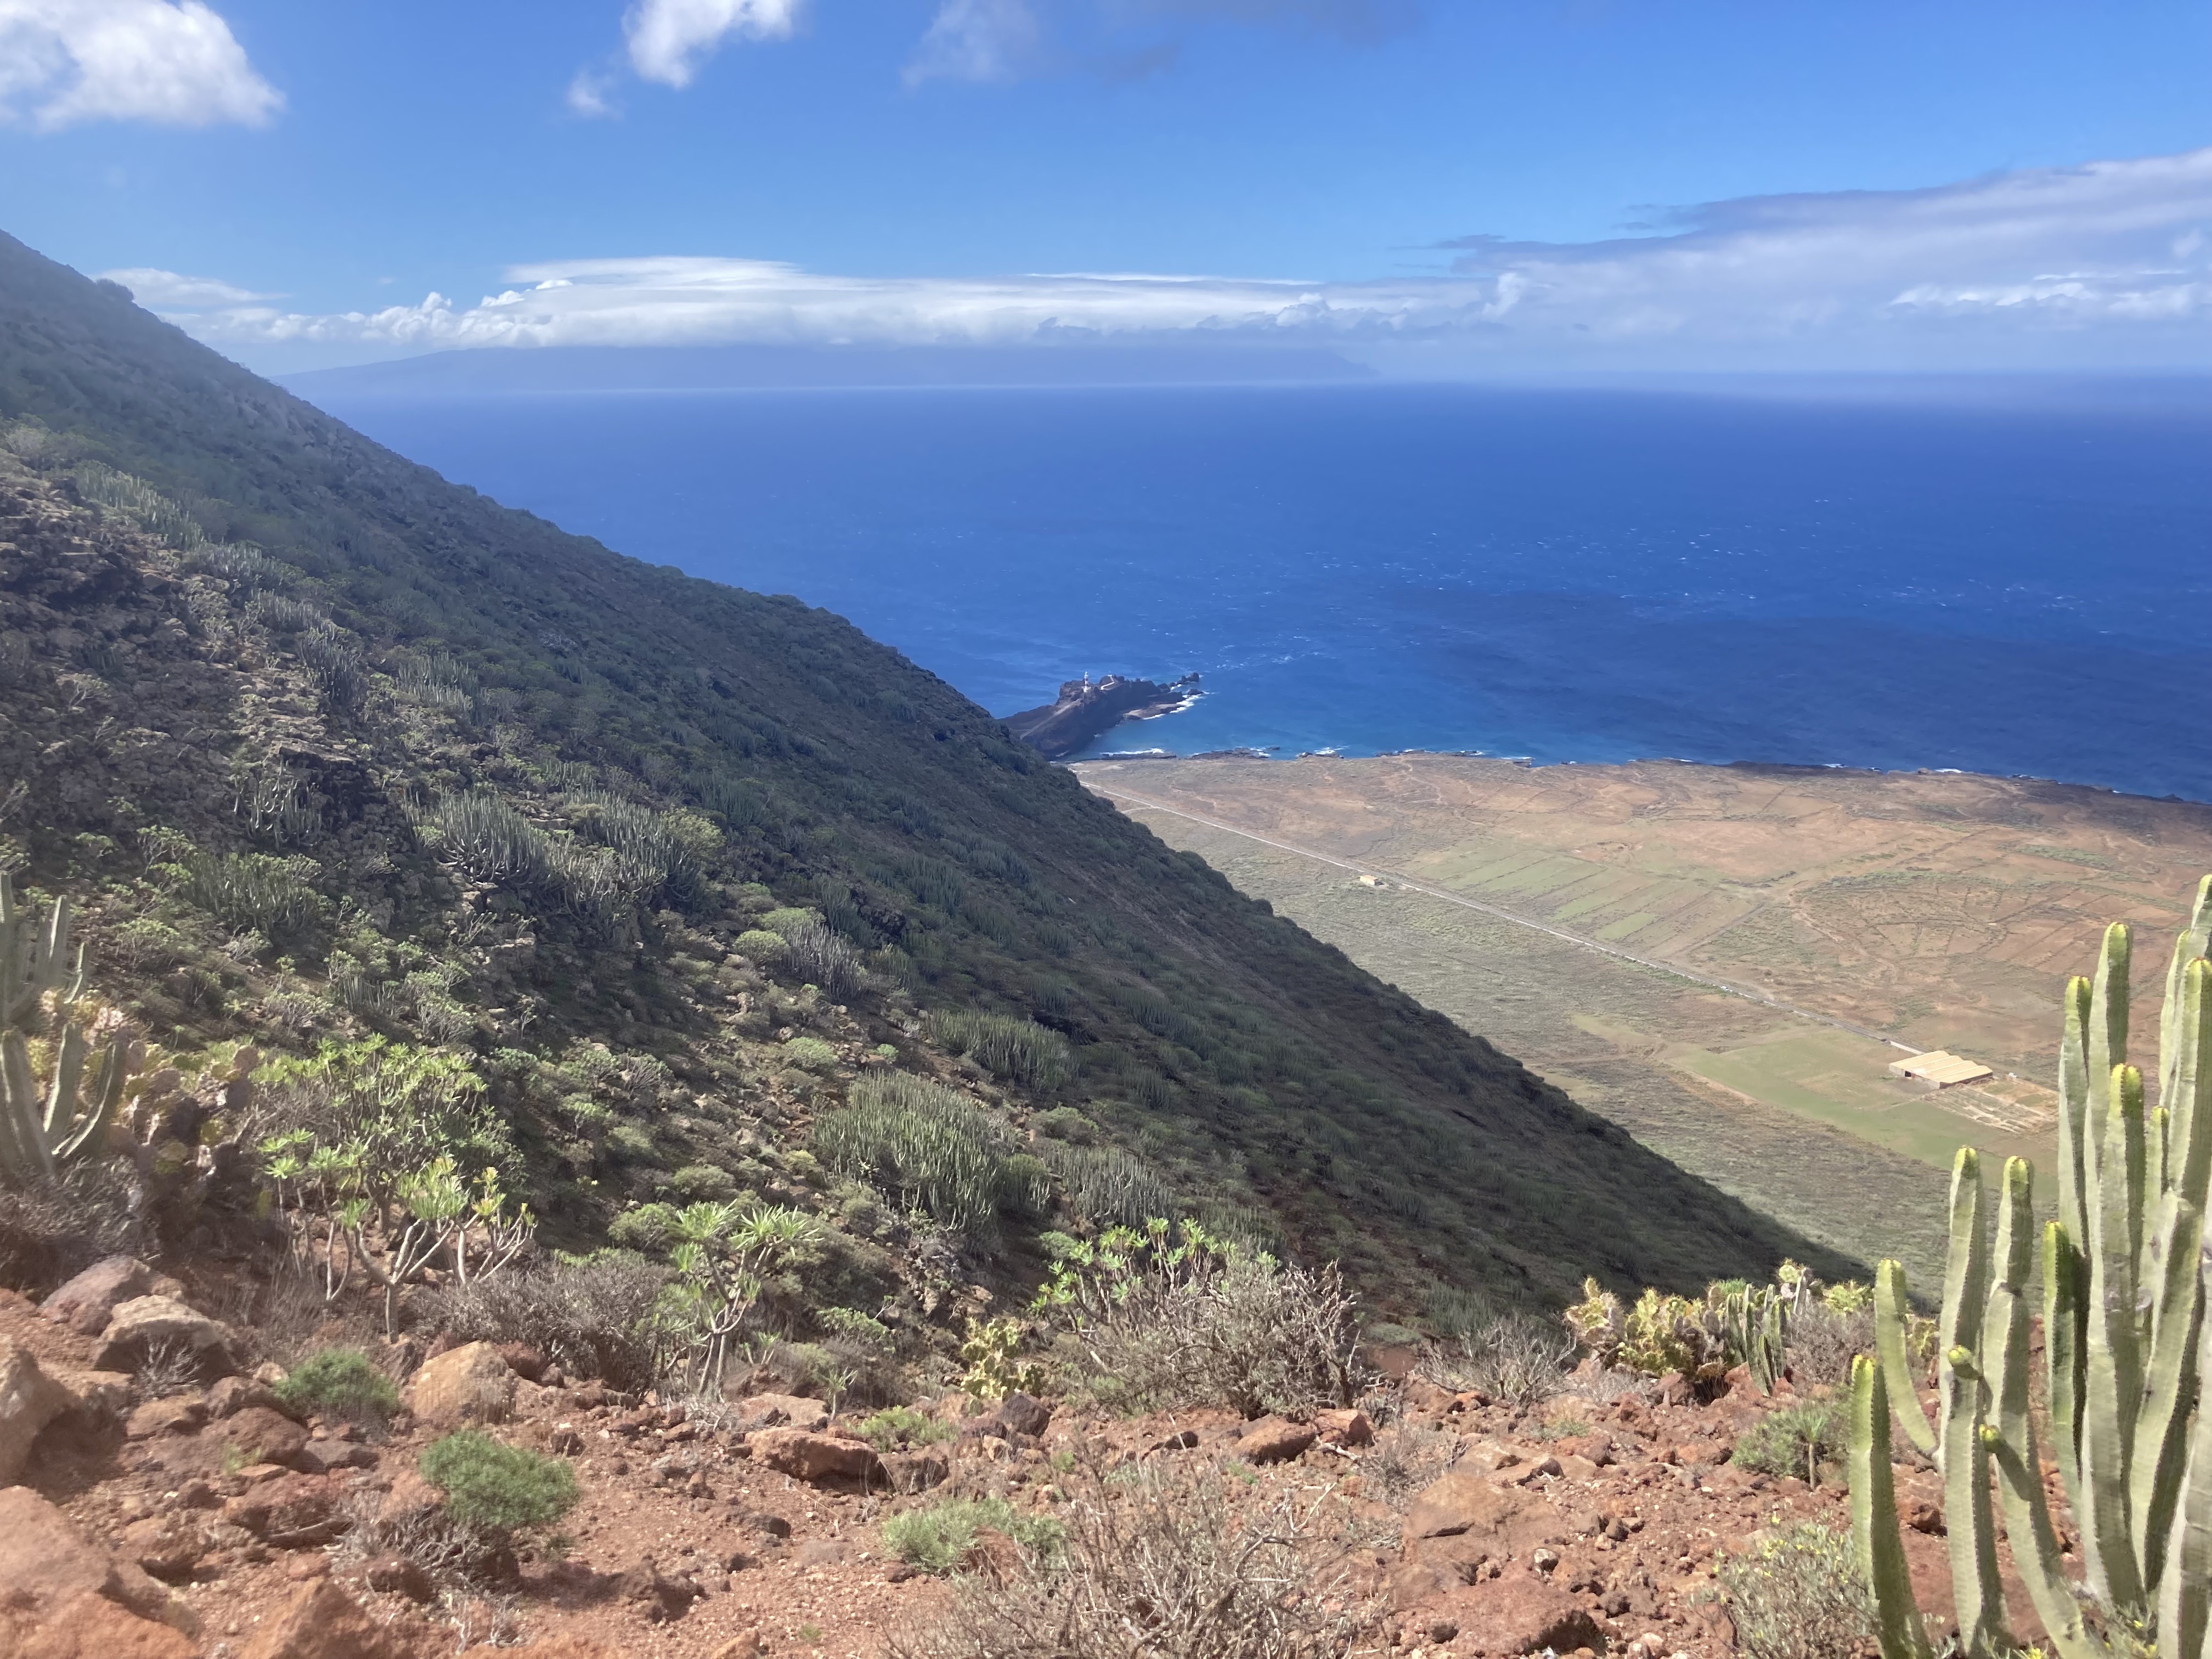
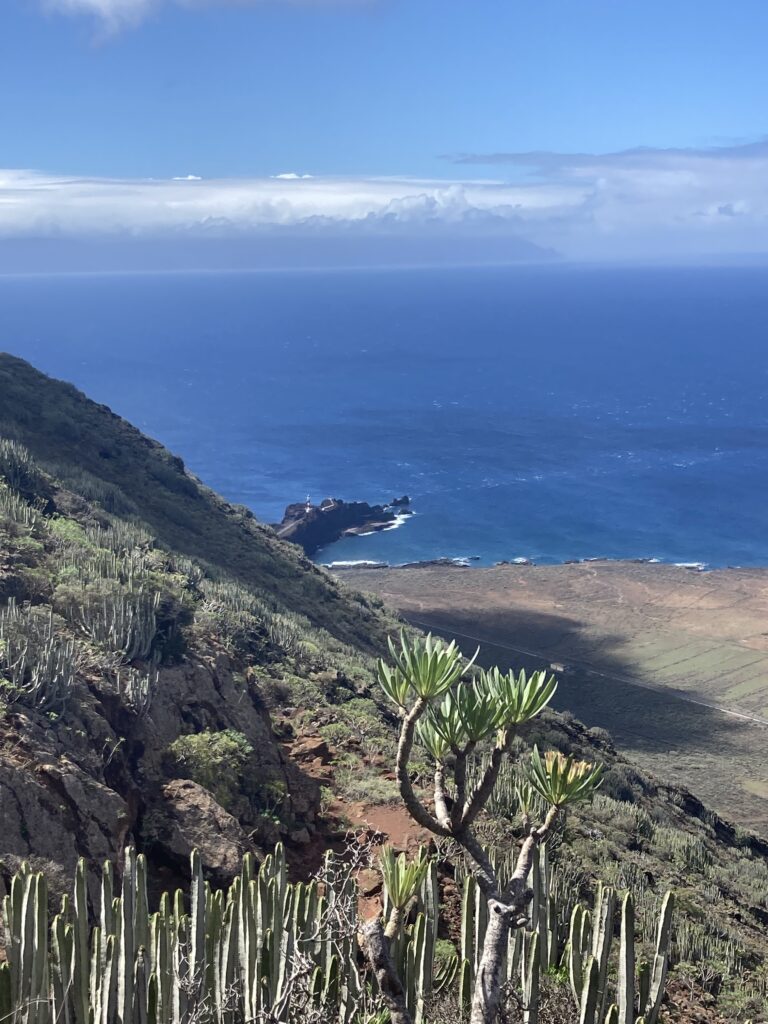
The descent continues for a while. You’ll pass through a small village and walk alongside a canyon on your left. Eventually, you’ll spot the wind turbines far below at sea level on your right.
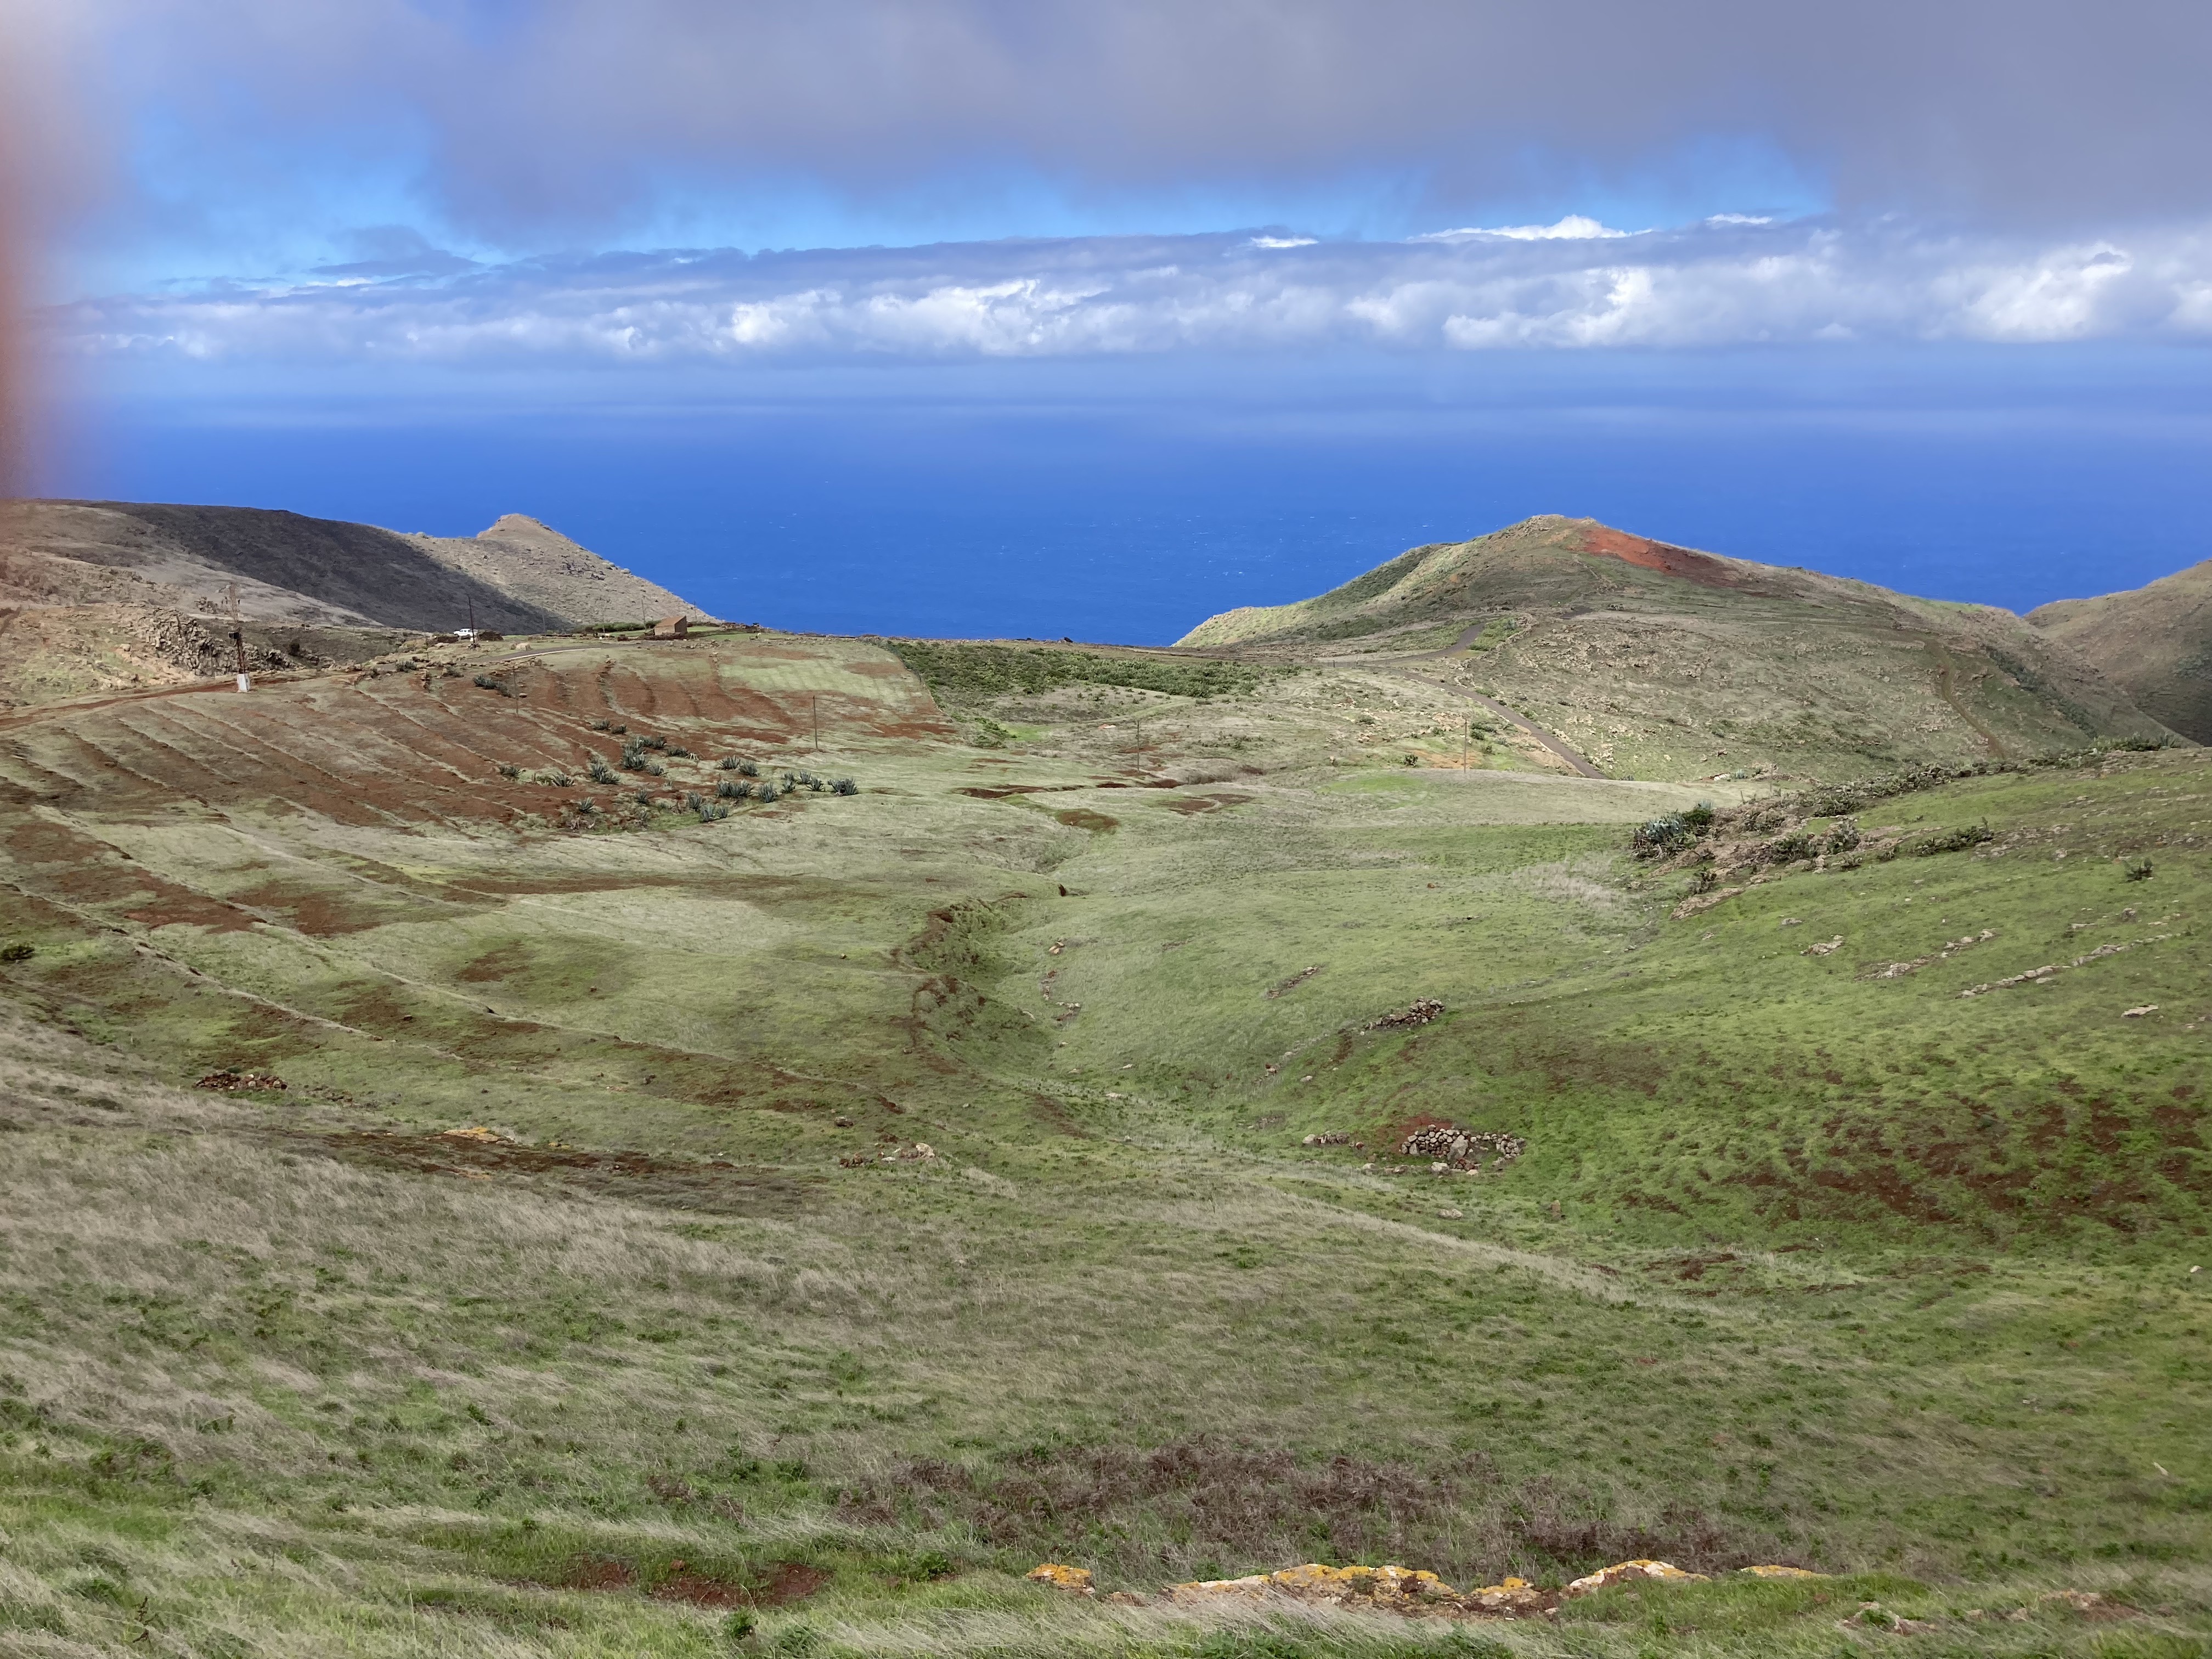
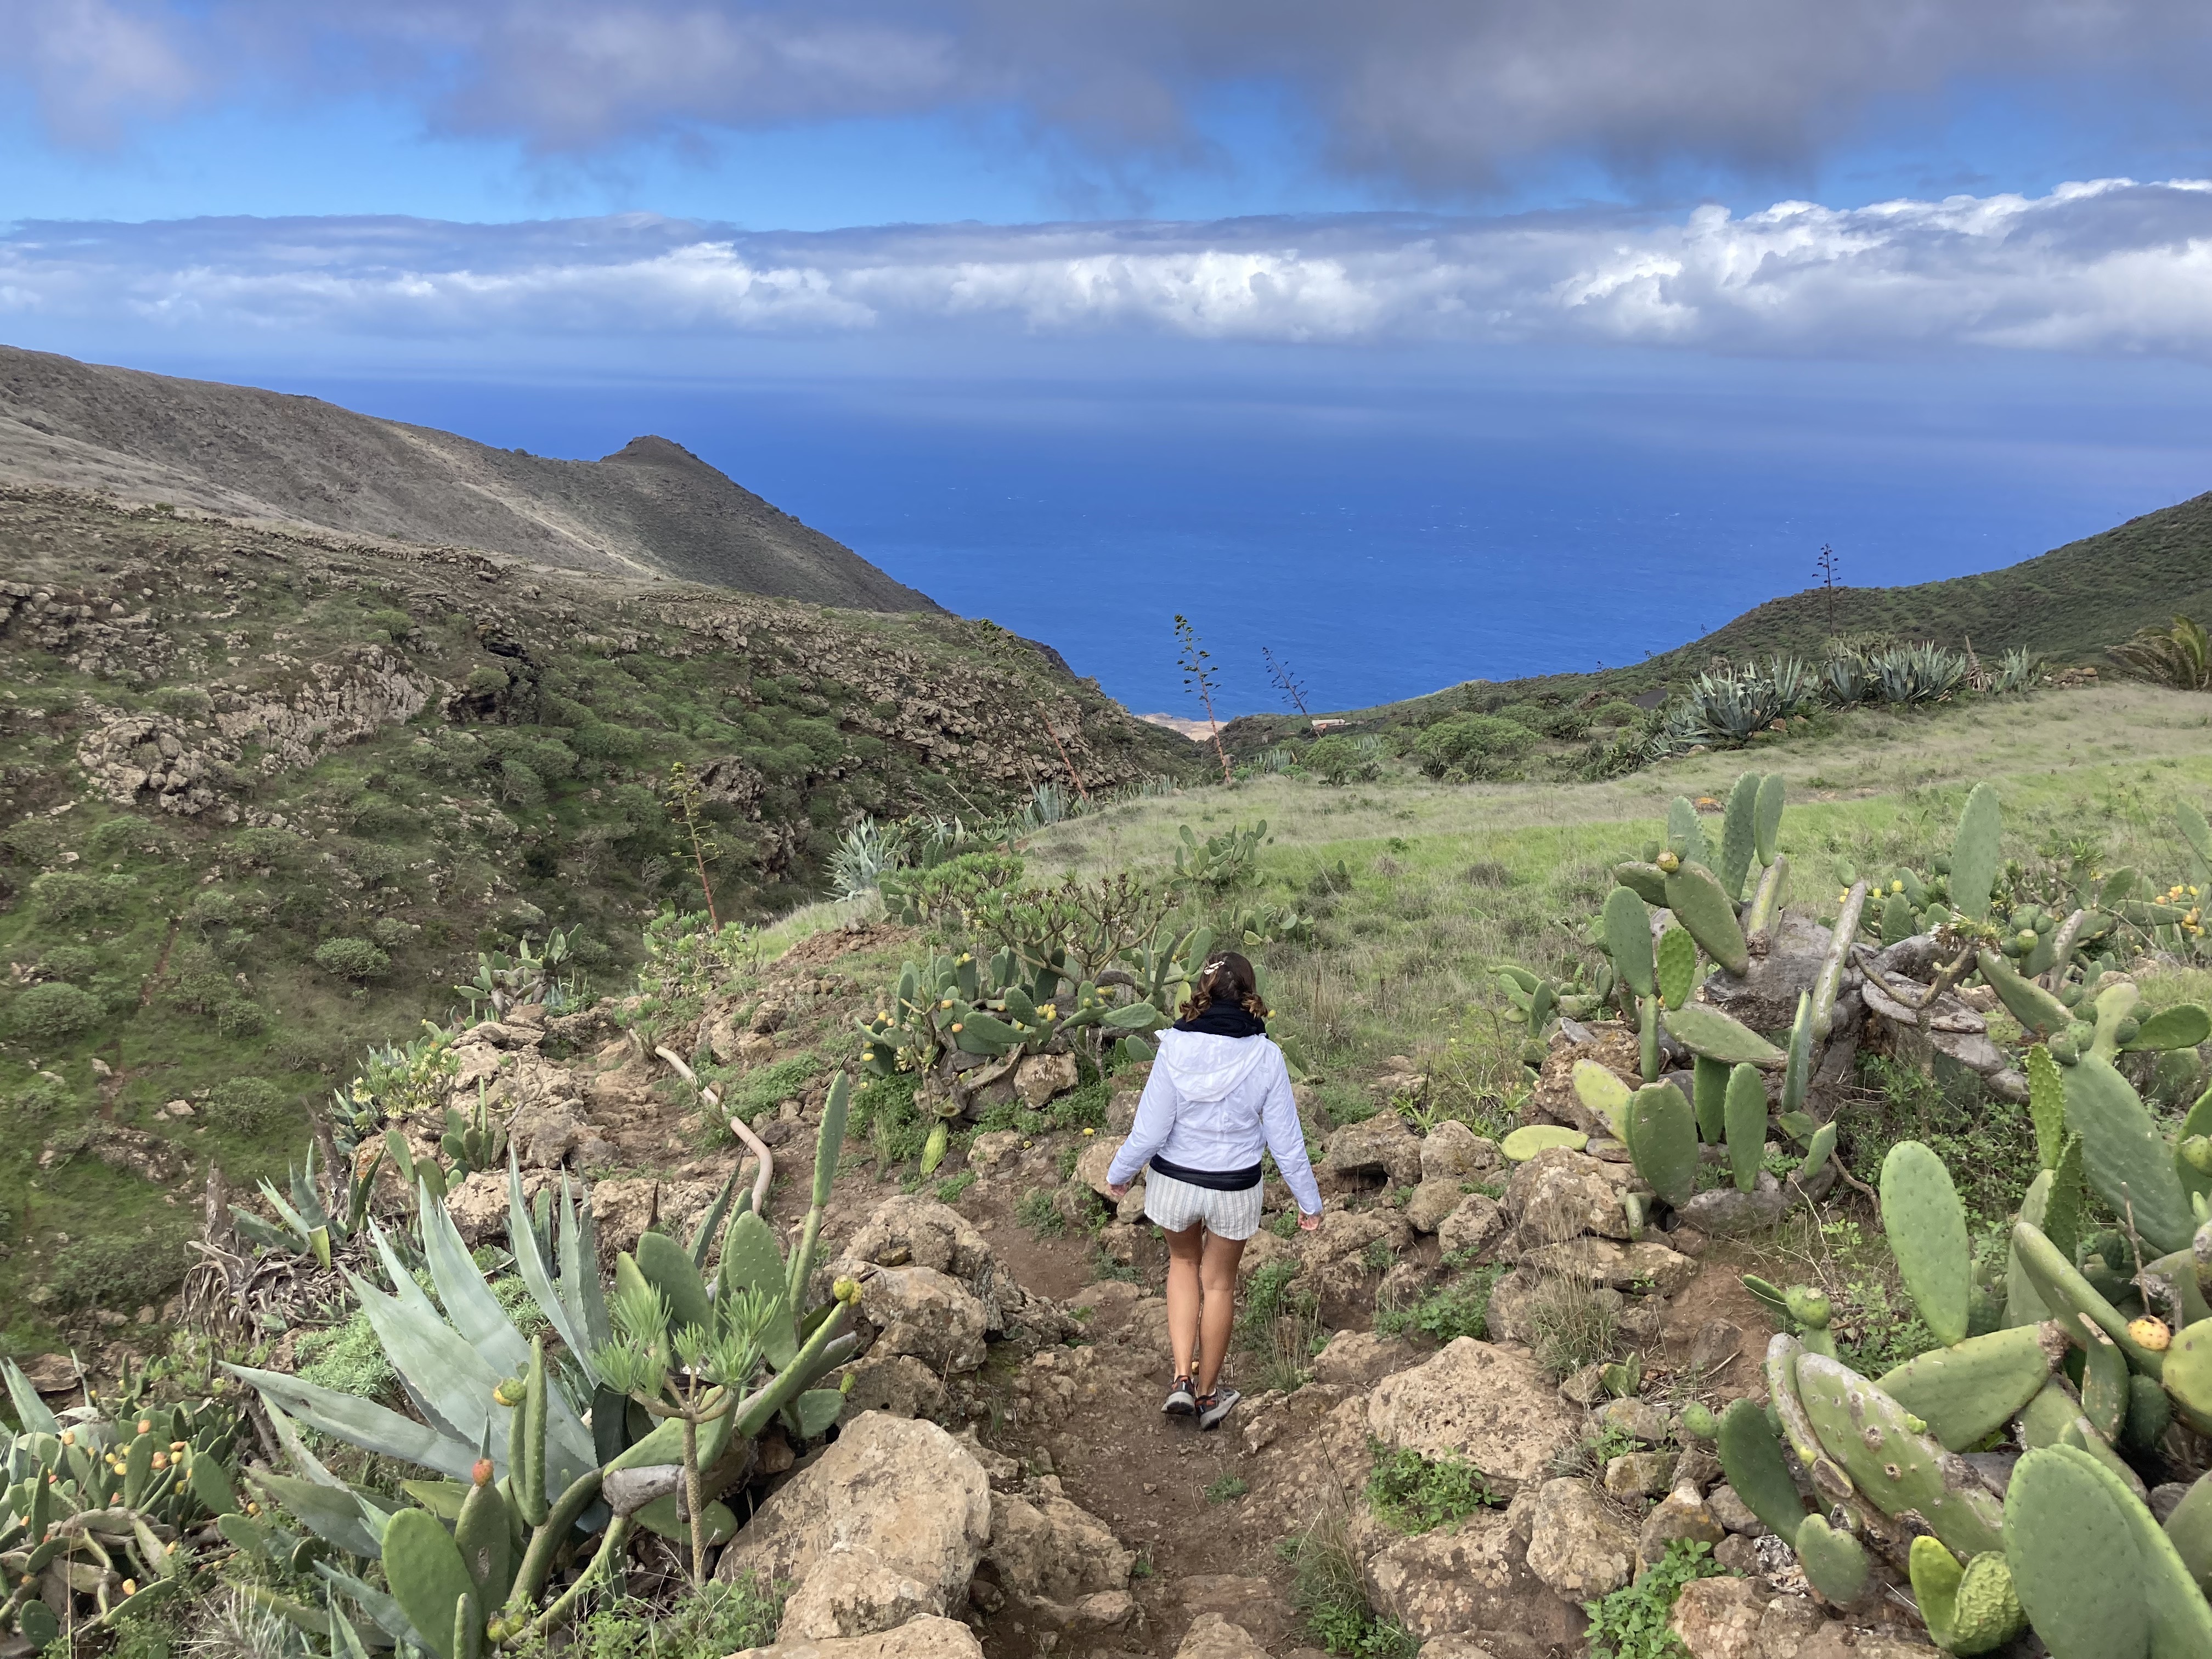
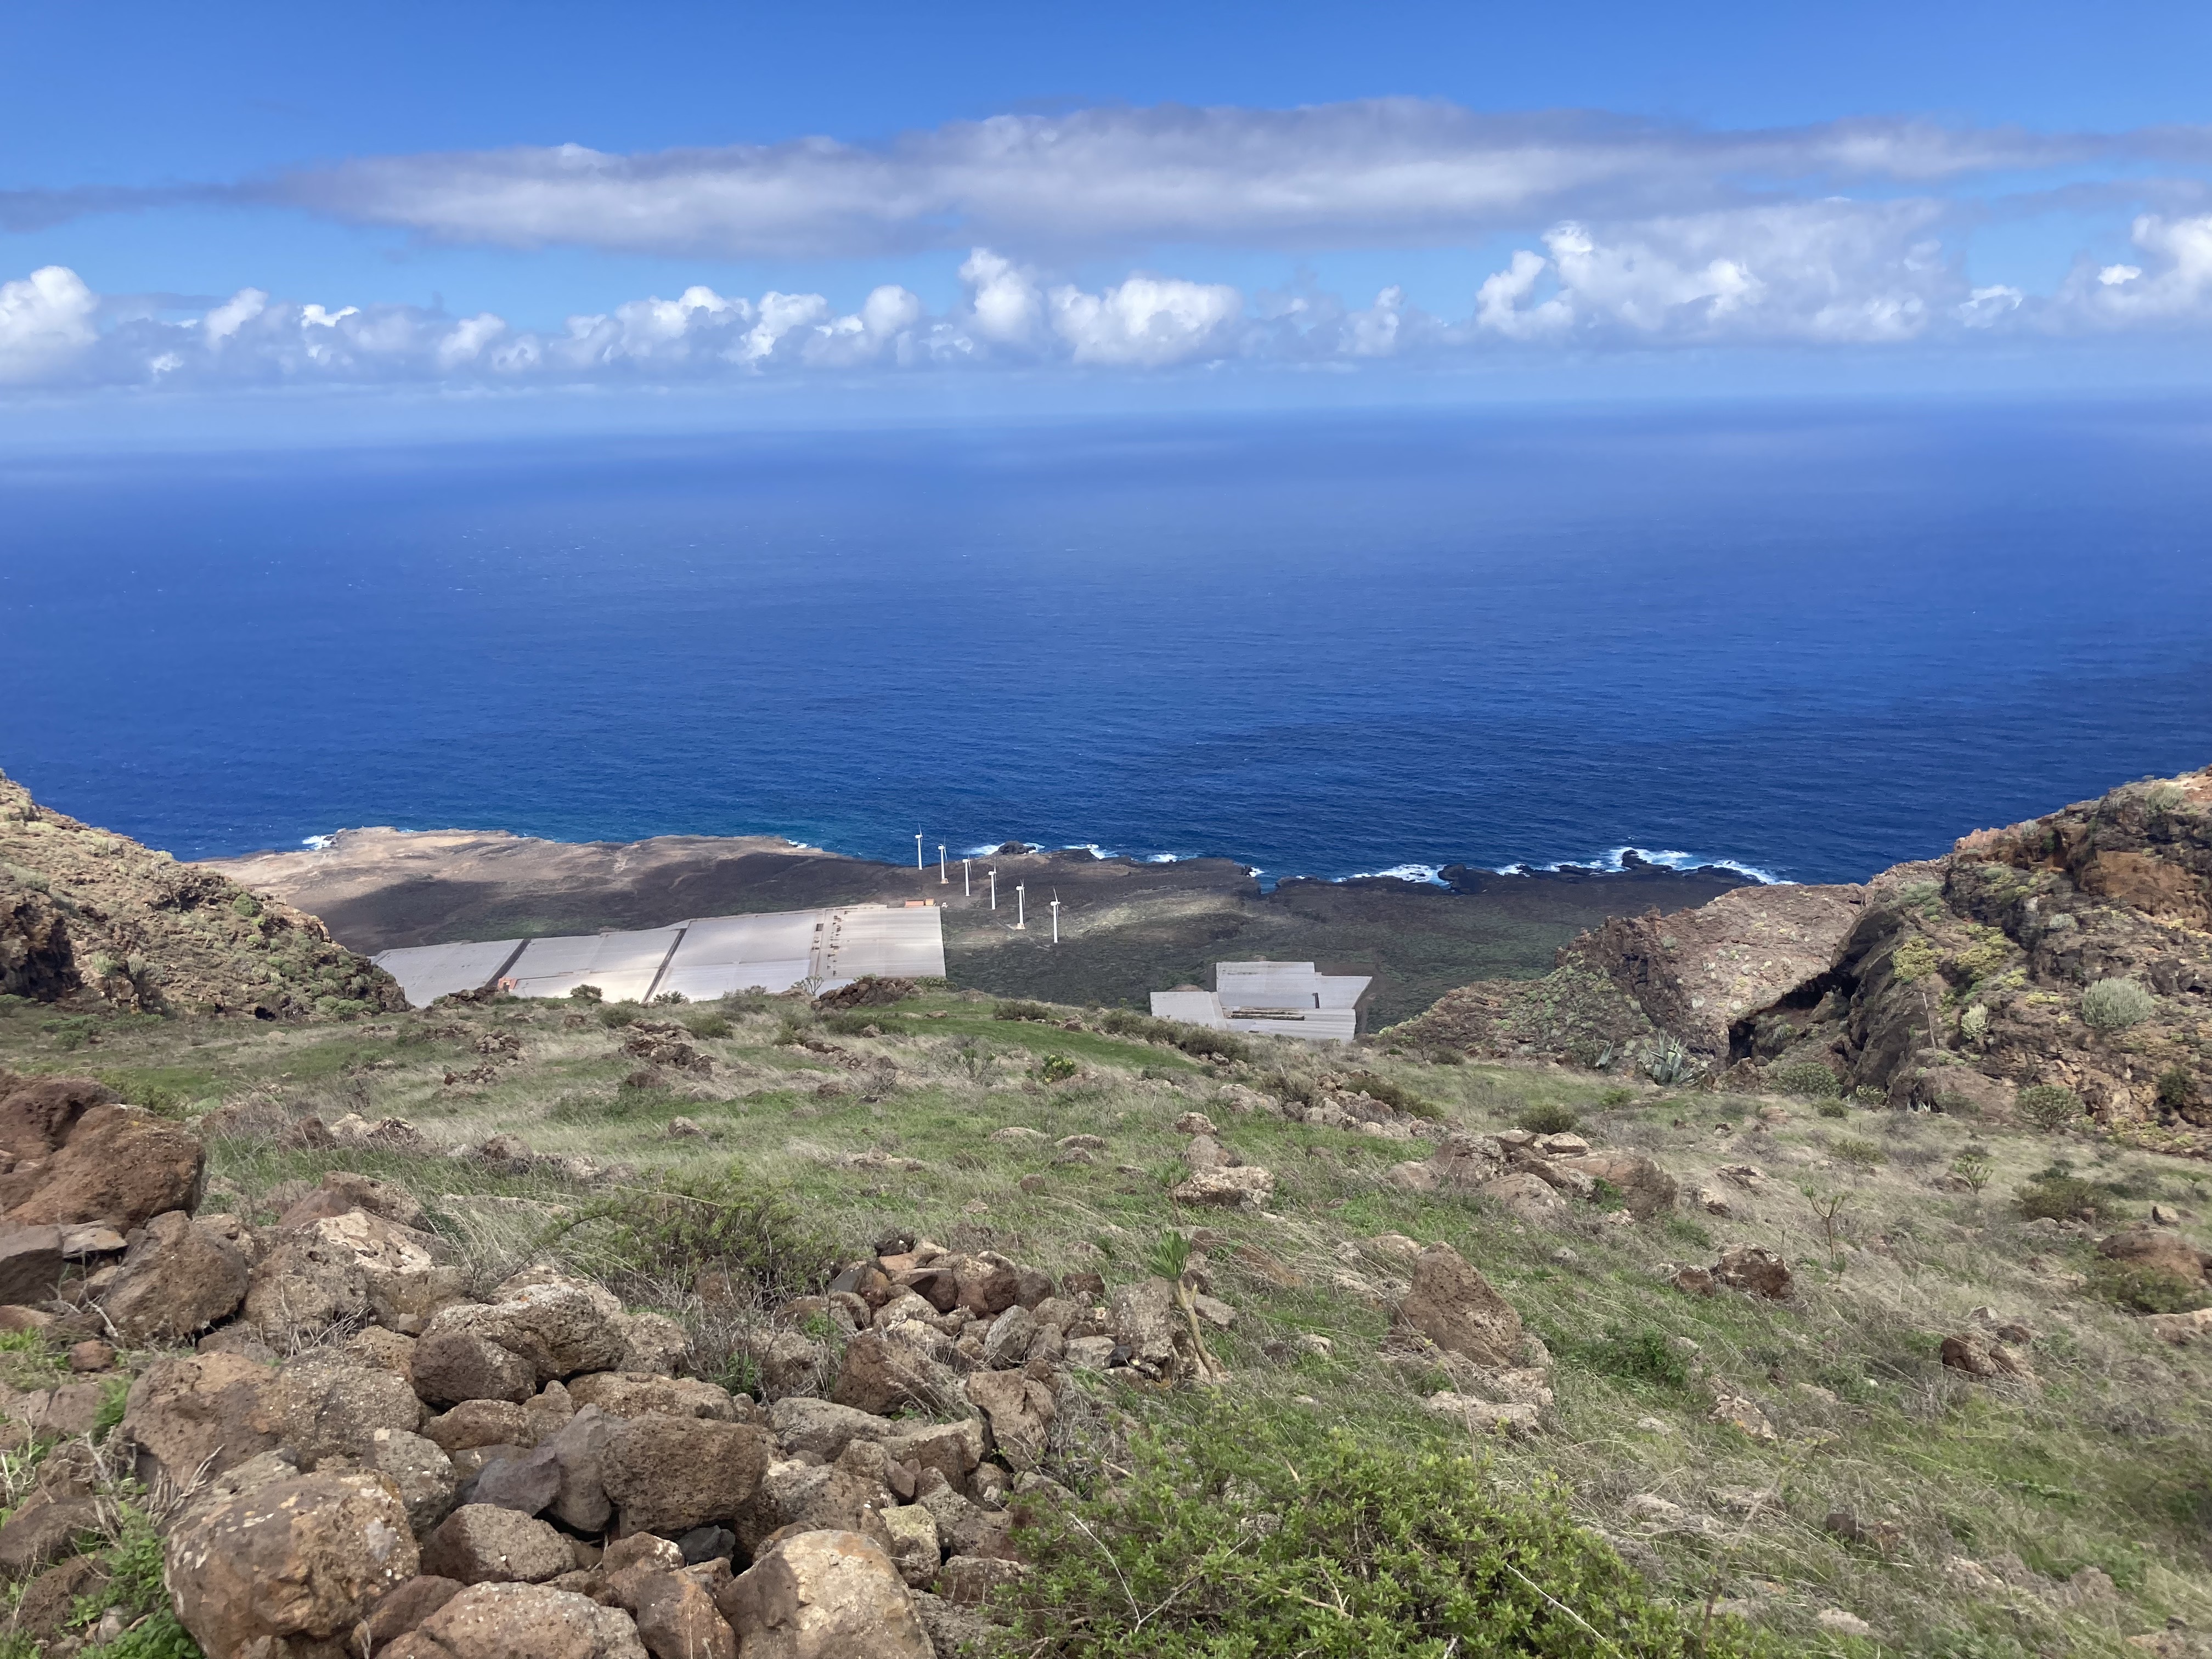
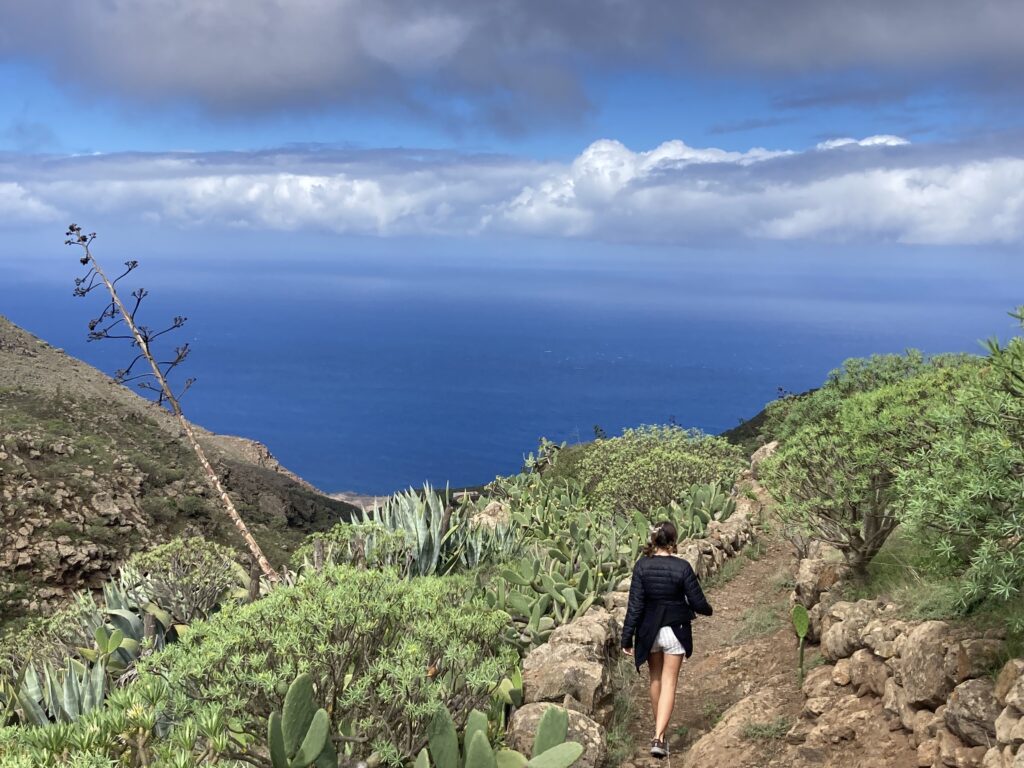
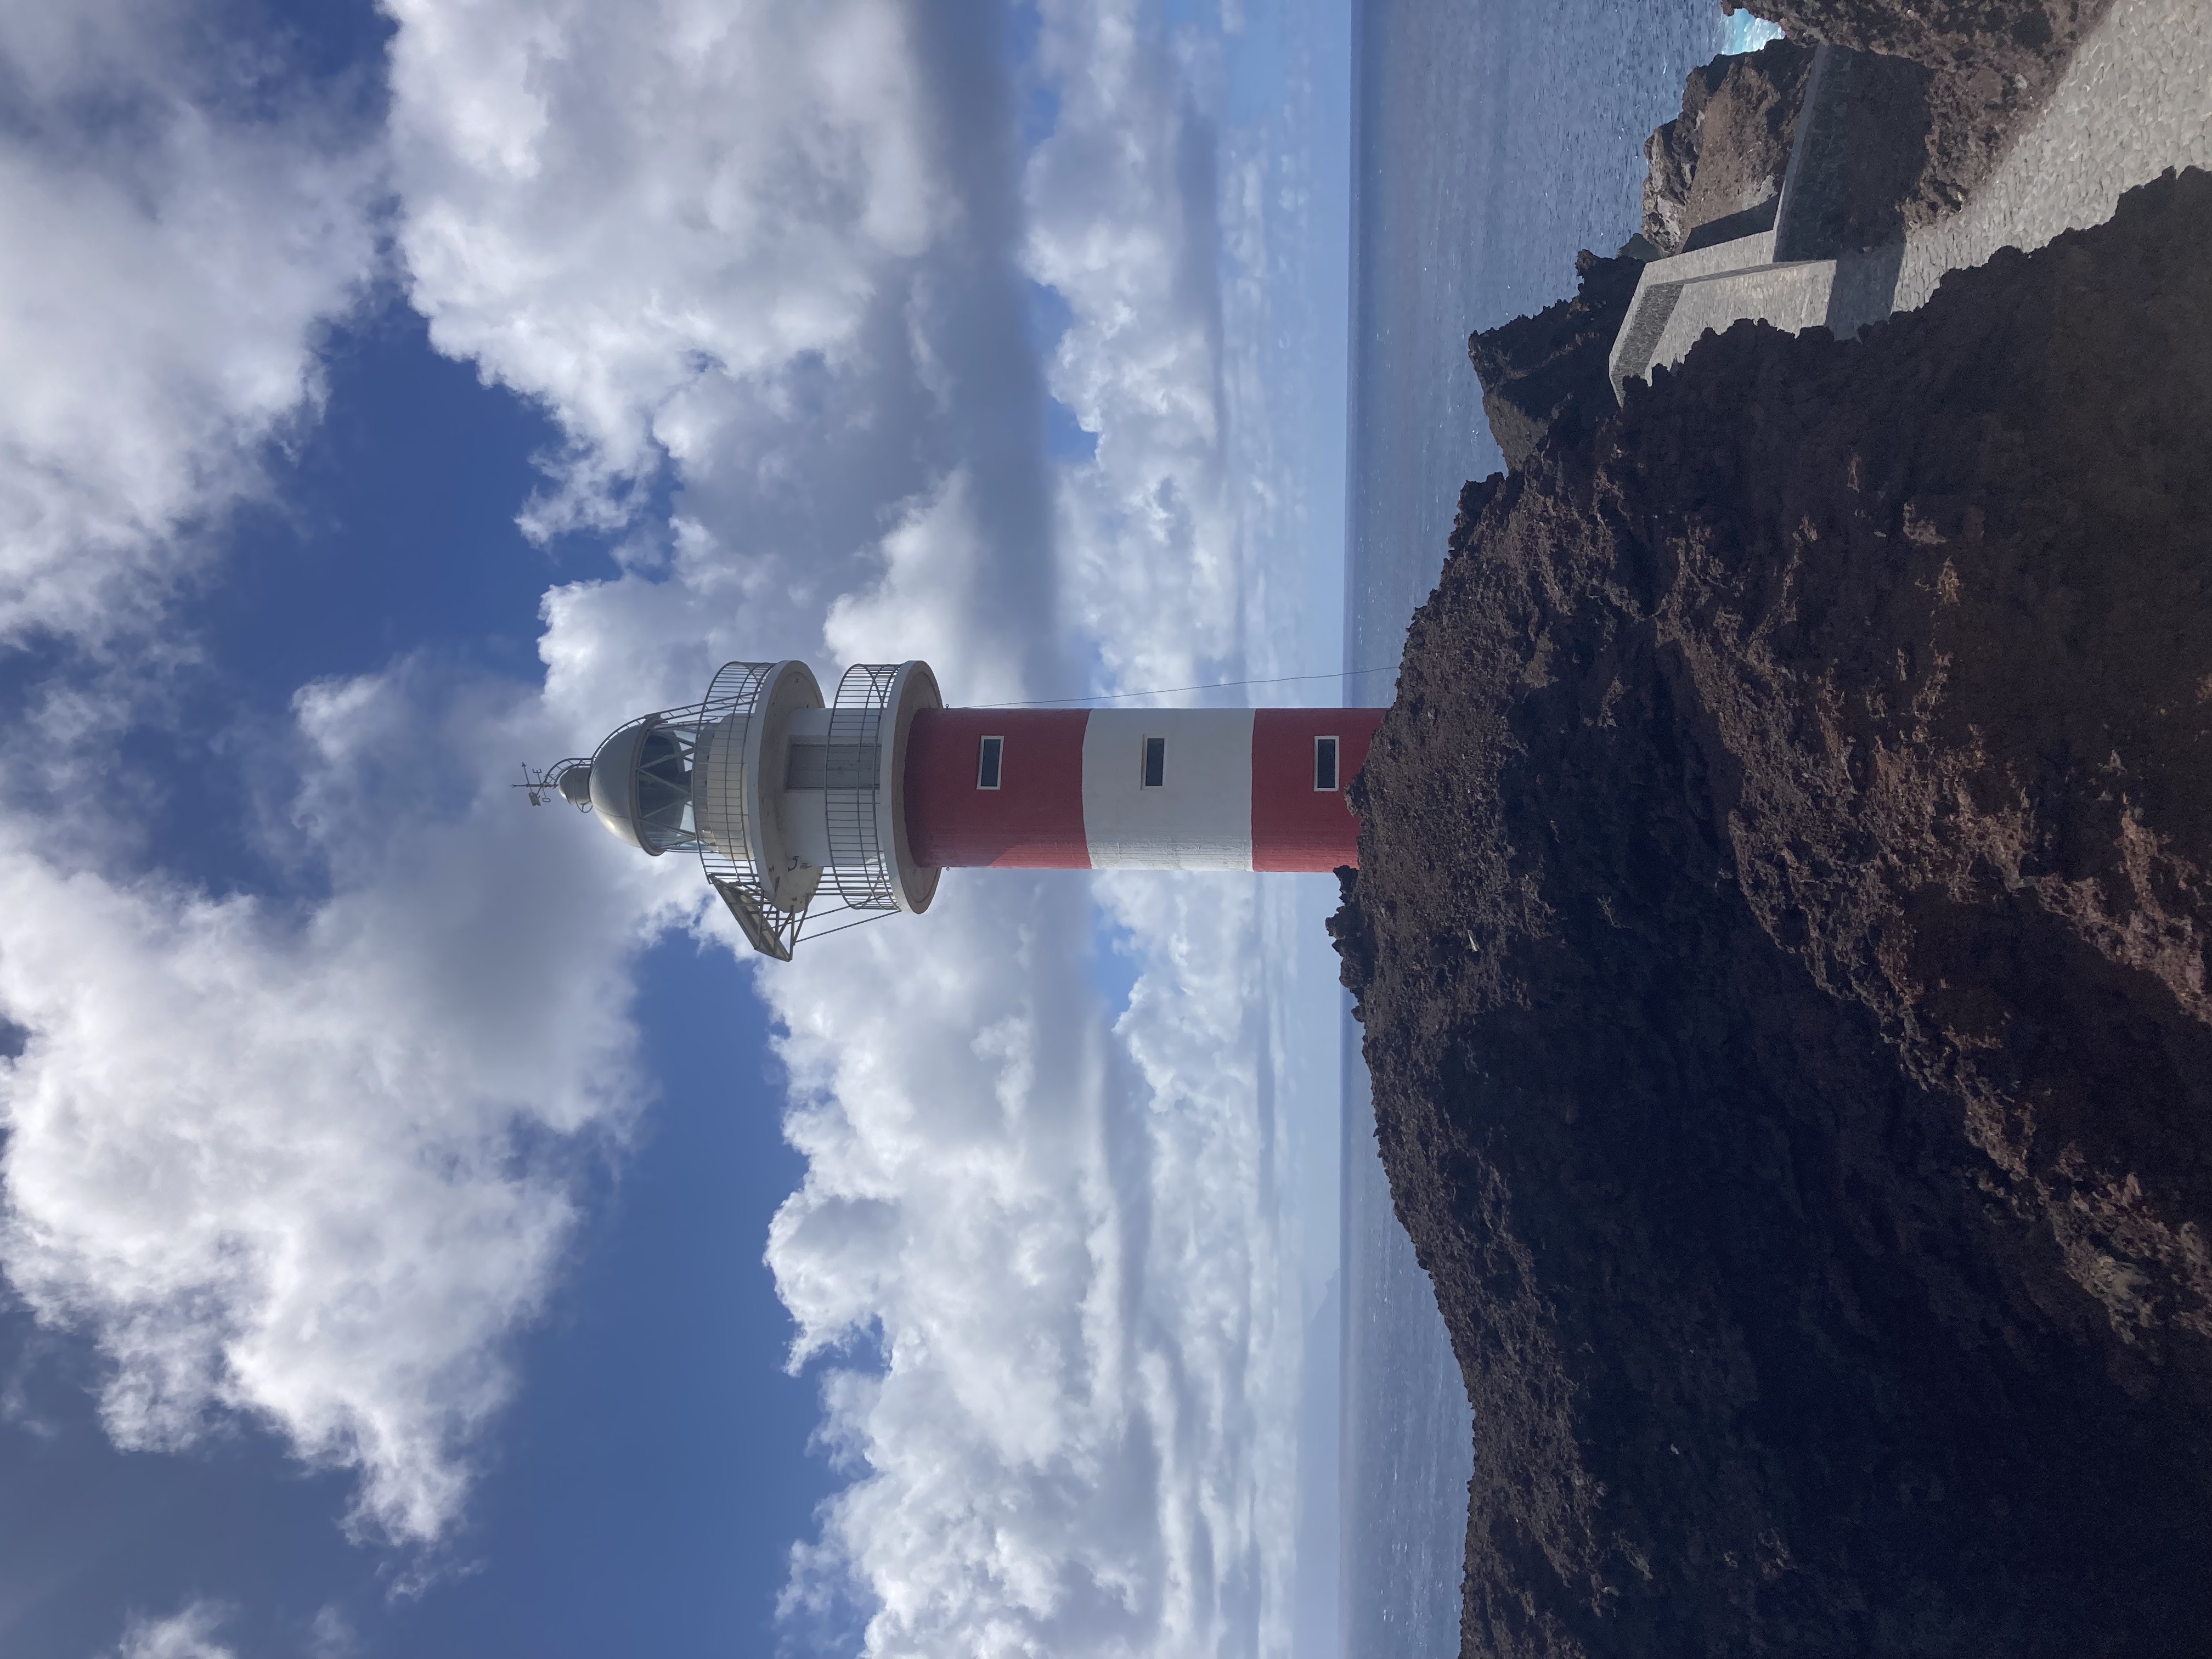
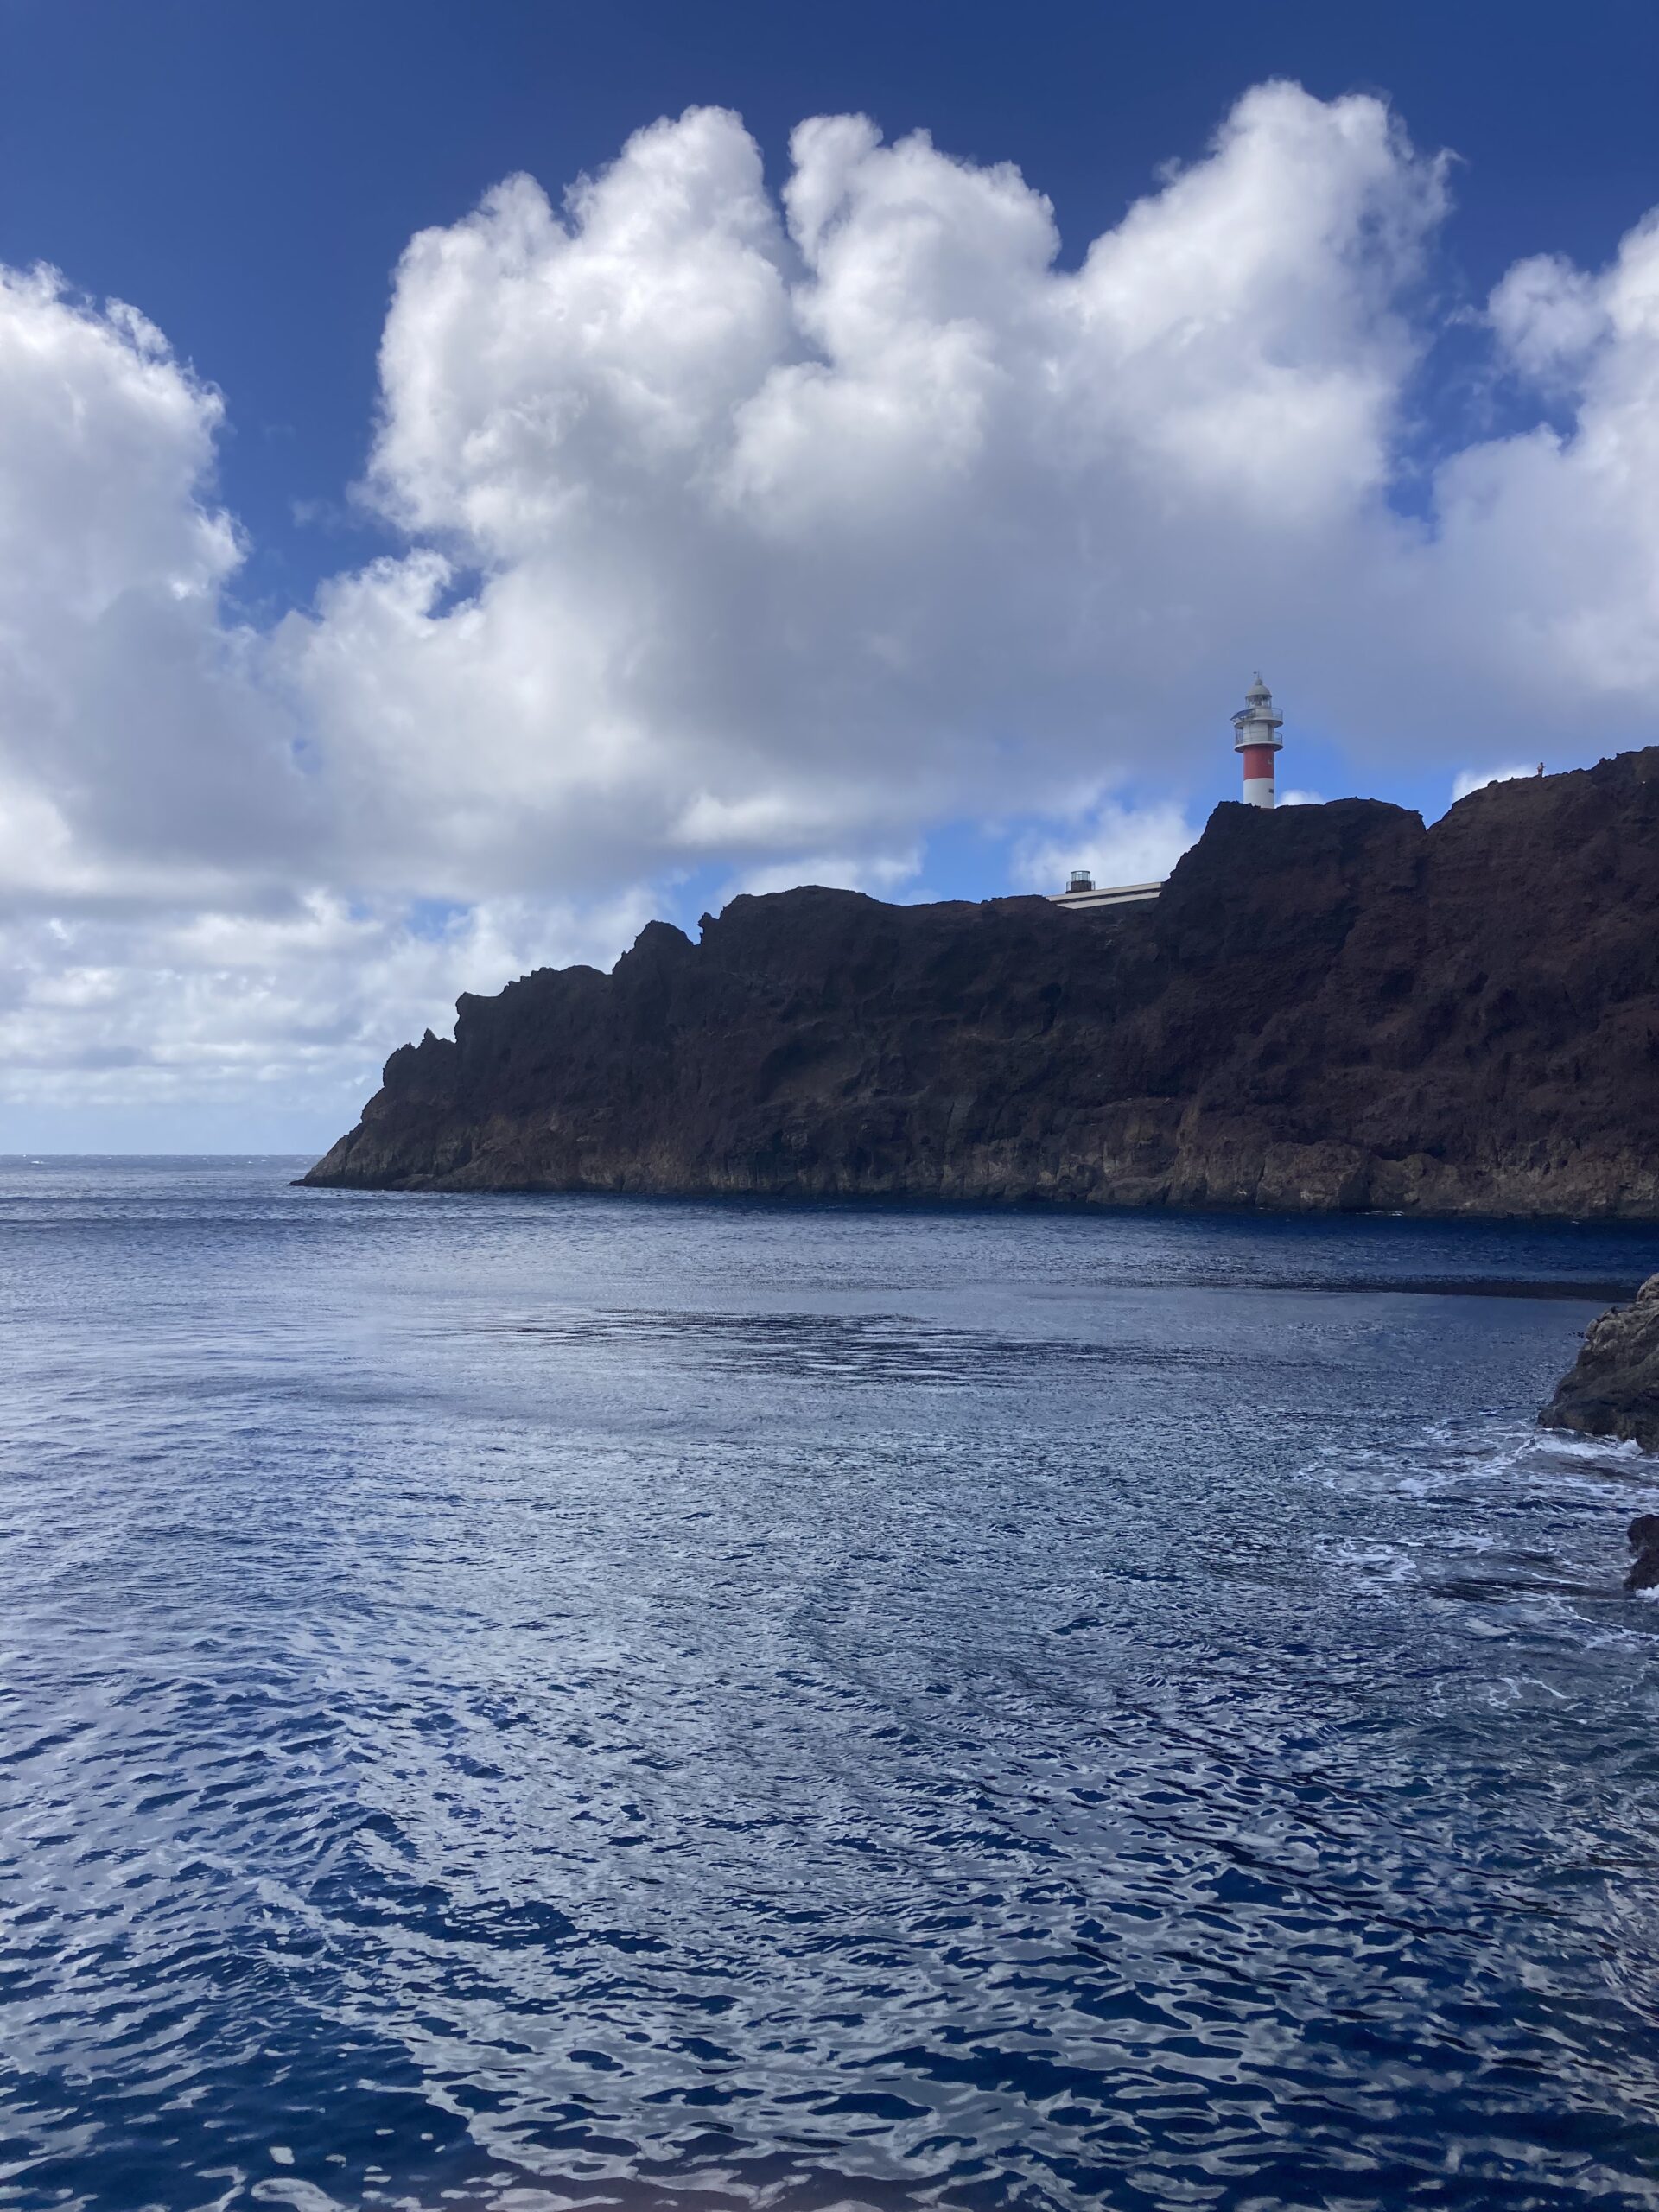
Step 3: Entering the Wild West — Lighthouse in Sight At a wide bend with a clear view, you’ll finally see the Teno Lighthouse and Punta Teno. The landscape suddenly transforms into something straight out of the Wild West — cacti and ochre rocks. It feels like the Grand Canyon!
You’ll find several alternative paths on Maps.me, but we don’t recommend taking shortcuts — lots of cacti and difficult terrain.
Step 4: Arrival at the Lighthouse Continue on the road until you reach Punta Teno. Bring gear for snorkeling — swimming here is possible! The area is small and quick to explore. We couldn’t get close to the lighthouse because a gate was locked.
Step 5: Climb Back Time to head back. Two options:
- By bus: Runs every 30 minutes depending on the season.
- On foot: Complete the loop.
We split up: I walked back via the loop to get the car, and my partner took the bus to Garachico — we met there later.
The return path starts after the road’s end — near a house or small church.
Warning: The trail isn’t well marked. Use Maps.me carefully and make sure you’re on the correct path — I lost 20 minutes at first being just 10 meters off!
You’ll climb for a while with beautiful views, pass a dry waterfall and old terracing. It’s confusing in parts but the main path always reappears.
The final stretch goes past a lunar landscape — Paisaje Lunar En Teno Alto. Eventually, you’ll arrive back at Teno Alto — loop complete.
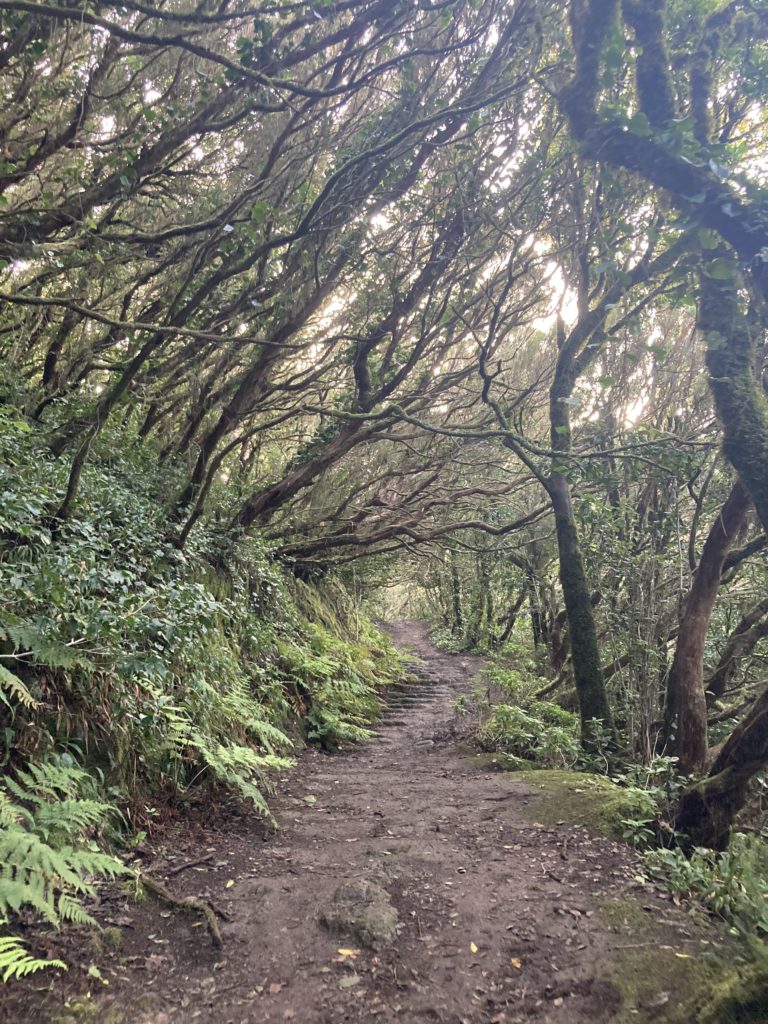
#6 • Cruz del Carmen > Chinamada > Punta Del Hidalgo > Batan de Arriba
Full details in our article: Cruz del Carmen to Punta del Hidalgo via Chinamada Hike
Ready to stack up the kilometers? Let’s go!
This stunning hike starting from Cruz del Carmen is breathtaking. While it could easily be in the top 3, we’ve placed it slightly lower due to the sheer length (over 20 km).
It’s a spectacular loop through charming villages, majestic forests, and jaw-dropping viewpoints.
Duration: 10 hours
Loop: Yes
Difficulty: 4/5
Distance: 21 km
Step 1: Parking at Cruz del Carmen Park at the Cruz del Carmen viewpoint — about 30 spots — or in front of the restaurant across the street.
Step 2: Descent Toward Chinamada Head toward Chinamada through a dense and magical forest. The trail eventually hugs dramatic cliffs with stunning views until you reach Chinamada.
Step 3: Down to Punta del Hidalgo From the village, follow the signs down to Punta del Hidalgo. You’ll pass incredible spots like Mirador hacia el Roque de los Pinos and Mirador Aguaide. The landscape is dramatic — similar to the Grand Canyon near Punta de Teno.
Optional: detour to the Punta del Hidalgo lighthouse if you have energy!
Step 4: Climb Back via Homician If needed, buses go from Punta del Hidalgo to San Cristóbal de La Laguna and then on to Cruz del Carmen (check Google Maps for timetables).
For the brave: climb back up through Batan de Arriba. Start climbing through Homician, which overlooks Punta del Hidalgo. After 35 intense minutes, you’ll reach a high point with incredible views.
First descent: a narrow trail carved into the ochre-yellow cliff — stunning!
Step 5: Batan de Arriba The trail continues up and down until you reach the picturesque village of Batan de Arriba, with its vineyards nestled in the valley.
Step 6: Return to Cruz del Carmen Climb alongside rocky walls — ropes are available but it’s not too dangerous.
Later, the trail becomes unclear — after a small bridge, turn right. It may feel like you’re lost, but keep going.
Eventually, you’ll reach the enchanted forest. Climb some steps and push through a long final ascent to return to Cruz del Carmen.
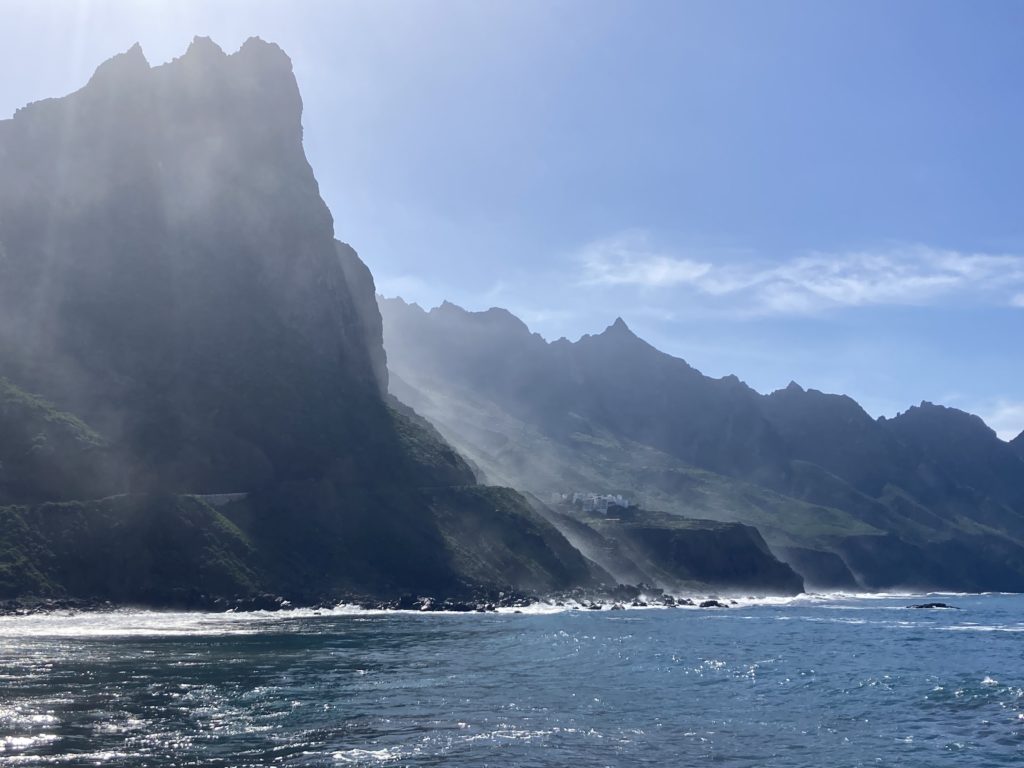
#7 • Afur – Playa del Tamadite – Taganana
Full details in our dedicated article: Hike from Afur to Playa del Tamadite to Taganana
Oh wow, this hike was epic!
We didn’t follow the official trail (we took the red trail visible on Maps.me). We climbed a mountain, thought we were going to die, started seeing the end, heard gunshots and barking dogs getting closer, and finally ended up in a farmer’s field. He scolded us, threatened to set his dogs on us and call the police, all while repeating “Porque tu tiene mucha carra” over and over again for 20 minutes.
We didn’t understand a thing, and he eventually told us to take another path — we were literally 2 minutes from our car.
Aside from that… the hike is incredible!
A gorgeous wild beach, a view of Roque de las Animas, an intense climb, and a descent where we felt completely alone in the world.
We strongly recommend sticking to the official path — unless you’re feeling extremely adventurous. The shortcut we took was dangerous!
Duration: 6 hours
Loop: Yes
Difficulty: 4/5
Distance: 15 km
Step 1: Parking in Afur
There’s a small parking lot at the start of the hike in Afur with about 20 spots.
In high season, you’ll want to arrive early to find a space.
Step 2: Descent to Playa del Tamadite
The descent is quite gentle and enjoyable as it winds through the valley. You’ll arrive at Playa del Tamadite fairly quickly — and it’s incredible!
Wild, with big rocks and dramatic cliffs. A perfect spot to relax.
Warning: swimming is dangerous due to strong currents. Stick to the shore and don’t go too far out!
Step 3: Toward Taganana
We started the ascent for the loop route. At the trailhead, there’s a sign warning against proceeding.
We ignored it, and honestly, it was totally fine — a few fallen rocks here and there, but nothing dangerous.
The views are amazing, especially of Roque de las Animas.
Step 4: The Non-Official Shortcut — Entering Hell
Then came the chaos. We had seen a shortcut in a Spanish guidebook and confirmed it on Maps.me.
We took the path. At first, it was okay. Then… landslides, overgrown bushes, steep terrain, and goat-trails. At one point we had to crouch and scramble.
We struggled a lot, but after a solid hour of tough climbing, we finally saw the summit.
Step 5: Reaching the Top and Descending
At last, the summit! We thought we were saved.
The descent was a bit easier, though we still got lost a couple of times — thank goodness for Maps.me.
Some sections were steep and uneven, but we eventually spotted Afur in the distance.
Step 6: The Chaotic Ending
Then we heard gunshots and barking. Panic set in. Private property signs everywhere.
We were exhausted, desperate to return to civilization, and tried a shortcut that appeared to lead into the village — we could see our car!
Then came the farmer, waving a stick and yelling the now-famous “Porque tu tiene mucha carra.” Eventually, he let us go, telling us to head back and turn right.
Not the warmest welcome, but finally, we saw the village church — and our parking spot. What a relief!
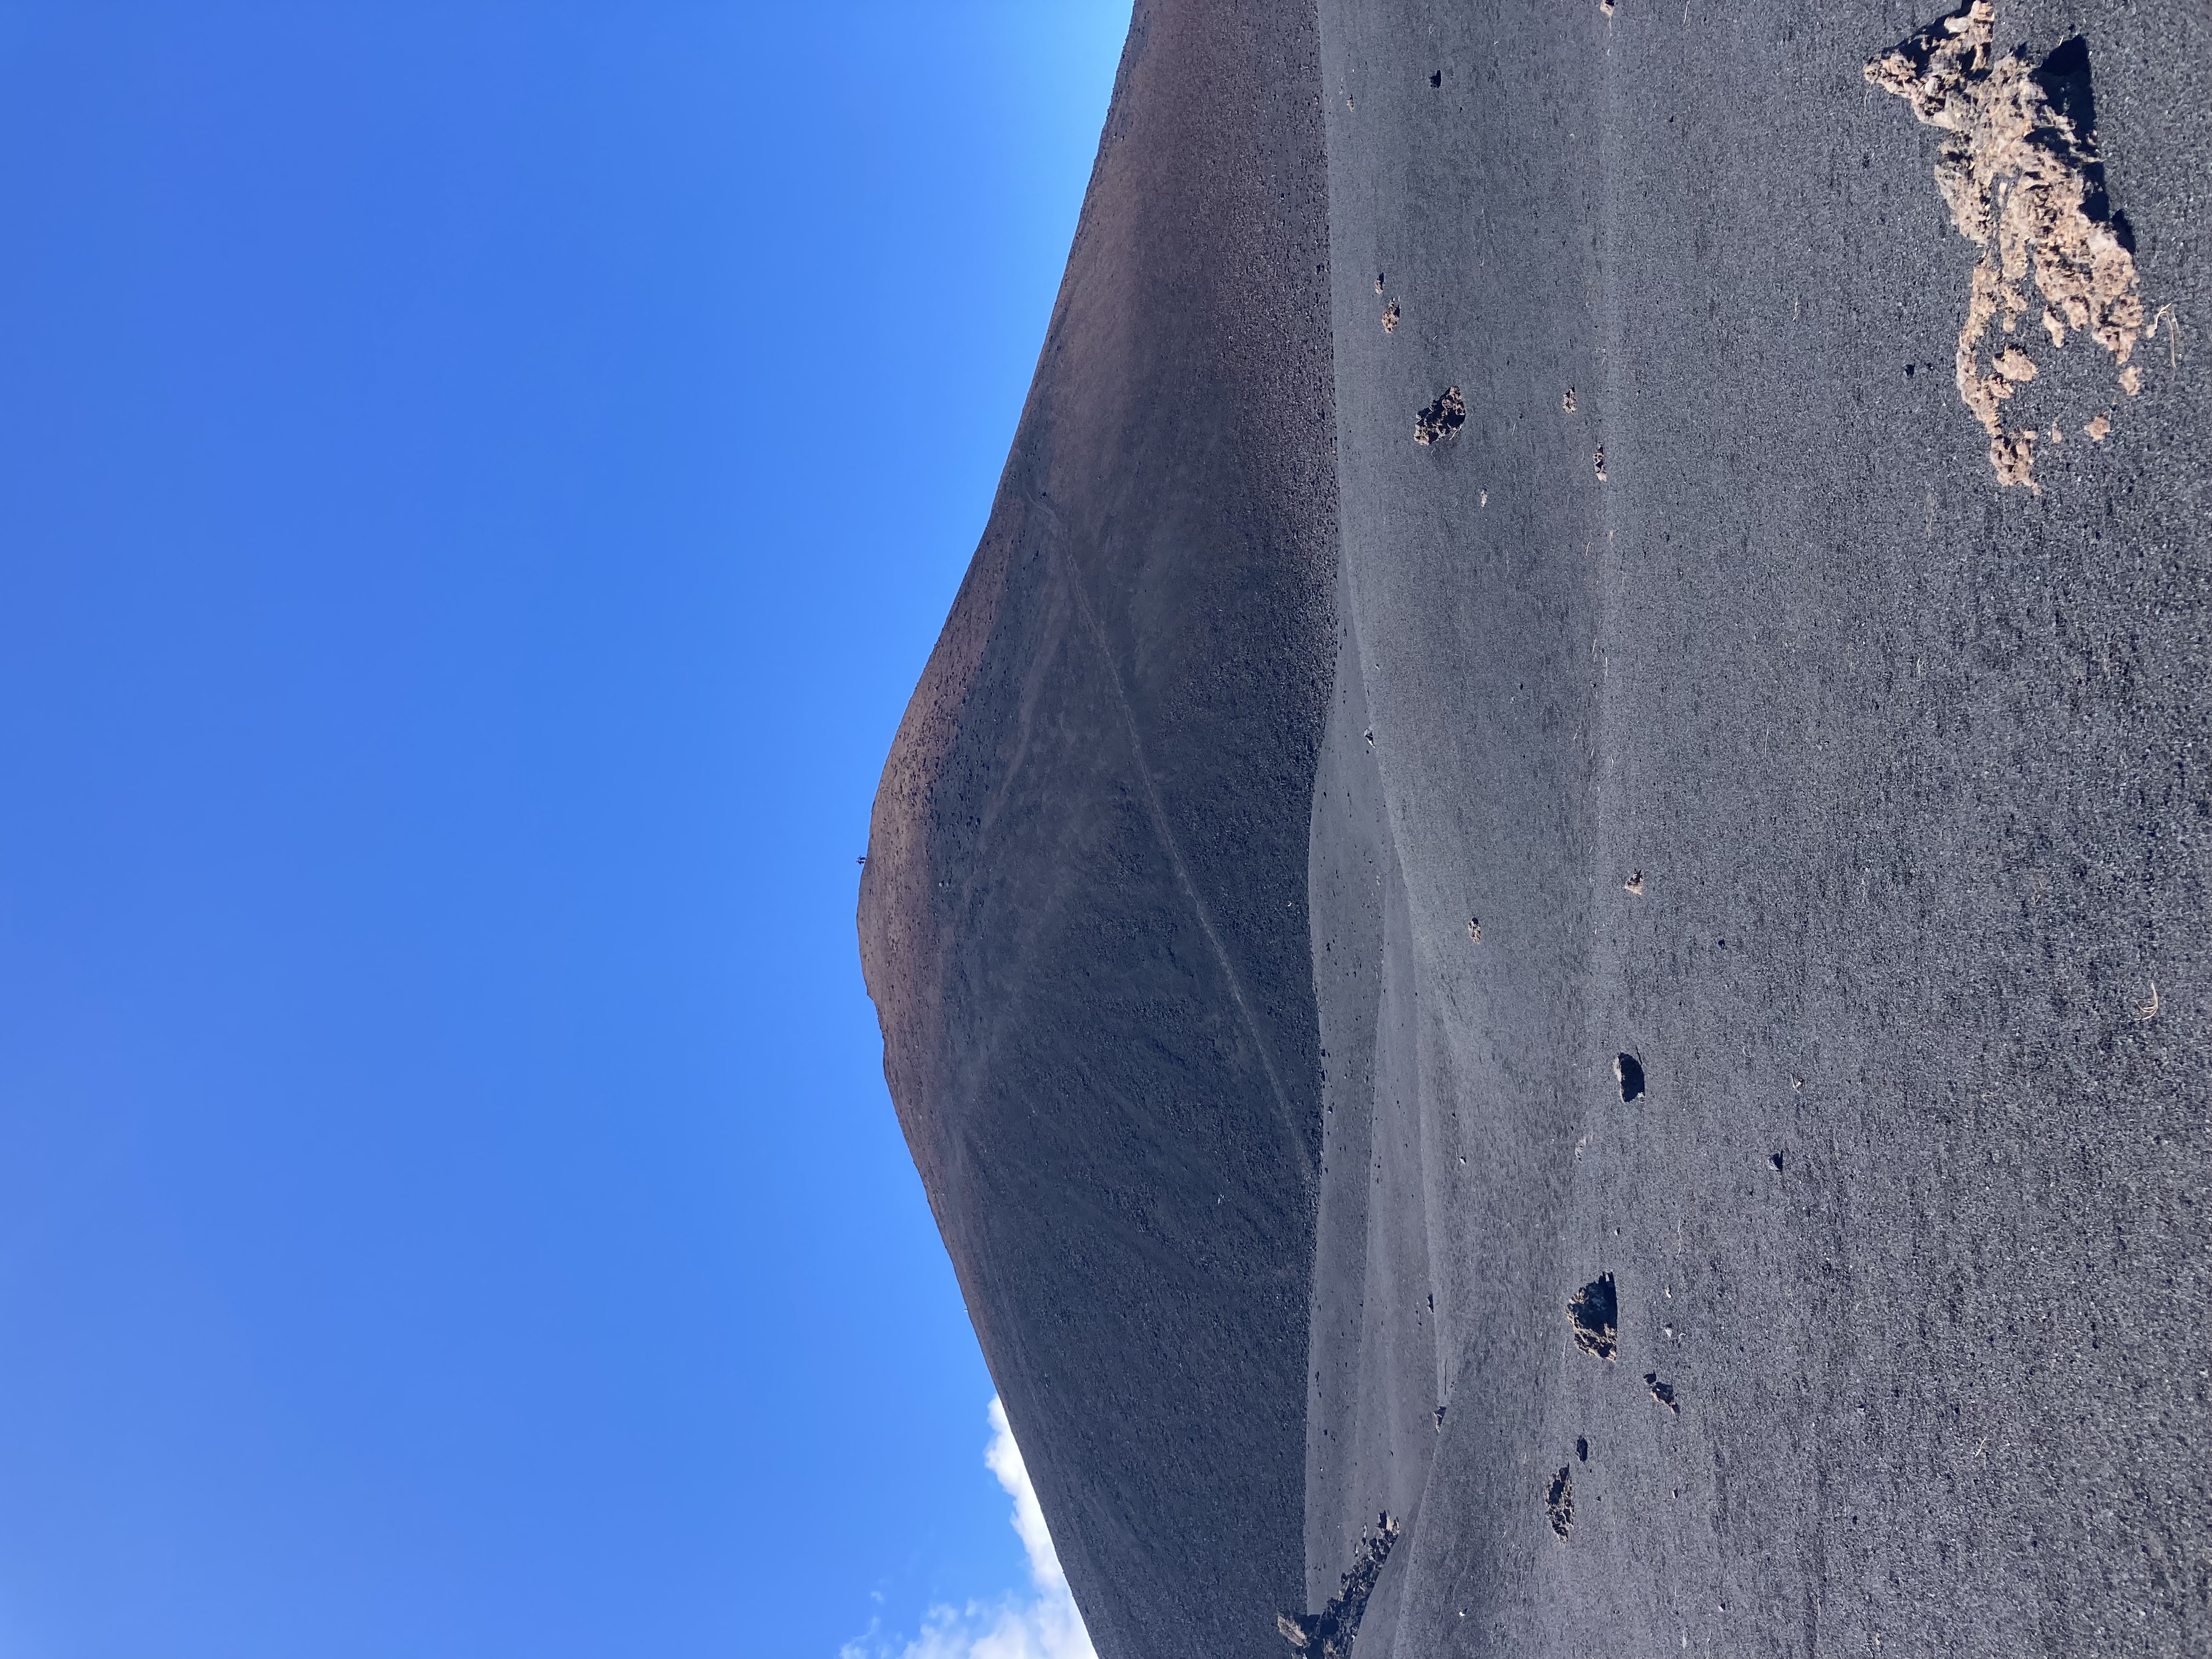
#8 • Chinyero
Full details in our dedicated article: Hiking Chinyero
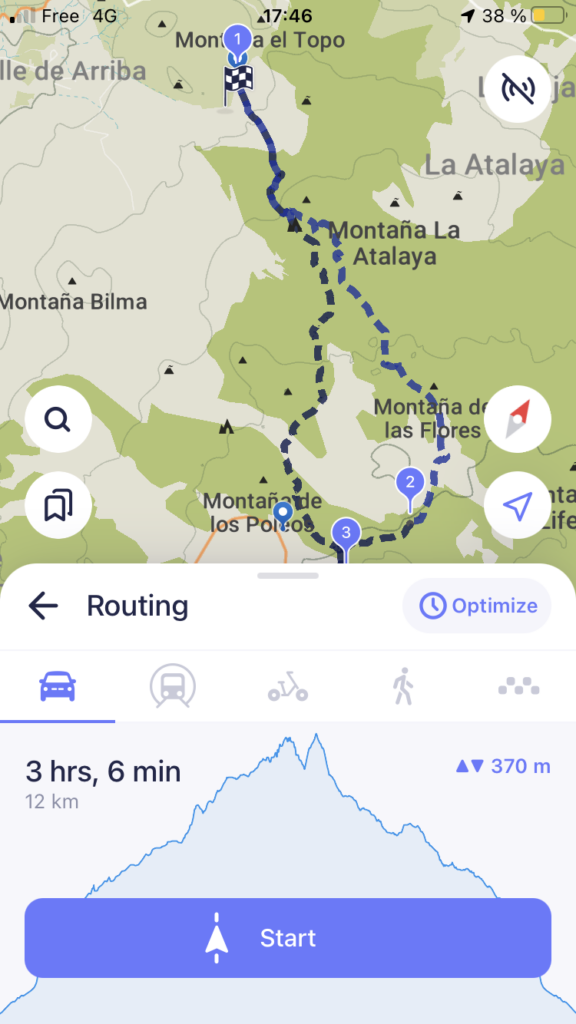
This hike is super pleasant!
Perfect if you’re looking for something intermediate and relatively easy.
There are several starting points, and the trail loops around Volcán Chinyero, the last volcano to erupt on Tenerife. It even sent lava pouring toward Garachico.
You’ll walk through beautiful pine forests and lava gravel trails.
Duration: 3 hours
Loop: Yes
Difficulty: 1/5
Distance: 12 km
Step 1: Parking
Several parking options:
- From the Northwest (El Tanque, Garachico): use the Ecomuseo parking.
- Trail starts nearby (check Maps.me), here ou here.
- From Teide: start at Sendero del Chinyero for a closer access point.
Step 2: Walking Through the Pines
We used the first option, driving partway up the paved road to find a spot. The trail starts off dull but quickly transforms as you enter stunning pine forests.
The trail undulates slightly through the woods and eventually opens up to views of Teide and finally the Chinyero volcano.
Step 3: Climbing Chinyero
We decided to climb it. The trail isn’t official but is shaped by hiker traffic. At the top: a wonderful 360° view and the lava flows tracing the crater.
Step 4: Completing the Loop
After the ascent, we continued around Chinyero and made our way back through the forest to the car.
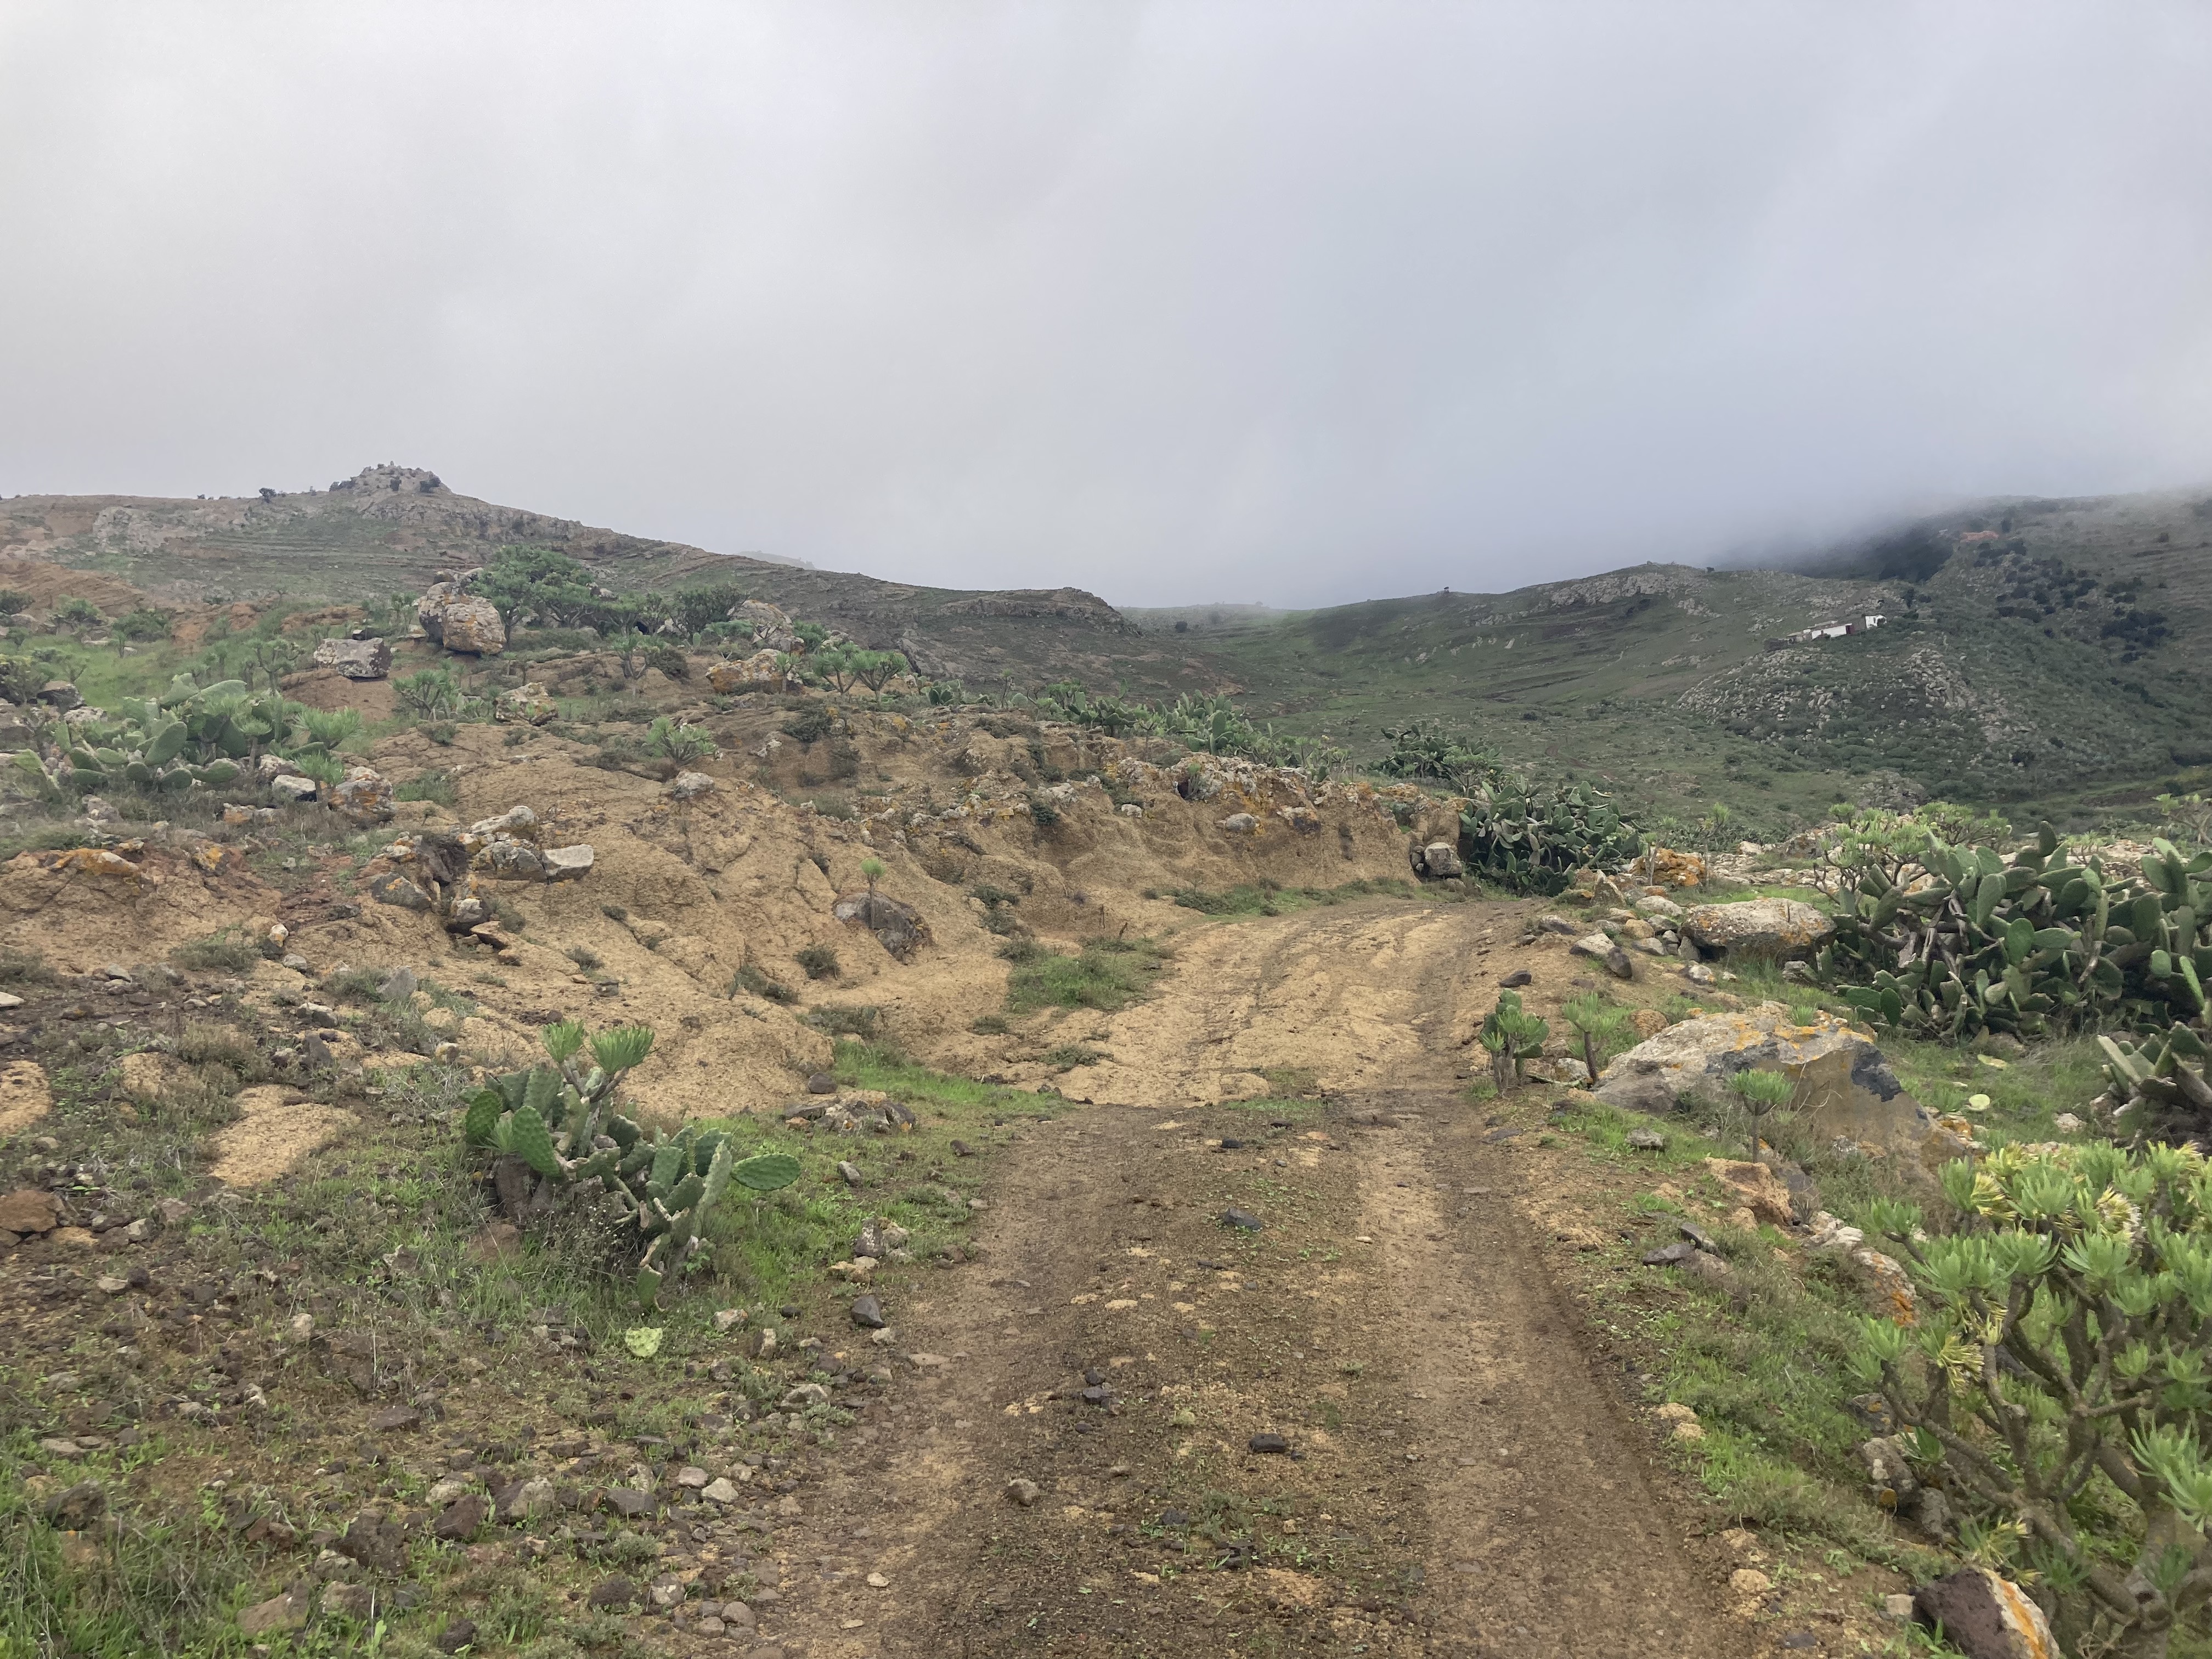
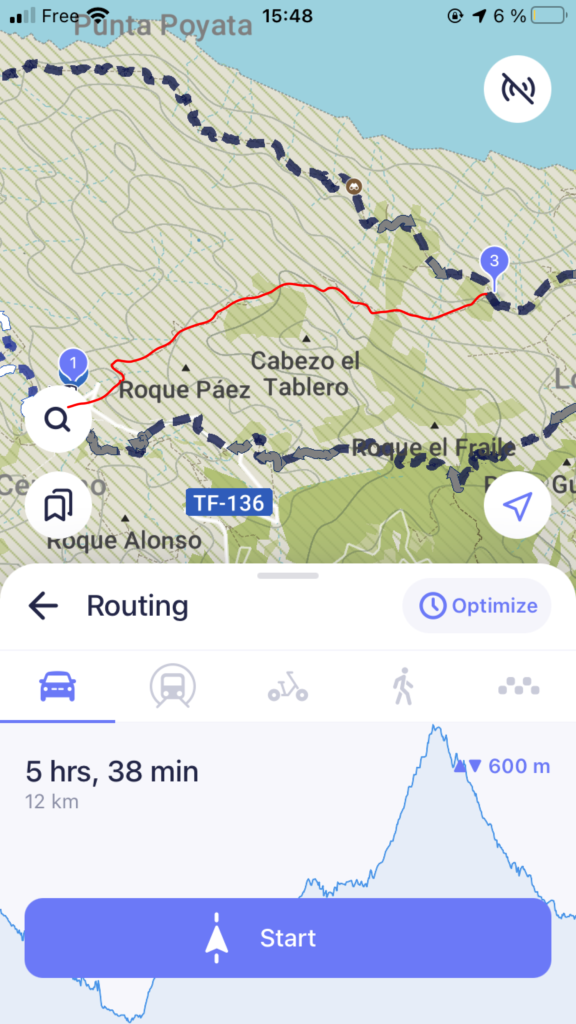
#9 • El Palmar – Cumbres de Baracan – Cumbre del Carrizal
Full details in our dedicated article: Hiking El Palmar – Cumbres de Baracan – Cumbre del Carrizal
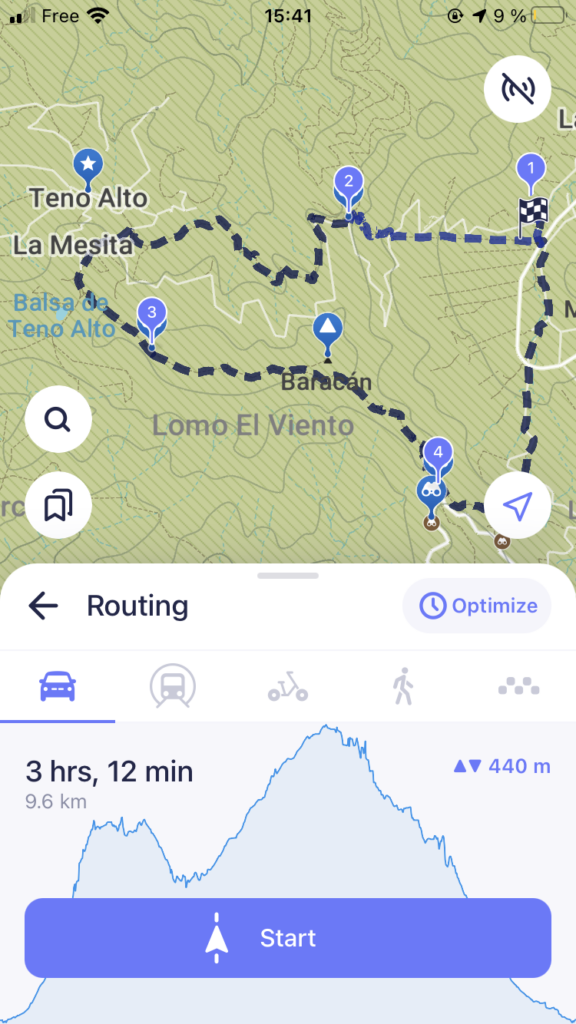
A lovely hike, but we ranked it lower because we had awful weather. It was so foggy we didn’t get to enjoy the views. Still, the trail was great — and on a clear day, it must be spectacular!
Duration: 4 hours
Loop: Yes
Difficulty: 2/5
Distance: 10 km
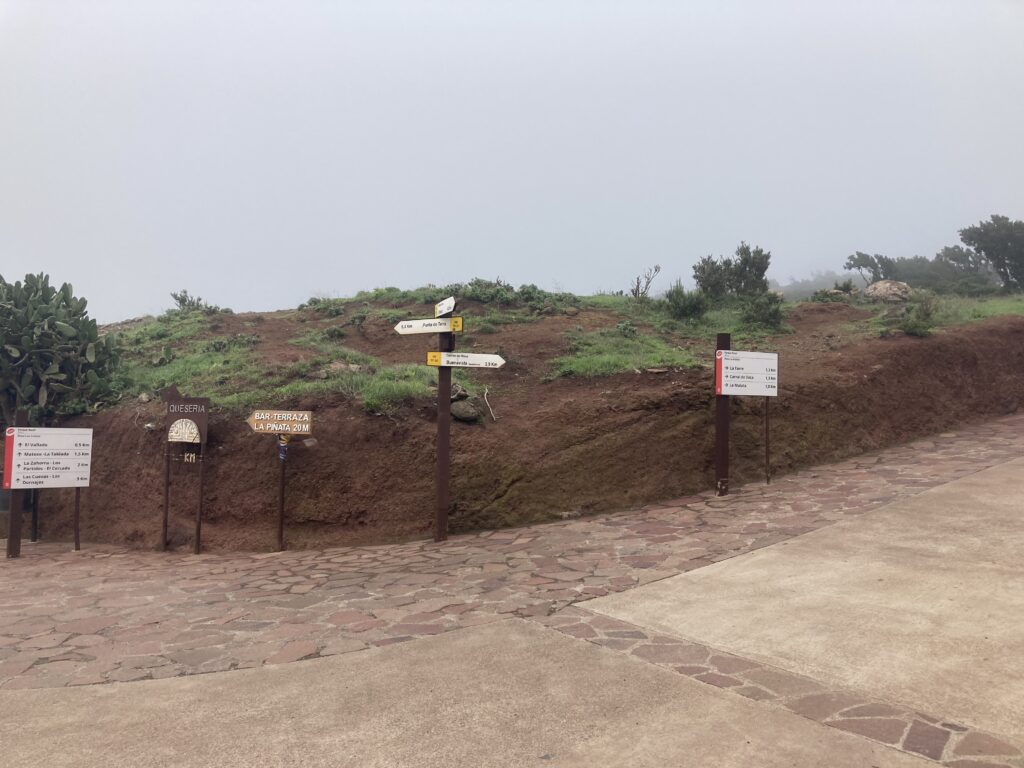
Step 1: Parking in El Palmar
Parking is easy. There’s a Visitor Center that provides maps and info, as well as public restrooms.
Further up, you’ll find a free camping zone: Zona De Acampada De Los Pedregales.
Step 2: Ascent with Views of Montaña de El Palmar (Montaña Zahorra)
The trail climbs through cactus fields and succulent plants. As you gain elevation, you get nice views of the mountain — though the climb is steep.
Step 3: Toward Teno
Past a viewpoint (we didn’t see Teide due to fog), the trail begins to descend toward Teno. It goes up and down but remains manageable and enjoyable.
Step 4: Before Teno, Head to Baracan
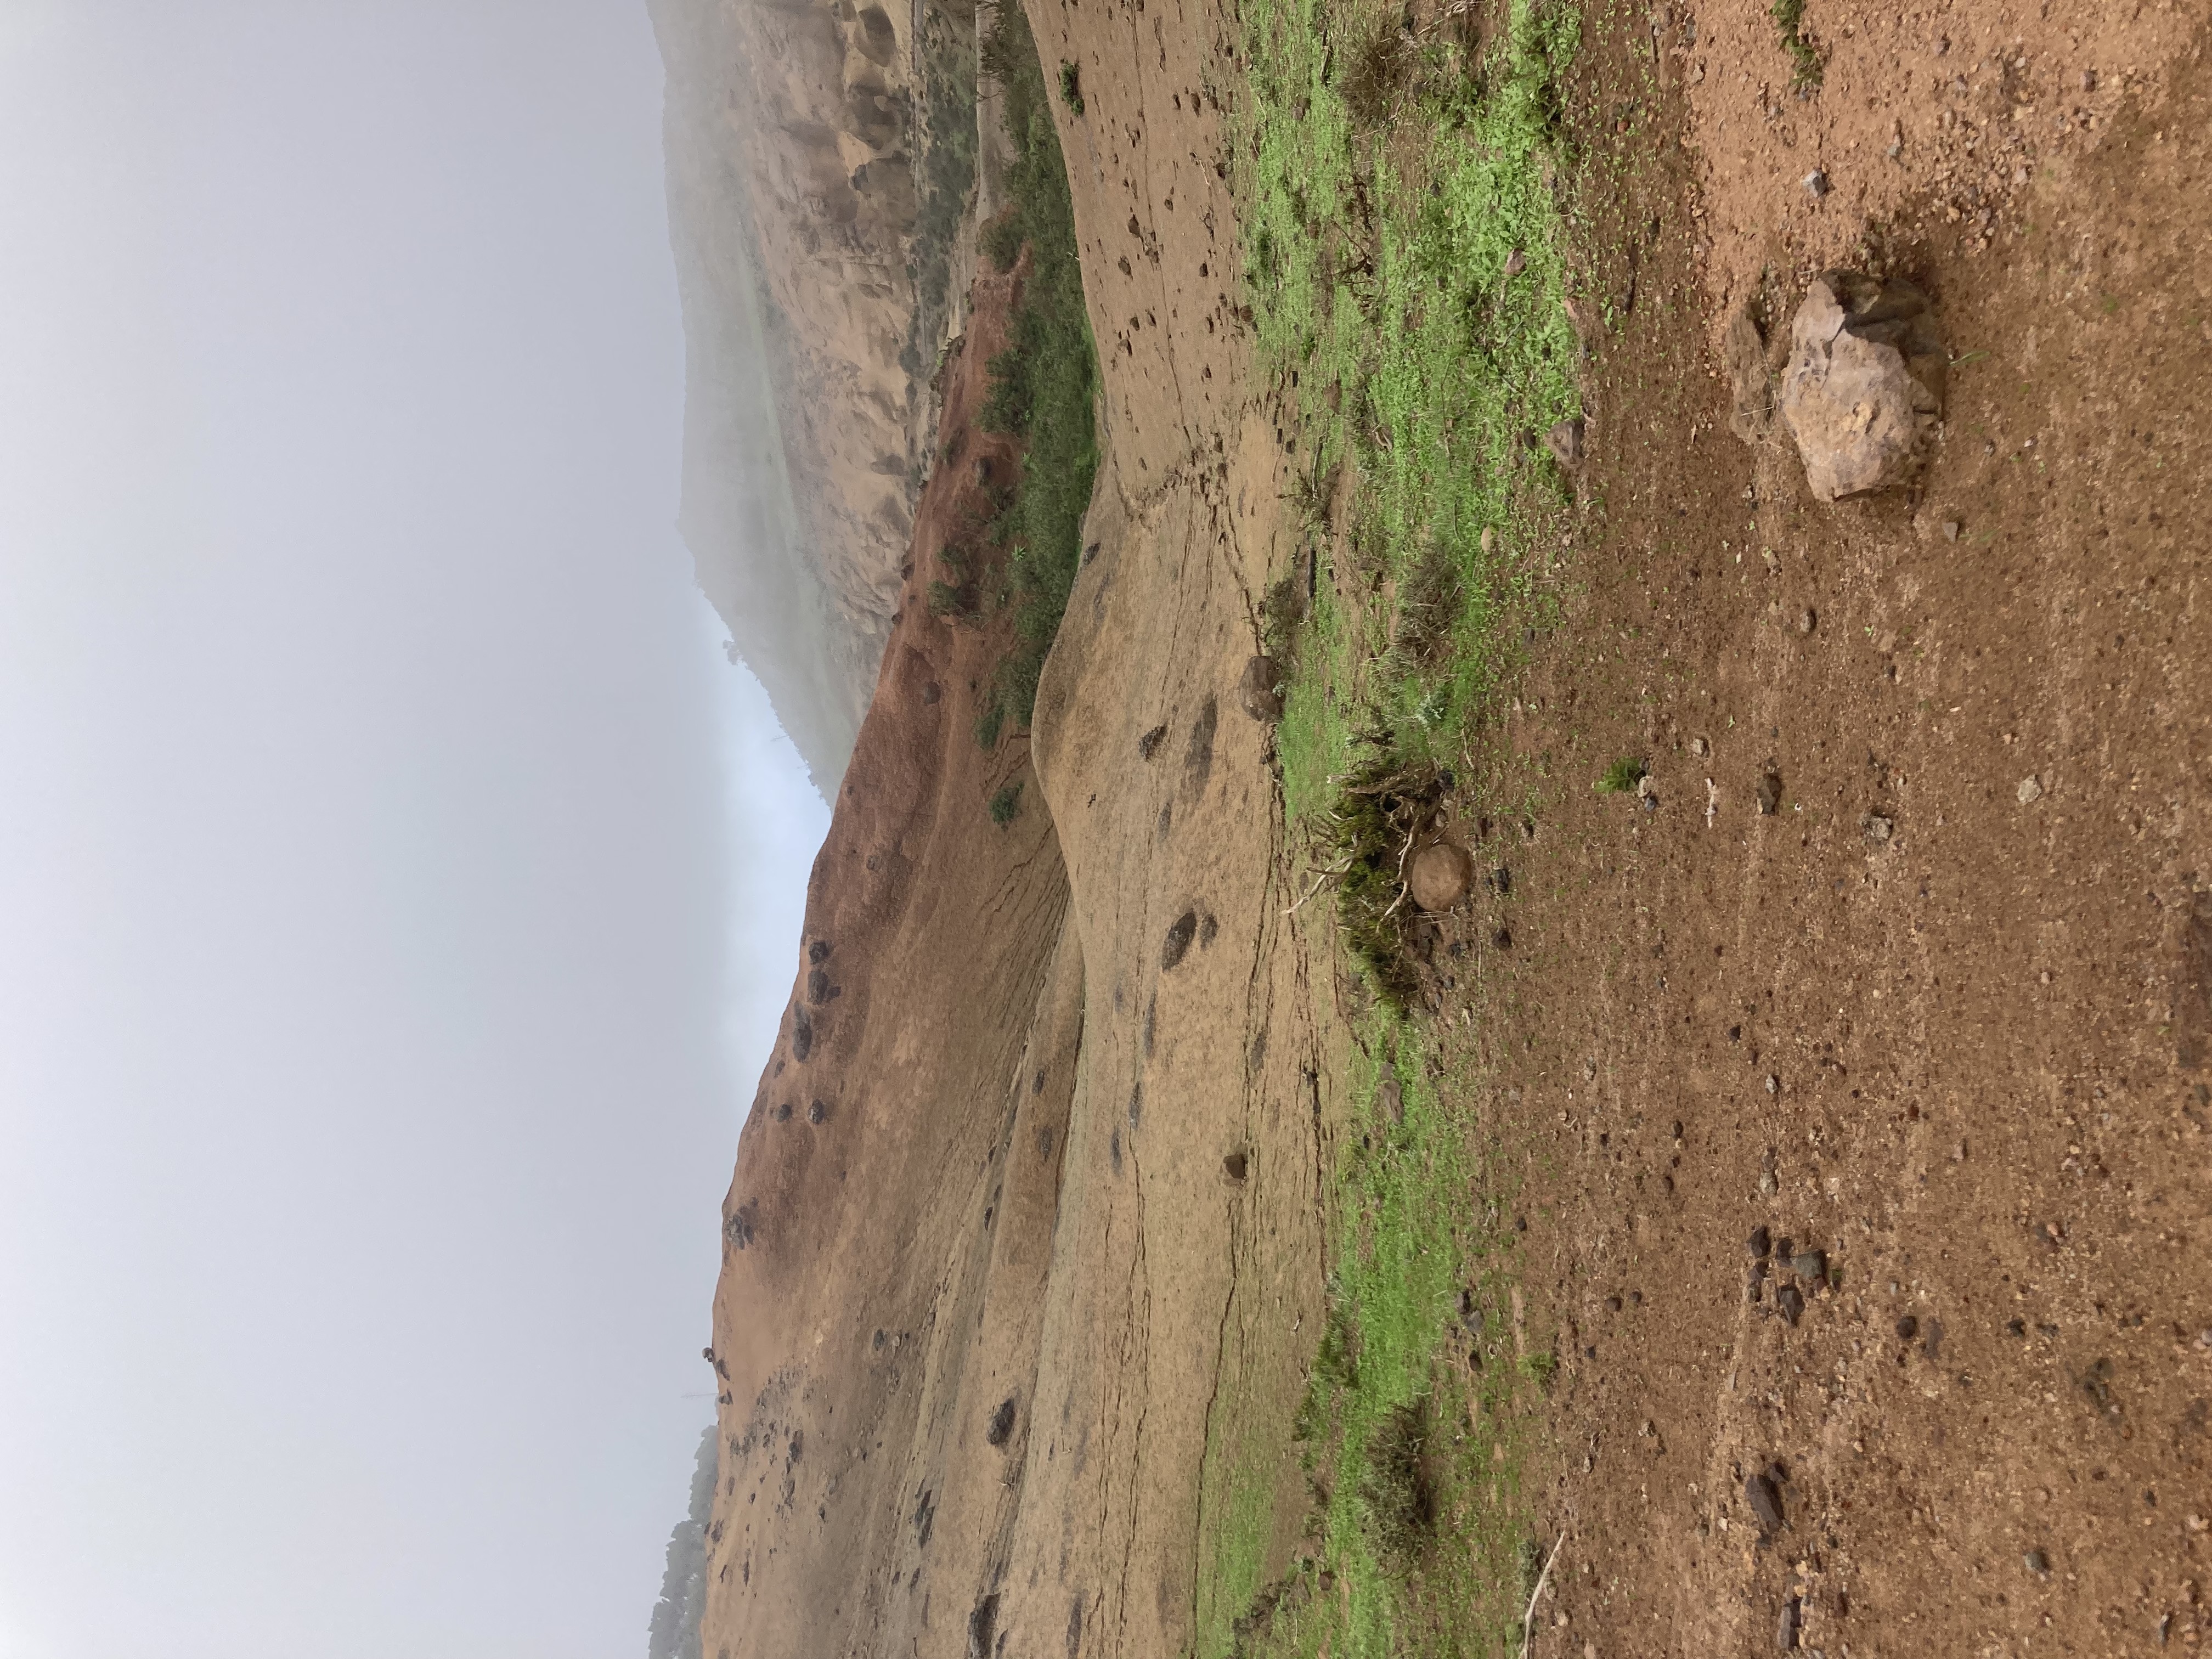
You’ll pass a small religious retreat — not really an attraction but a landmark. Follow the Maps.me route, walk about 10 minutes on the road, then rejoin a stair-filled trail toward Baracan. The ochre-red rocks are stunning, and the trail winds through lovely forest. We were supposed to have breathtaking views — we saw nothing. So we kept going.
Step 5: Cumbre del Carrizal
Again, amazing views are expected here. For us? Just mist. Still, the trail itself was beautiful.
Step 6: Back to El Palmar
The return trail is well maintained and easy. We arrived soaked, windblown, and tired — but it was still worth it.
#10 • Los Gigantes
Full details in our dedicated article: Hiking Log Gigantes
A short “hike” — but not for the faint of heart.
If you’re comfortable with heights and well equipped, give it a shot!
The trail hugs the cliffs of Los Gigantes and offers incredible views.
Duration: 1 hour
Loop: Yes
Difficulty: 2/5
Distance: 1 km
Step 1: Parking in Los Gigantes
Parking is tricky. Try residential streets above the port. There’s a paid lot near the port, but it’s expensive.
Step 2: Reaching the Trailhead
Start at the end of Calle Tabaiba — walk up to the trailhead. Spots are limited.
Step 3: Follow the Trail (Maps.me)
The start is easy. You’ll reach a viewpoint, then continue on a narrower path that clings to the cliffside. Warning: not for those with vertigo!
The views are phenomenal.
Step 4: Return and Don’t Go Too Far
If you keep going, there’s a tunnel — reportedly closed. We suggest not venturing too far as the terrain becomes more treacherous.
That’s a wrap on our Top 10 Hikes in Tenerife!
There are many more to explore — including the 4 Palos trail.
Feel free to leave a comment or follow us on Instagram @jeanmichelvoyage


Discover our other roadtrip